Bead Board Walls and Ceiling: Transform Your Space with Timeless Charm

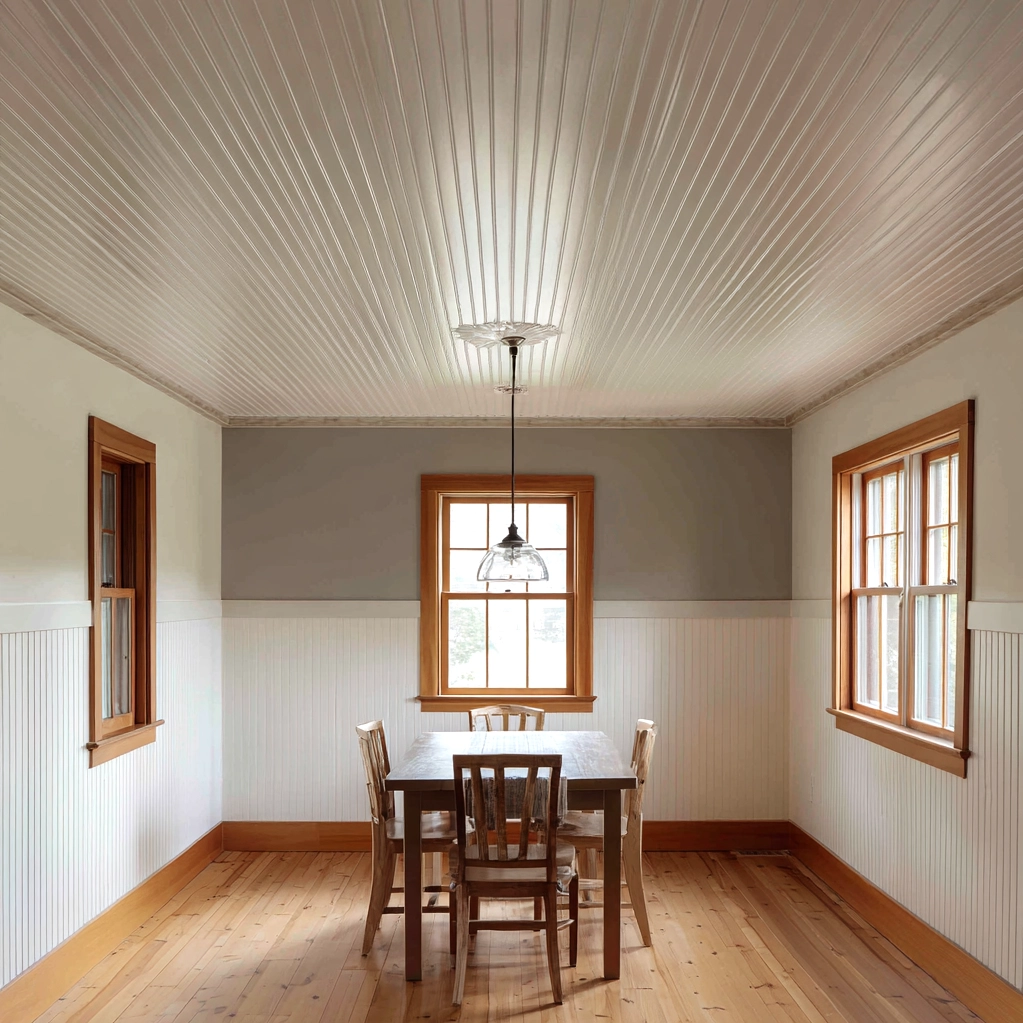
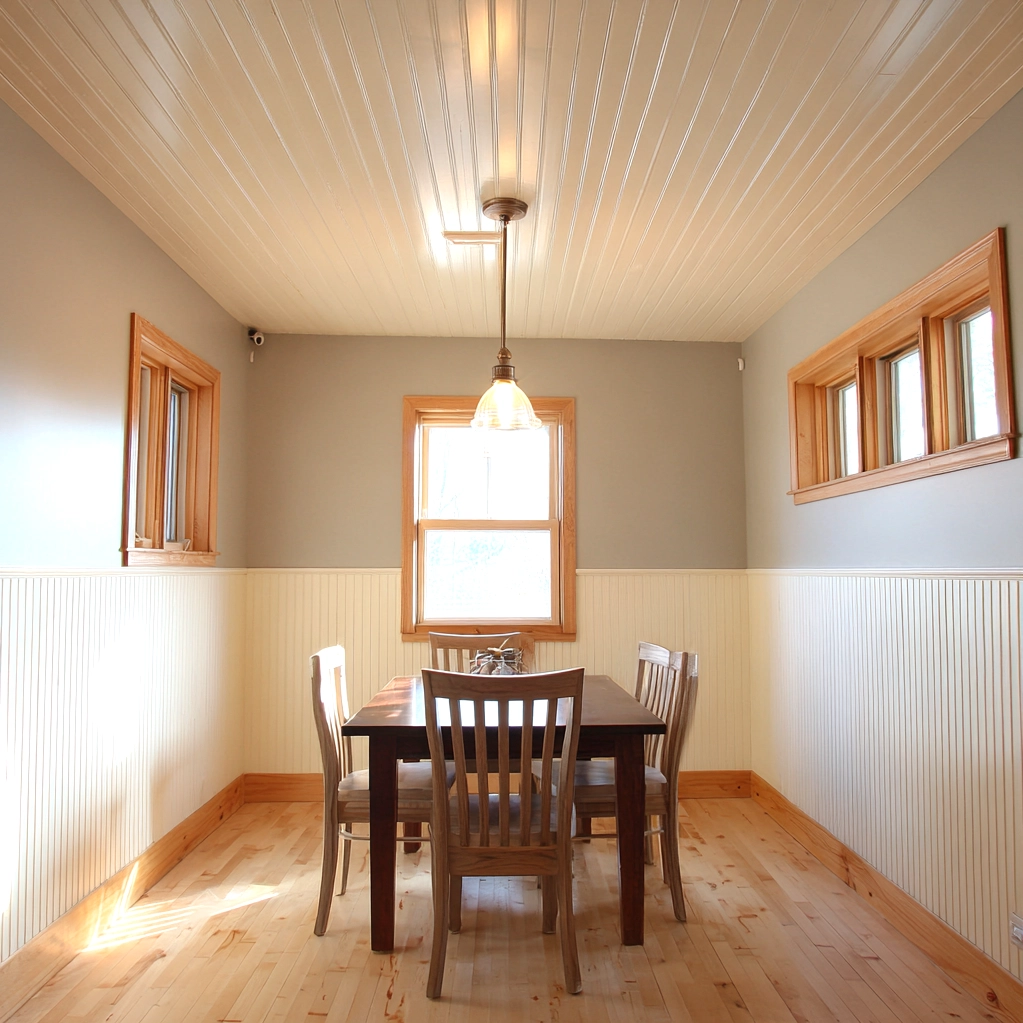
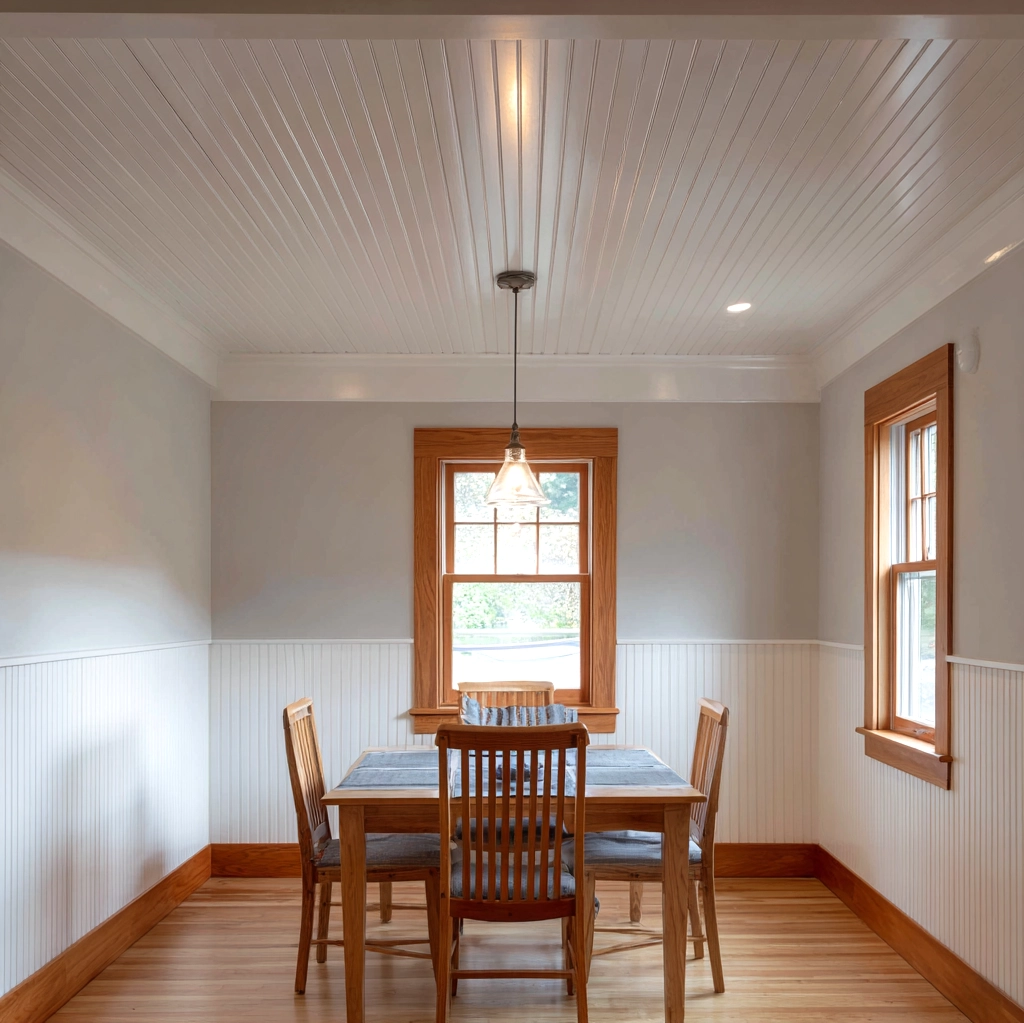
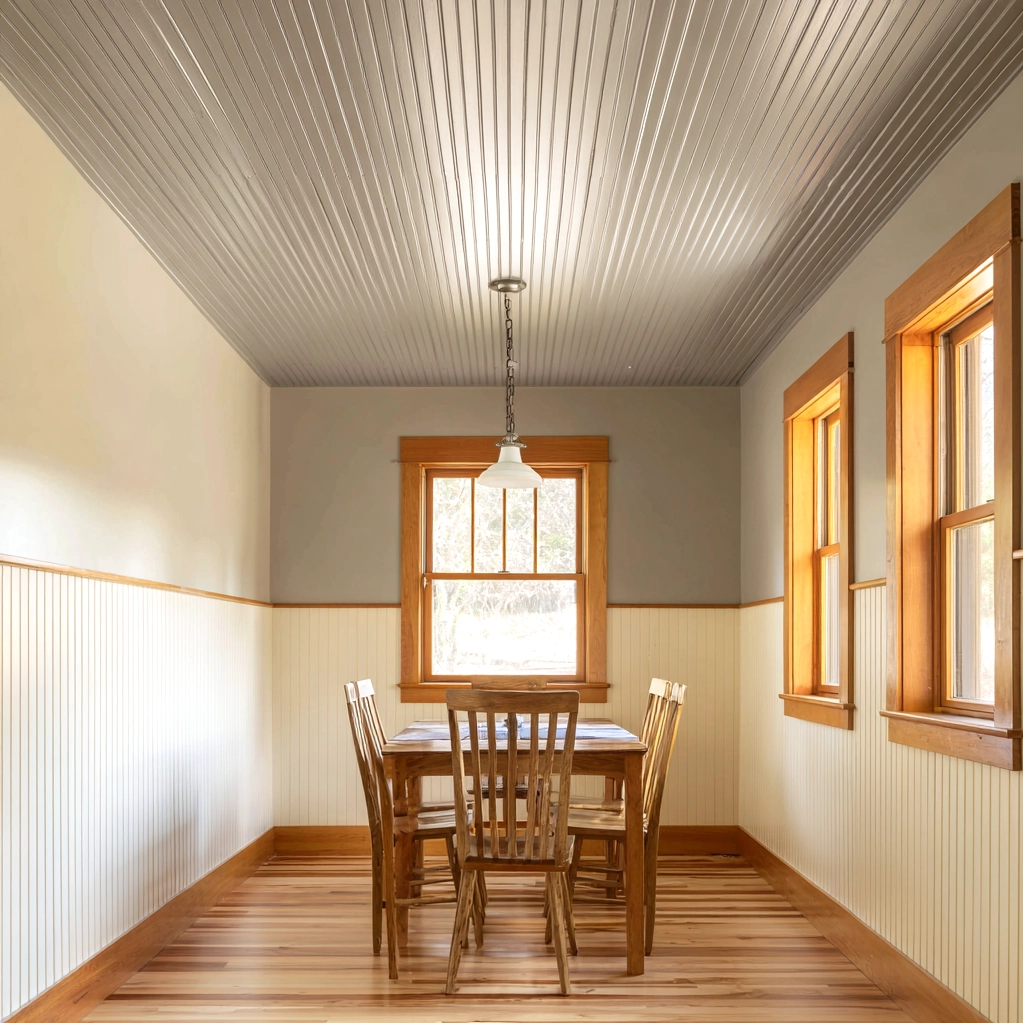
Bead board walls and ceiling installations represent more than just a design trend—they are a timeless architectural feature that can completely transform the character of any room. Originating from practical 19th-century applications, bead board has evolved into a versatile design element that brings warmth, texture, and classic elegance to modern homes. The distinctive V-groove pattern creates visual interest while adding architectural depth that flat surfaces simply cannot achieve. Whether you’re renovating a historic property or adding character to a new build, bead board offers a unique opportunity to elevate your space with authentic craftsmanship. This classic material works beautifully in various rooms, from cozy cottages to contemporary urban apartments, proving that traditional elements can enhance any design aesthetic. Beyond its visual appeal, bead board provides practical benefits like sound dampening and surface protection. The installation of bead board walls and ceiling creates a cohesive look that ties a room together, offering both visual continuity and structural definition. As homeowners increasingly seek ways to add personality and warmth to their living spaces, bead board presents an accessible solution that delivers significant impact. Understanding how to properly incorporate this classic element can help you create spaces that feel both fresh and timelessly elegant.
Planning Your Bead Board Walls and Ceiling Installation
Successful bead board walls and ceiling projects begin with careful planning that considers both aesthetic and practical factors. Before purchasing materials, assess the room's dimensions, existing architecture, and lighting conditions. Measure your space accurately, accounting for windows, doors, and any built-in features that will affect installation. Consider the room's purpose—high-moisture areas like bathrooms and kitchens require moisture-resistant materials, while living areas offer more flexibility in material choices. Choose between traditional solid wood bead board panels or modern alternatives like MDF or PVC, each offering different benefits in terms of durability, maintenance, and cost. The direction of your bead board installation significantly impacts the visual effect. Vertical installation creates the illusion of height, making rooms feel more spacious, while horizontal installation can make a room appear wider. Ceiling installations typically follow the direction of the ceiling joists for proper support. Consider whether you want to install bead board on all walls or create an accent wall, and decide if you'll extend it to the ceiling for a cohesive look. Proper planning includes preparing surfaces—ensuring walls and ceilings are clean, dry, and structurally sound. Gather necessary tools including a level, measuring tape, saw, adhesive, and finishing nails. Understanding these planning fundamentals ensures your bead board walls and ceiling installation proceeds smoothly and achieves your desired aesthetic outcome.
Design Inspiration for Bead Board Walls and Ceiling Combinations
Creative design approaches can maximize the visual impact of bead board walls and ceiling installations, transforming ordinary rooms into extraordinary spaces. For a classic cottage feel, consider painting bead board in crisp white or soft pastel shades, creating a bright, airy atmosphere perfect for kitchens, bathrooms, and sunrooms. Modern interpretations might feature dark stained or painted bead board in dramatic colors like navy blue or charcoal gray, creating sophisticated contrast against white ceilings and trim. Two-tone approaches, where walls and ceiling feature different colors, can define separate zones within open-concept spaces. Consider incorporating bead board wainscoting that transitions seamlessly into full-height walls and continues onto the ceiling for a unified look. This creates visual continuity that makes rooms feel intentionally designed rather than piecemeal. For ceilings, bead board installation can highlight architectural features like beams or medallions, or create the illusion of higher ceilings through strategic placement and painting techniques. Mixing bead board with other materials adds depth and interest—combine it with shiplap on adjacent walls, or use bead board on the ceiling while keeping walls smooth for contrast. Lighting considerations are crucial: recessed lighting works beautifully with bead board ceilings, while sconces and wall-mounted fixtures complement bead board walls. These design strategies demonstrate how bead board walls and ceiling installations can serve as both background elements and focal points, depending on your creative approach and the room's overall design vision.
Maintenance Tips for Your Bead Board Walls and Ceiling
Proper maintenance ensures your bead board walls and ceiling retain their beauty and functionality for years to come. Regular dusting with a soft cloth or vacuum attachment prevents dirt buildup in the grooves, which can be challenging to clean once accumulated. For painted bead board, use a mild soap solution and soft sponge for deeper cleaning, taking care not to oversaturate the surface, especially at seams where moisture could penetrate. Unfinished or stained wood bead board may require occasional reapplication of protective finishes to maintain moisture resistance and prevent fading. Inspect your bead board walls and ceiling periodically for signs of damage, particularly in high-moisture areas like bathrooms and kitchens. Look for warping, cracking, or separation at seams, which could indicate humidity issues or improper installation. Address minor repairs promptly to prevent more extensive damage. For painted surfaces, touch up chips and scratches with matching paint to maintain a fresh appearance. Consider applying a clear protective coat over painted bead board in high-traffic areas for added durability. Seasonal changes in humidity can affect wood bead board, so maintaining consistent indoor humidity levels helps prevent expansion and contraction. For ceilings, be mindful of potential water damage from leaks above, and address any signs of staining or warping immediately. These maintenance practices extend the life of your bead board walls and ceiling while preserving their aesthetic appeal. With proper care, bead board installations can remain beautiful features that add value and character to your home for decades.
Conclusion
Bead board walls and ceiling installations offer a timeless design solution that combines aesthetic appeal with practical functionality. From careful planning through installation to ongoing maintenance, each step contributes to creating spaces that feel both classic and contemporary. The versatility of bead board allows it to enhance various architectural styles, from traditional cottages to modern urban homes, proving its enduring relevance in interior design. As we look toward future home design trends, the appreciation for authentic materials and craftsmanship continues to grow, positioning bead board as a valuable addition to any renovation or new construction project. Beyond its visual impact, bead board provides practical benefits like sound absorption, surface protection, and the ability to conceal minor imperfections in walls and ceilings. For homeowners seeking to add character and warmth to their living spaces, bead board represents an accessible investment that delivers significant returns in both aesthetic satisfaction and potential property value. Consider starting with a smaller project, like a bathroom or hallway, to experience firsthand how bead board walls and ceiling can transform a space. As you plan your next home improvement project, remember that sometimes the most impactful design elements are those with proven staying power—and bead board has demonstrated its timeless appeal across generations of beautiful homes.
Frequently Asked Questions
Q: What rooms work best for bead board walls and ceiling installations?
Bead board walls and ceiling installations work beautifully in various rooms, each offering unique benefits. Bathrooms benefit from bead board's moisture-resistant properties when properly sealed, creating a classic spa-like atmosphere. Kitchens gain charming character with bead board backsplashes or full-wall installations that complement cabinetry. Dining rooms and living areas achieve cozy, traditional elegance with bead board wainscoting or full-height applications. Bedrooms feel more intimate and inviting with bead board accent walls or ceiling treatments. Sunrooms and porches particularly suit bead board's casual, cottage-style aesthetic. Even laundry rooms and mudrooms can be elevated with this practical yet attractive material. The key is choosing appropriate materials for each room's conditions—moisture-resistant options for bathrooms and kitchens, and standard wood or MDF for dry areas. Consider the room's existing architecture and your overall design vision when deciding where to install bead board walls and ceiling elements.
Q: How do I choose between different bead board materials?
Selecting the right bead board material depends on your budget, installation location, and desired maintenance level. Solid wood bead board offers the most authentic look and feel, with natural grain variations that add character. It's ideal for dry areas where you want a premium finish but requires more maintenance and is generally more expensive. MDF (medium-density fiberboard) bead board provides a smooth, uniform appearance at a lower cost, takes paint beautifully, and resists warping better than solid wood in stable environments. PVC and vinyl bead board offer excellent moisture resistance, making them perfect for bathrooms, kitchens, and high-humidity areas—they're easy to clean and won't rot or warp. Consider your skill level too: some materials cut and install more easily than others. For painted finishes, MDF often provides the smoothest result, while solid wood shows more texture. Weigh factors like durability, maintenance requirements, and budget against your specific project needs to choose the best material for your bead board walls and ceiling installation.
Q: Can I install bead board walls and ceiling myself, or should I hire a professional?
Many DIY enthusiasts successfully install bead board walls and ceiling with proper planning and tools, particularly for straightforward applications on flat surfaces. DIY installation is most feasible for small to medium-sized rooms with regular layouts, using pre-finished materials that minimize finishing work. Essential skills include accurate measuring, basic cutting, and understanding how to work around obstacles like electrical outlets and light fixtures. However, professional installation is recommended for complex projects involving irregular ceilings, large rooms, or when integrating bead board with other architectural elements. Professionals ensure proper alignment, secure installation that accounts for expansion and contraction, and seamless transitions between surfaces. They also handle challenging aspects like crown molding integration and ensuring adequate support for ceiling installations. Consider your experience level, available time, and the project's complexity when deciding. Even if you hire a professional for the main installation, you might save costs by handling preparation and finishing work yourself. Many homeowners successfully tackle bead board wainscoting as a starter project before attempting full walls or ceiling installations.