How to Lighten Honey Oak Cabinets: 14 Genius Transformations for a Stunning Kitchen Revival

Honey oak cabinets once dominated kitchen designs with their warm, golden tones, but today they can feel dated and overwhelming. If you’re living with this classic wood finish and craving a brighter, more contemporary space, you’re not alone. Many homeowners find themselves wondering how to lighten honey oak cabinets without the expense and disruption of a full kitchen renovation. The good news is that numerous effective techniques exist to transform your cabinets from dark and heavy to light and airy, breathing new life into your kitchen’s aesthetic. This comprehensive guide will walk you through proven methods to achieve the lighter look you desire. Whether you’re working with a tight budget or planning a more substantial update, understanding your options is the first step toward creating a kitchen that feels fresh, modern, and perfectly suited to your style. Lightening honey oak cabinets isn’t just about changing a color—it’s about transforming the entire mood of your home’s heart. By reducing the visual weight of those amber tones, you can make your kitchen appear larger, cleaner, and more inviting. This process allows you to preserve the quality of solid wood cabinets while updating their appearance to match contemporary tastes. From simple cleaning tricks to complete refinishing projects, we’ll explore solutions that range from quick weekend updates to more involved transformations. With careful planning and the right approach, you can turn those honey oak cabinets into a feature you love rather than one you tolerate. Let’s dive into the practical steps and creative ideas that will help you achieve a stunning kitchen revival.
How to Lighten Honey Oak Cabinets with Paint and Stain
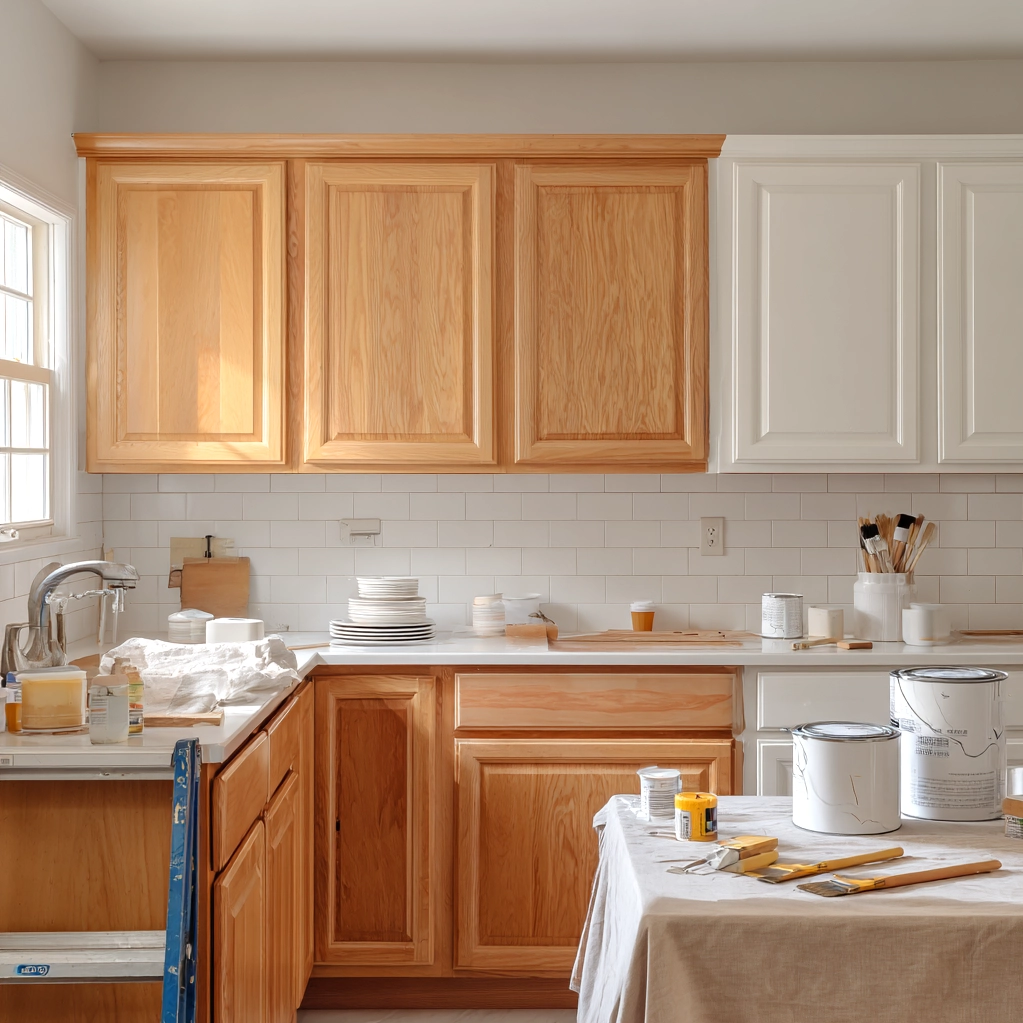
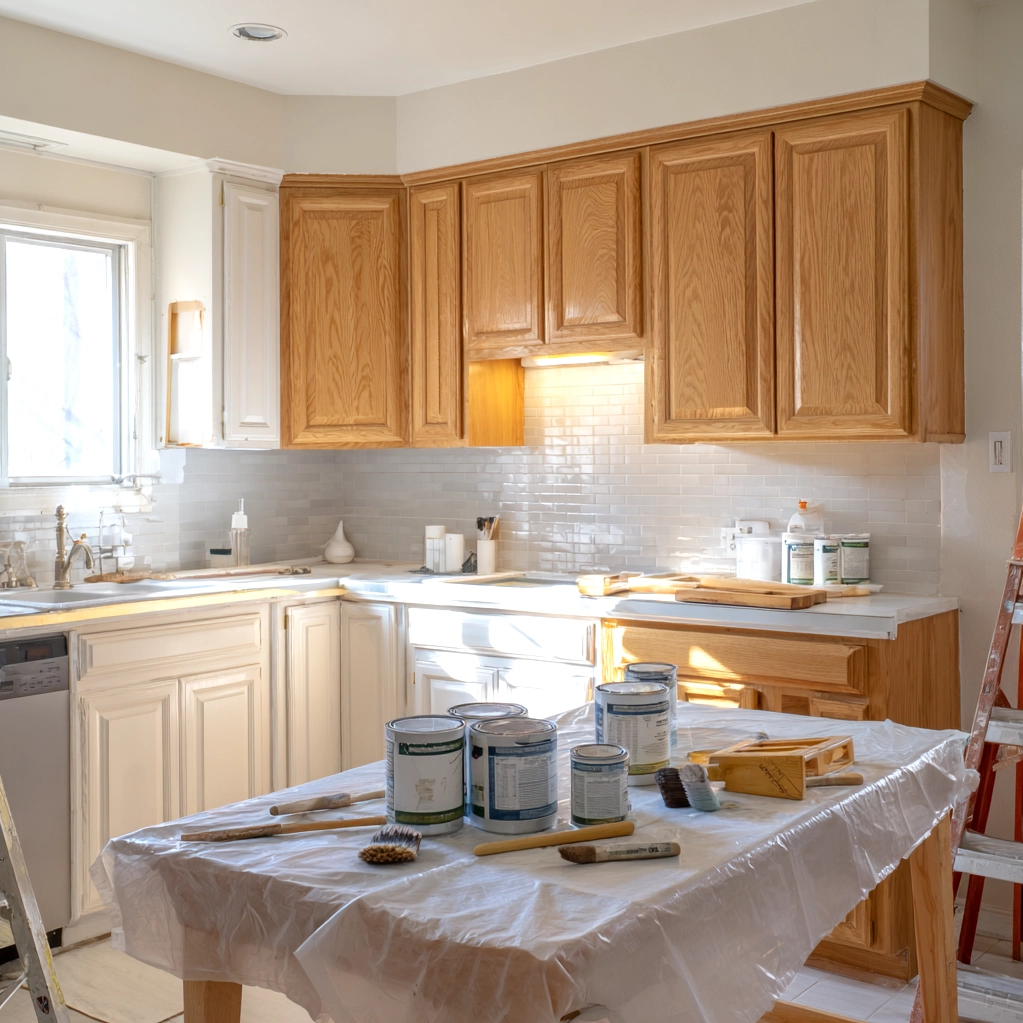
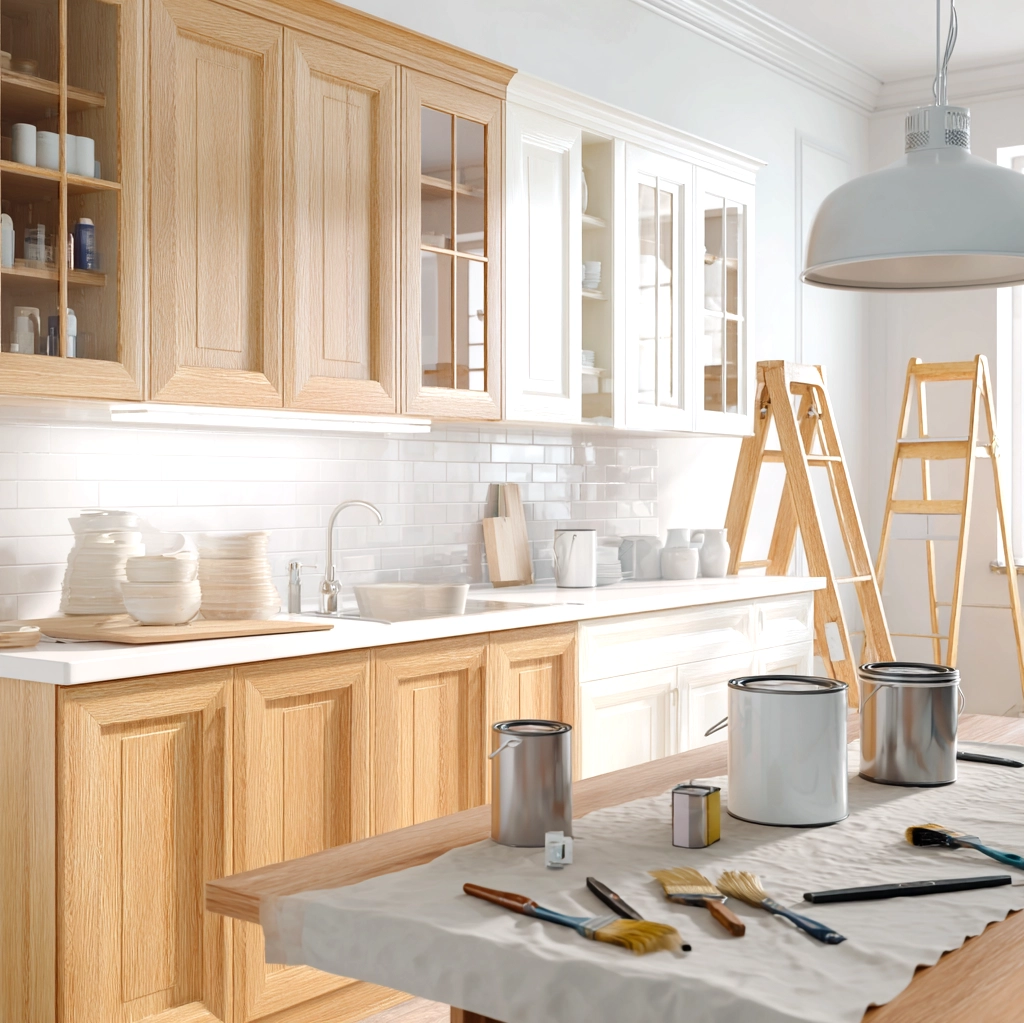
One of the most transformative approaches to lighten honey oak cabinets involves using paint or stain to alter their color completely. Painting provides the most dramatic lightening effect, covering the honey oak grain with a solid, opaque finish. For those who want to maintain some wood character while lightening the tone, staining offers a middle ground. Before beginning any painting or staining project, thorough preparation is crucial. Start by removing all cabinet doors, drawers, and hardware. Clean every surface with a degreaser to remove years of cooking residue and grime. Light sanding with fine-grit sandpaper helps create a surface that paint or stain can adhere to properly. For painting, use a high-quality primer specifically designed for kitchen cabinets to prevent the honey oak's tannins from bleeding through. When selecting paint colors, light neutrals like soft whites, pale grays, or creamy off-whites work beautifully to brighten the space. Apply paint in thin, even coats using a brush for details and a roller for flat surfaces, allowing proper drying time between coats. For staining, choose a light-toned wood stain like natural, whitewash, or pickling stain that allows some grain to show through while significantly lightening the overall appearance. Apply stain with a clean cloth, working in the direction of the grain, and wipe away excess for an even finish. Seal both painted and stained cabinets with a durable clear coat to protect against moisture, heat, and daily wear. This method completely transforms honey oak cabinets, giving you control over the exact shade and finish you want in your kitchen.
How to Lighten Honey Oak Cabinets Through Clever Design Choices
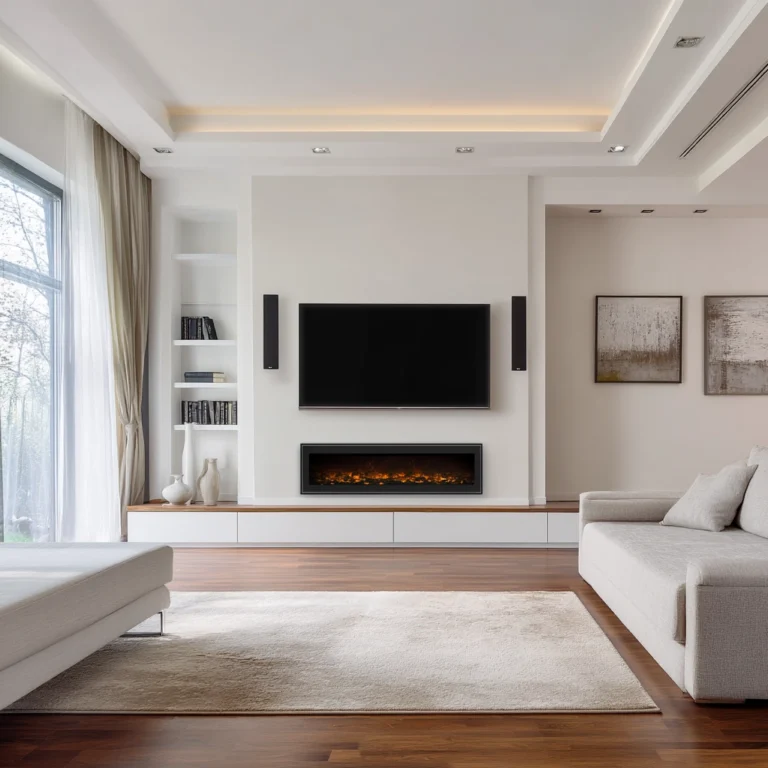
Beyond direct cabinet treatments, strategic design decisions can effectively lighten the appearance of honey oak cabinets without changing their finish. This approach works well for renters, those on tight budgets, or anyone who wants to test lighter aesthetics before committing to refinishing. Start by evaluating your kitchen's lighting situation. Adding under-cabinet LED strips illuminates countertops and creates a brighter visual field that reduces the cabinets' visual weight. Consider replacing existing light fixtures with brighter, whiter bulbs or adding additional lighting sources like pendant lights over islands. The backsplash presents another excellent opportunity to lighten the overall look. Choose light-colored materials like white subway tile, pale marble, or glossy ceramic in neutral tones that reflect light and draw attention away from the cabinets. Countertop selection also plays a significant role. Light quartz, white marble, or pale granite countertops create contrast that makes honey oak cabinets appear less dominant. Don't overlook the power of accessories and decor. Replace dark hardware with brushed nickel, polished chrome, or matte black pulls and knobs that create visual interest. Open shelving between or above cabinets breaks up the expanse of wood, allowing you to display light-colored dishes, glassware, or decorative items. Window treatments should maximize natural light—opt for sheer curtains or minimalist blinds that don't block sunlight. Finally, consider what you store on your countertops. Keeping surfaces clear or displaying only light-colored appliances and accessories helps maintain an airy feel. These design strategies work together to create a brighter kitchen environment where honey oak cabinets become just one element rather than the dominant feature.

How to Lighten Honey Oak Cabinets with Professional and DIY Techniques
Understanding the range of available techniques—from professional services to DIY projects—helps you choose the right approach to lighten honey oak cabinets based on your budget, timeline, and skill level. Professional cabinet refinishing offers the highest quality results with minimal disruption to your household. Experts use specialized equipment like spray systems that create flawless, even finishes difficult to achieve with brushes and rollers. They also have access to commercial-grade products that offer superior durability in high-traffic kitchen environments. The cost typically ranges from $1,500 to $5,000 depending on kitchen size and finish complexity, but you're paying for expertise, efficiency, and guaranteed results. For those comfortable with tools and willing to invest time, DIY approaches provide significant cost savings. Basic cleaning and brightening can be accomplished with a mixture of warm water, mild detergent, and a touch of vinegar to remove years of built-up residue that darkens wood. More advanced DIY methods include using wood bleach or oxalic acid solutions to lighten the existing stain without removing it completely—though this requires careful application and protective gear. Another popular DIY option is the gel stain method, which allows you to apply a lighter stain over the existing honey oak without stripping the original finish first. For complete transformations, cabinet refacing replaces just the doors and drawer fronts while keeping the cabinet boxes, offering a lighter look at about half the cost of all-new cabinets. Whichever method you choose, proper preparation remains essential. Test any product on an inconspicuous area first, work in a well-ventilated space, and follow all safety precautions. The investment in time or money pays off in a kitchen that feels brighter, more modern, and more enjoyable to use every day.
Conclusion
Transforming honey oak cabinets from dated to delightful is entirely achievable with the right approach and techniques. Whether you choose to paint, stain, bleach, or simply design around them, these 14 methods offer solutions for every budget and skill level. The journey to lighten honey oak cabinets begins with understanding your specific cabinets' condition, your kitchen's layout, and your personal style preferences. Remember that even small changes—like updating hardware, improving lighting, or adding a light backsplash—can create significant visual impact. For more substantial transformations, proper preparation and quality materials ensure results that last for years. As kitchen trends continue to favor lighter, brighter spaces with clean lines and natural materials, your lightened honey oak cabinets can become a timeless feature rather than a dated relic. The process not only updates your kitchen's appearance but can increase your home's value and your daily enjoyment of the space. Looking forward, consider how your newly lightened cabinets might inspire further updates, like coordinating flooring or updated appliances, to create a completely cohesive look. Most importantly, approach this project with creativity and patience—the transformation of honey oak cabinets is as much about the journey as the destination. Your revived kitchen awaits, ready to become the bright, welcoming heart of your home where memories are made and shared for years to come.
Frequently Asked Questions
Q: Can I lighten honey oak cabinets without sanding them down completely?
Yes, several methods allow you to lighten honey oak cabinets without complete sanding. Gel stains can be applied directly over the existing finish after thorough cleaning and light scuff sanding to help adhesion. Specialty products like deglosser or liquid sandpaper create a textured surface for new finishes without generating dust. Another option is using wood bleach or oxalic acid solutions that lighten the wood tone without removing the existing finish. For painting, high-adhesion primers designed for slick surfaces can bond to cleaned cabinets with minimal sanding. Always test any method on an inconspicuous area first to ensure proper adhesion and desired results.
Q: What is the most cost-effective way to lighten honey oak cabinets?
The most budget-friendly approach involves design changes rather than cabinet modifications. Start by replacing dark hardware with light or metallic finishes—new knobs and pulls cost as little as $2-$10 each. Add under-cabinet lighting with affordable LED strips to brighten countertops and reduce visual weight. Paint your walls a light, neutral color to create contrast that makes cabinets appear lighter. Install a light-colored backsplash using affordable materials like peel-and-stick tiles or painted beadboard. Remove some cabinet doors to create open shelving where you can display light-colored dishes. Deep clean cabinets with a mixture of warm water, mild detergent, and vinegar to remove years of residue that darkens wood. These changes can cost under $500 while creating a significantly brighter kitchen aesthetic.
Q: How long does it typically take to lighten honey oak cabinets using painting methods?
The timeline for painting honey oak cabinets depends on kitchen size, preparation needs, and drying conditions. For an average kitchen with 20-30 cabinet doors and drawers, plan for 3-7 days of active work. Day 1 involves removing doors, hardware, and cleaning all surfaces. Day 2 includes sanding, repairing any damage, and applying primer. Days 3-4 cover applying 2-3 coats of paint with proper drying time between coats—oil-based paints require 24 hours between coats while water-based options dry in 4-6 hours. Day 5 involves applying protective topcoat if needed. Day 6 allows for final curing before rehanging doors on day 7. Working in a well-ventilated space with temperatures between 60-80°F ensures proper drying. Rushing the process can lead to poor adhesion, drips, or premature wear, so patience yields the best results.