Painting Flower Pots: Transformative Techniques for Stunning Garden Magic
Imagine stepping into your garden and being greeted not just by vibrant blooms, but by containers that are works of art in themselves. Painting flower pots is more than a simple craft—it’s a powerful way to inject personality, color, and creativity into your outdoor or indoor spaces. This delightful activity bridges the gap between functional gardening and expressive home decor, turning ordinary terracotta or ceramic pots into extraordinary focal points. Whether you’re looking to refresh a tired patio, create a cohesive theme for your plant collection, or simply enjoy a relaxing DIY project, painted pots offer endless possibilities. They allow you to customize your environment to match your style, from bold patterns that make a statement to subtle hues that complement your flowers. Beyond aesthetics, painting pots can protect them from weather damage, extending their lifespan. This guide will walk you through everything you need to know, from selecting materials to mastering techniques, ensuring your painted pots become cherished elements of your home and garden. Get ready to unleash your creativity and transform humble containers into stunning displays that elevate your entire space.
Essential Materials for Painting Flower Pots Successfully
Before you dive into painting flower pots, gathering the right materials is crucial for a durable and beautiful finish. Start with the pots themselves: terracotta is popular for its porous surface that holds paint well, but ceramic, plastic, or concrete pots also work with proper preparation. You'll need acrylic paints, which are versatile, water-based, and available in a vast color range. For outdoor use, consider adding a sealant like polyurethane or a clear outdoor varnish to protect your artwork from sun and rain. Don't forget brushes—synthetic bristle brushes in various sizes help with details and broad strokes. Sandpaper is essential for smoothing rough surfaces, especially on terracotta, while a primer or gesso ensures paint adheres evenly and lasts longer. Other handy tools include painter's tape for clean lines, stencils for intricate designs, and a palette for mixing colors. Always work in a well-ventilated area and protect surfaces with newspapers or drop cloths. Choosing quality materials not only enhances the final look but also makes the process smoother and more enjoyable. With these basics, you're set to create pots that stand out in your garden or home.
Step-by-Step Guide to Painting Flower Pots with Ease
Follow this simple guide to achieve professional-looking painted flower pots. First, clean your pots thoroughly with soap and water to remove dirt and dust, then let them dry completely. If using terracotta, lightly sand any rough areas to create a smooth base. Apply a coat of primer or gesso, allowing it to dry as per the product instructions—this step prevents paint from soaking in and ensures vibrant colors. Once primed, sketch your design lightly with a pencil or use stencils for precision. Start painting with your base color, using even strokes and multiple thin coats rather than one thick layer to avoid drips. For patterns, let each color dry before adding the next to prevent smudging. Techniques like sponging, splattering, or using masking tape can create interesting textures and clean lines. After the paint dries completely, apply a sealant to protect your work, especially for outdoor pots exposed to elements. Allow the sealant to cure for at least 24 hours before planting. This method ensures your painted pots are not only beautiful but also durable. Remember, patience is key—rushing can lead to messy results. With practice, you'll develop your own style and confidence in painting flower pots.
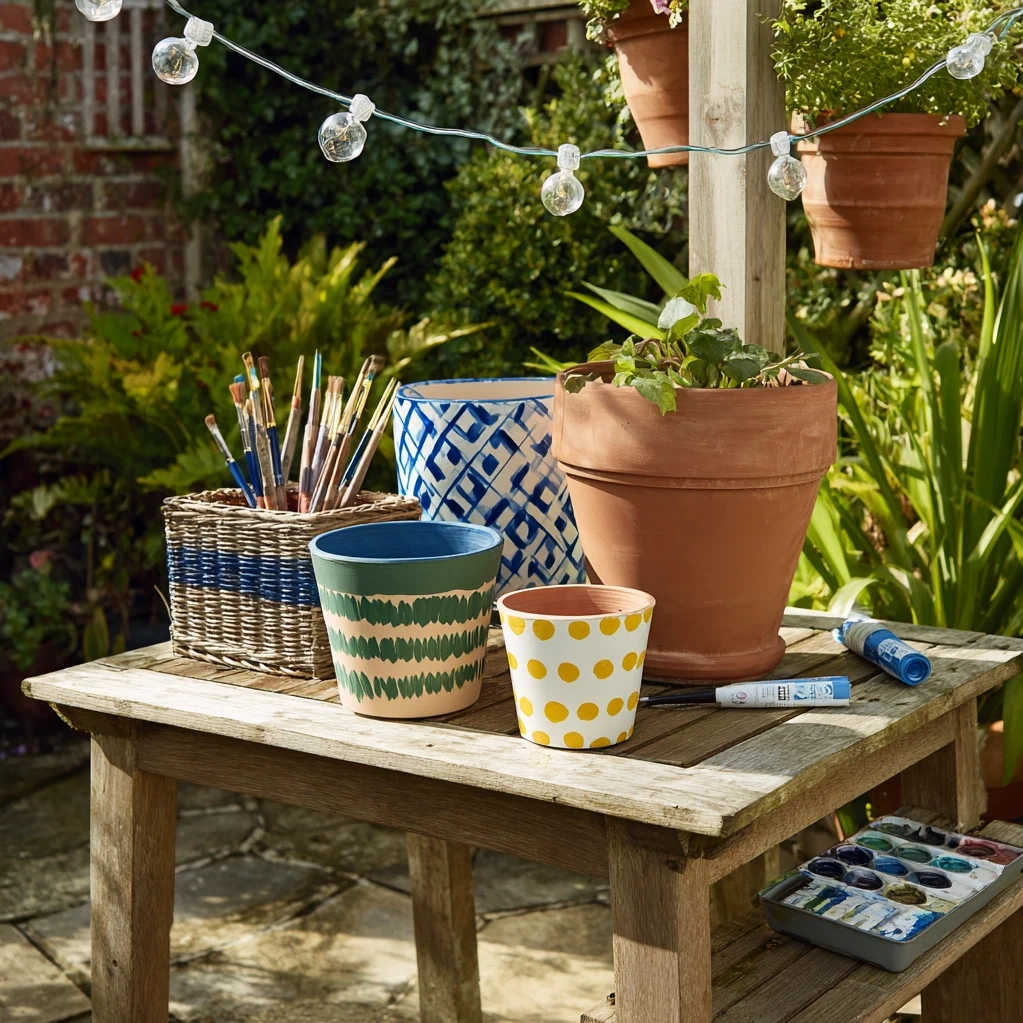
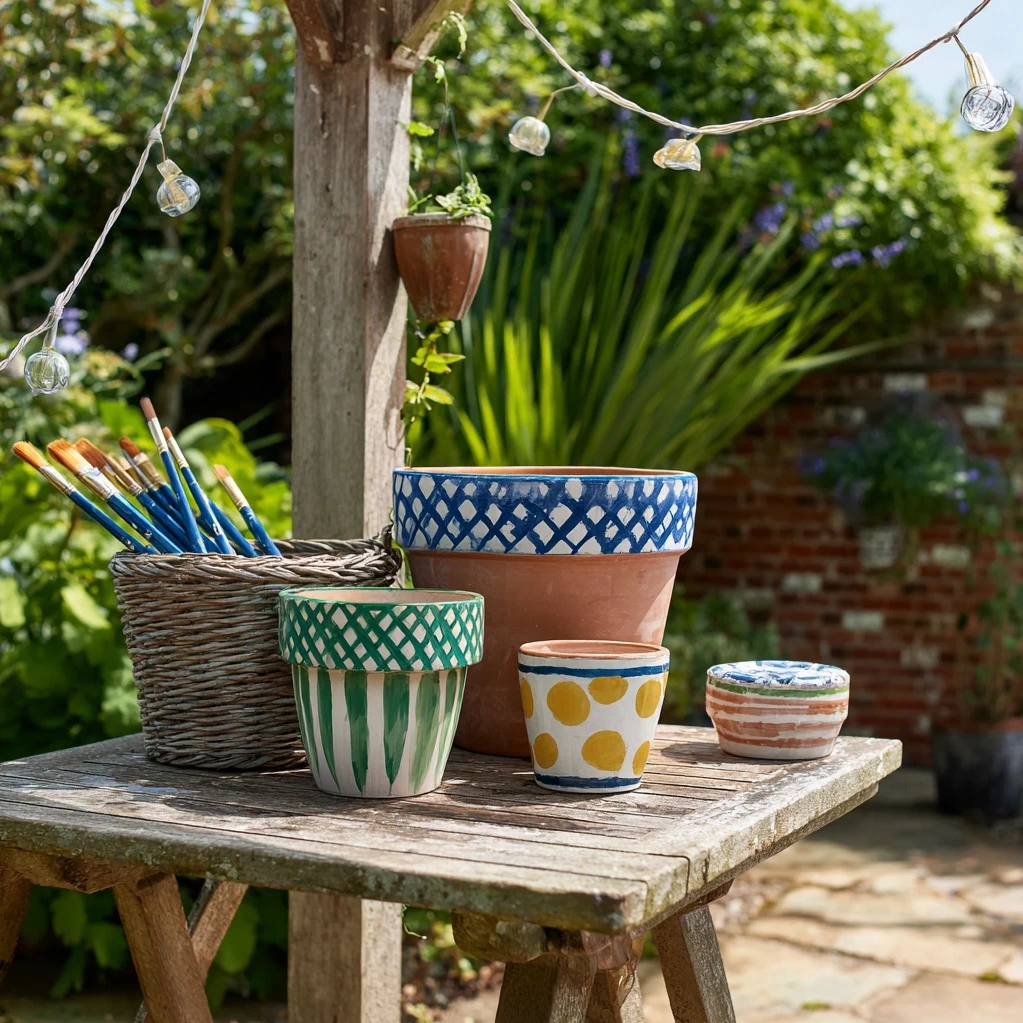
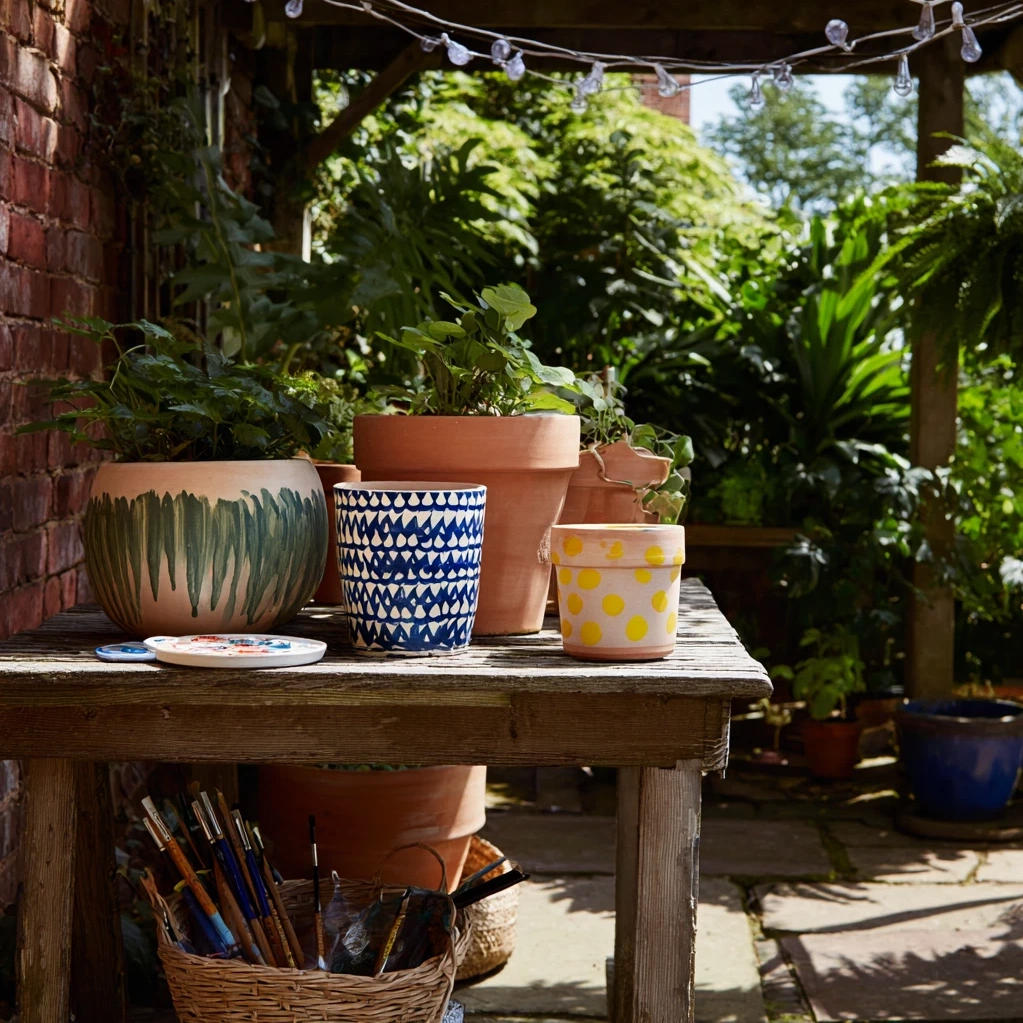
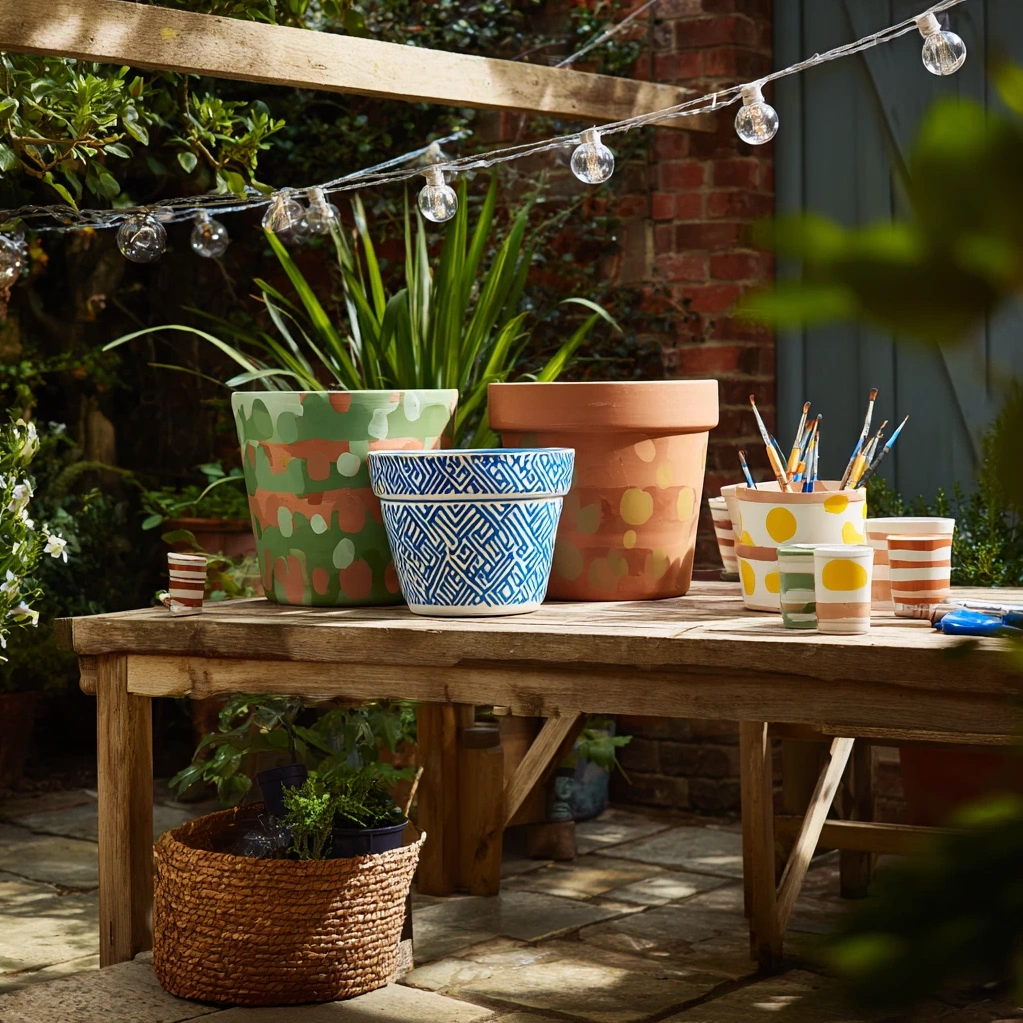
Creative Ideas for Painting Flower Pots to Inspire Your Projects
Unlock your creativity with these inspiring ideas for painting flower pots. For a natural look, try earthy tones like greens and browns, or use ombre techniques that blend colors seamlessly. Geometric patterns, such as stripes or polka dots, add a modern touch and are easy to achieve with painter's tape. Consider themes like coastal blues for a beachy vibe or vibrant florals that mimic the plants inside. Personalize pots with hand-painted names, quotes, or images that reflect your interests. Upcycling old pots with a fresh coat of paint is an eco-friendly option—just ensure they're clean and primed. For seasonal decor, paint pots in autumn hues or festive colors for holidays. Mixing textures, like adding glitter or using textured paints, can create visual interest. Don't be afraid to experiment; painting flower pots is a forgiving craft where mistakes can often be painted over. These ideas can transform ordinary containers into unique pieces that tell a story. Share your creations with friends or use them to brighten up indoor spaces like kitchens or living rooms. The possibilities are endless, making each pot a canvas for your imagination.
Maintaining Your Painted Flower Pots for Long-Lasting Beauty
To keep your painted flower pots looking fresh, proper maintenance is essential. Start by placing them in suitable locations—outdoor pots should be in areas with some protection from harsh weather, like under eaves or in covered patios, to minimize fading and wear. Water plants carefully to avoid excessive moisture on the painted surfaces, which can cause peeling or mold over time. Use saucers or trays to catch drainage and prevent water from pooling at the base. Clean pots periodically with a soft cloth and mild soap, avoiding abrasive cleaners that might scratch the paint. If you notice chips or scratches, touch them up with matching paint and a small brush, then reseal the area. For pots exposed to intense sun, consider reapplying a UV-resistant sealant every year or two to maintain color vibrancy. In winter, move delicate painted pots indoors or to a sheltered spot to prevent cracking from frost. Regularly inspect for signs of wear and address them promptly. With these simple steps, your painted flower pots can remain beautiful for years, continuing to enhance your garden and home decor. Investing a little time in upkeep ensures your creative efforts pay off in lasting enjoyment.
Conclusion
Painting flower pots is a rewarding activity that blends artistry with practicality, allowing you to personalize your living spaces in vibrant ways. Throughout this article, we've explored the essentials—from gathering materials and following step-by-step techniques to brainstorming creative ideas and maintaining your finished pieces. By painting flower pots, you not only add color and character to your garden or home but also engage in a therapeutic craft that fosters creativity and relaxation. These painted containers can transform bland areas into focal points, complement your plants, and even serve as thoughtful gifts. As you continue your journey, consider experimenting with new styles or themes each season to keep your decor dynamic. Share your projects with others to spread inspiration, or host a painting party to make it a social event. Looking ahead, the trend towards sustainable and personalized home decor suggests painted pots will remain popular, offering endless opportunities for innovation. So grab your brushes, unleash your imagination, and start painting flower pots today—your garden will thank you for the splash of magic.
Frequently Asked Questions
Q: What type of paint is best for painting flower pots?
Acrylic paint is generally the best choice for painting flower pots due to its versatility, ease of use, and durability. It adheres well to various surfaces like terracotta, ceramic, and plastic, and it comes in a wide range of colors. For outdoor pots, ensure you use a sealant over the acrylic paint to protect it from weather elements like rain and sun. Alternatively, you can use outdoor-specific paints or spray paints designed for ceramics, but always check the label for compatibility and safety.
Q: How do I prepare a terracotta pot before painting?
To prepare a terracotta pot for painting, start by cleaning it thoroughly with soap and water to remove any dirt or debris, then let it dry completely. Lightly sand the surface with fine-grit sandpaper to smooth out rough spots and improve paint adhesion. Apply a primer or gesso as a base coat; this step is crucial because terracotta is porous and can absorb paint unevenly. Allow the primer to dry according to the product instructions before beginning to paint. This preparation ensures your paint job looks smooth and lasts longer.
Q: Can I paint plastic flower pots, and if so, how?
Yes, you can paint plastic flower pots, but preparation is key to ensure the paint sticks properly. Clean the pot with soap and water to remove any oils or dirt, and let it dry. Lightly sand the surface with fine sandpaper to create a texture that helps paint adhere. Apply a primer designed for plastic surfaces, as this will prevent peeling. Once the primer is dry, use acrylic paint or spray paint suitable for plastic. Finish with a clear sealant to protect the paint, especially if the pot will be used outdoors. Avoid using the pot until all coatings are fully cured to prevent damage.