Milk Can Planter Ideas: 10 Stunning Transformations for Your Garden

Milk cans, those nostalgic metal containers from bygone dairy days, have found an exciting new purpose in modern gardening. These sturdy vessels, once used to transport fresh milk from farm to table, now serve as charming and rustic planters that can elevate any outdoor or indoor space. Their durability, unique shape, and vintage appeal make them perfect candidates for creative repurposing projects. Whether you’re an experienced gardener looking for distinctive containers or a home decor enthusiast seeking unique accents, milk can planters offer endless possibilities. The beauty of using milk cans as planters lies in their versatility. They can be left in their original weathered state for an authentic farmhouse look, or painted in vibrant colors to match your personal style. Their tapered shape provides excellent drainage when properly prepared, and their metal construction stands up well to outdoor elements. From small herb gardens on patios to dramatic floral displays in larger yards, these containers add character and history to your plant arrangements. This article will explore practical and inspiring ways to incorporate milk can planters into your living spaces. We’ll cover everything from preparation and planting techniques to design ideas that will transform these humble containers into stunning focal points. By embracing these milk can planter ideas, you’re not just creating beautiful displays—you’re preserving a piece of agricultural history while adding unique charm to your environment. Let’s explore how these simple containers can become extraordinary elements in your garden or home decor.
Essential Preparation: Getting Your Milk Can Ready for Planting
Before you can implement any of these milk can planter ideas, proper preparation is crucial for plant health and container longevity. Start by thoroughly cleaning your milk can, removing any rust or old paint with a wire brush. If you plan to paint your can, use a rust-resistant primer followed by outdoor-grade paint. For drainage—essential for healthy plants—drill several holes in the bottom of the can using a metal drill bit. Space these holes evenly to prevent waterlogging. If you're concerned about soil leaking through larger holes, add a layer of landscape fabric or coffee filters over the holes before adding soil. Next, consider your soil mixture. For most plants, a high-quality potting mix works well, but you might need to adjust based on what you're planting. Succulents and cacti require grittier, fast-draining soil, while moisture-loving plants benefit from soil with better water retention. Fill your milk can about one-third full with your chosen soil, then position your plants. For a lush, overflowing look, plant densely, but be mindful of each plant's mature size. Water thoroughly after planting, and monitor moisture levels closely during the first week as plants establish. Remember that metal containers can heat up in direct sun, potentially harming plant roots. Consider placing your milk can planter in partial shade or using light-colored paint to reflect heat. With proper preparation, your milk can will provide a healthy environment for plants to thrive while adding rustic charm to your space.

Creative Design: Transformative Milk Can Planter Ideas for Every Space
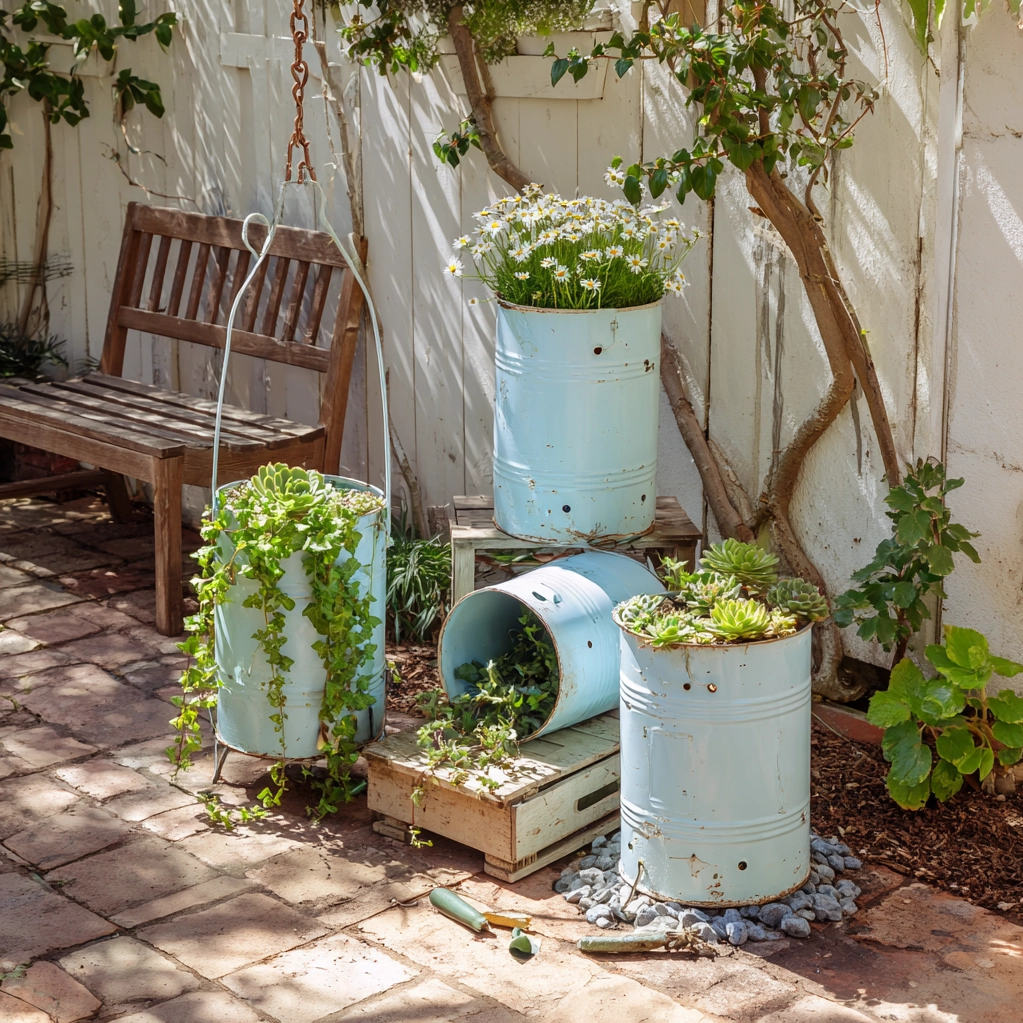
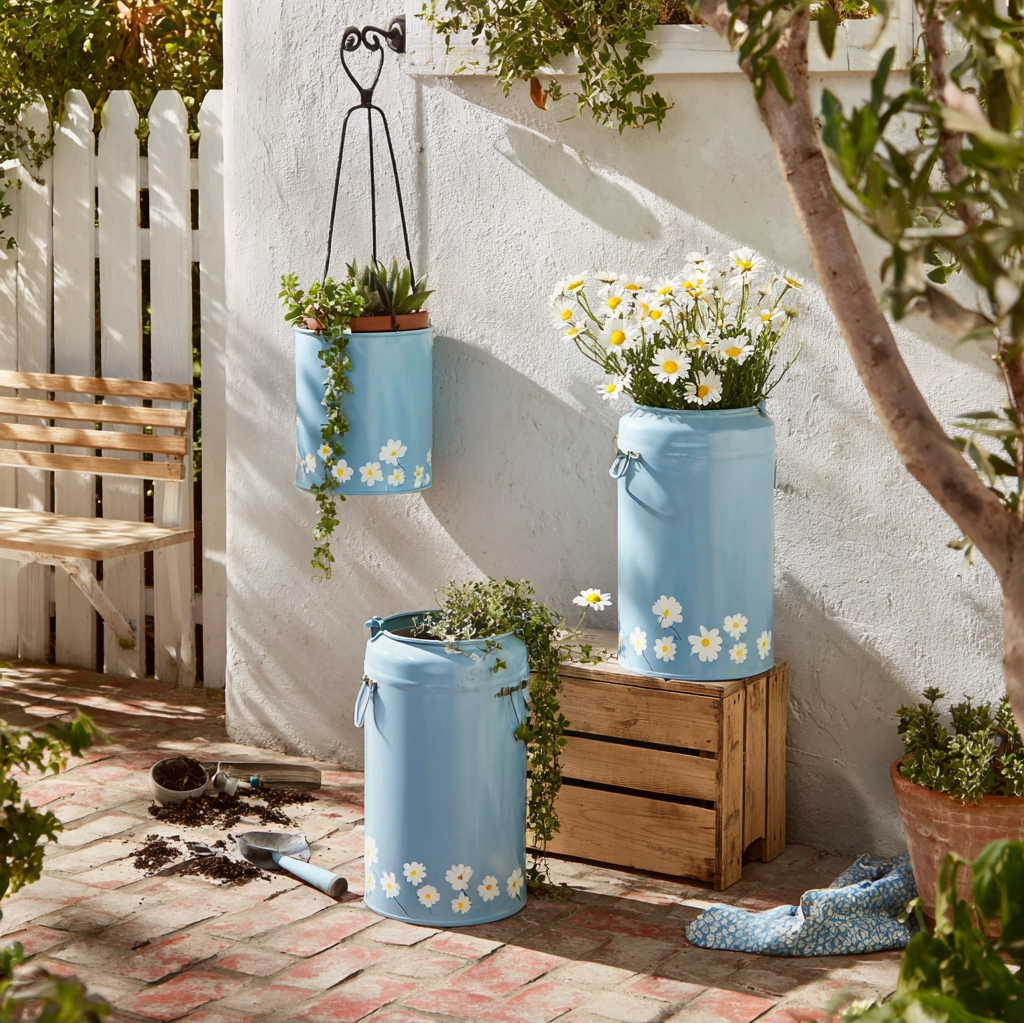
Once your milk can is prepared, the real fun begins with creative design possibilities. For a classic farmhouse look, leave your can in its original weathered state, letting the natural patina and occasional rust spots tell their story. Plant with trailing ivy or petunias that will spill over the sides, softening the metal's edges. If you prefer a more polished appearance, paint your milk can in colors that complement your outdoor furniture or home exterior. Consider using chalk paint for a matte finish or metallic paints for a modern twist. Group several milk cans of varying heights together for visual interest—this works particularly well with herbs or succulents. For smaller spaces like balconies or patios, use individual milk cans as statement pieces. Plant each with a single dramatic specimen like a dwarf citrus tree or large ornamental grass. In larger gardens, create pathways lined with milk can planters, or use them to define different garden zones. Don't forget vertical possibilities—hang smaller milk cans from shepherd's hooks or attach them to fences. For indoor use, milk cans make excellent planters for low-light tolerant plants like pothos or snake plants. Add decorative elements like vintage labels, stenciled designs, or even small fairy garden accessories to personalize your creation. The key to successful milk can planter ideas is balancing aesthetic appeal with plant health. Choose plants that suit your container's size and your local climate. With thoughtful design, these humble containers become artistic expressions that enhance any environment.

Practical Applications: Implementing Milk Can Planter Ideas in Different Settings
Implementing milk can planter ideas effectively requires considering your specific setting and needs. For urban gardens and small spaces, milk cans offer vertical gardening solutions. Stack them creatively or use wall-mounted brackets to maximize limited space. Plant compact herbs, strawberries, or flowering annuals that provide maximum impact without overwhelming the area. In suburban yards, milk cans work beautifully as border planters along walkways or as focal points in garden beds. Their height makes them ideal for adding dimension to flat landscapes. For rural properties, milk cans naturally complement farmhouse aesthetics. Use them in clusters near porches or as decorative elements in vegetable gardens. Consider practical applications too—plant culinary herbs in a milk can placed conveniently near your kitchen door, or create a sensory garden with fragrant flowers in containers placed near seating areas. For seasonal displays, milk cans are perfect for rotating plantings. In spring, fill with tulips or daffodils; in summer, switch to vibrant geraniums or marigolds; and in fall, plant ornamental kale or chrysanthemums. During winter, empty cans can be decorated with evergreen branches and berries. For those concerned about mobility, consider adding casters to larger milk cans for easy repositioning. Remember that placement affects both aesthetics and plant health—most flowering plants need at least six hours of sunlight daily, while ferns and hostas prefer shadier spots. By thoughtfully implementing these milk can planter ideas in your specific environment, you create both beautiful and functional garden elements.
Conclusion
Milk can planters represent more than just creative gardening containers—they embody a connection to agricultural heritage while offering modern decorative solutions. Throughout this exploration of milk can planter ideas, we've seen how these versatile vessels can transform from simple metal containers into stunning garden features. Their durability, unique shape, and nostalgic appeal make them ideal for everything from small balcony gardens to extensive landscape designs. The key to success lies in proper preparation, thoughtful plant selection, and creative design that suits your personal style and environment. As you implement these ideas, remember that gardening with repurposed items like milk cans contributes to sustainable living practices. You're giving new life to objects that might otherwise be discarded, reducing waste while creating beauty. The future of gardening increasingly embraces such creative repurposing, blending functionality with environmental consciousness. Looking forward, consider expanding your milk can collection or experimenting with different paint techniques and plant combinations. Share your creations with gardening communities, and don't be afraid to modify these ideas to suit your specific needs. Whether you're creating a single statement piece or an entire garden of milk can planters, each container tells a story and adds unique character to your space. Embrace the imperfections—the dents, scratches, and weathered surfaces that give each can its personality. With care and creativity, your milk can planters will bring joy for seasons to come, proving that sometimes the most ordinary objects can become extraordinary garden treasures.
Frequently Asked Questions
Q: How do I ensure proper drainage in my milk can planter?
Proper drainage is essential for healthy plants in milk can planters. Start by drilling several 1/4 to 1/2 inch holes in the bottom of the can using a metal drill bit. Space holes evenly across the bottom surface. For additional protection against soil loss, place a layer of landscape fabric, coffee filters, or small rocks over the holes before adding soil. This prevents soil from washing out while allowing water to drain freely. Monitor moisture levels regularly, especially during rainy periods or if your planter is in a location with poor air circulation. If you notice water pooling at the surface or plants showing signs of overwatering, you may need to add more drainage holes or adjust your watering schedule.
Q: What types of plants work best in milk can planters?
Many plants thrive in milk can planters, but some are particularly well-suited. For sunny locations, consider drought-tolerant plants like succulents, herbs (rosemary, thyme, oregano), or flowering annuals such as petunias, marigolds, or zinnias. For shadier spots, opt for ferns, hostas, impatiens, or begonias. Trailing plants like ivy, sweet potato vine, or creeping jenny work beautifully to soften the can's edges. If you're planting edible gardens, herbs, lettuce, strawberries, and compact pepper varieties perform well. Avoid plants with deep taproots or those that require extensive root space, as milk cans have limited depth. Always consider your local climate and the specific microclimate where your planter will be located when selecting plants.
Q: How can I protect my milk can planter from rust and weather damage?
Protecting your milk can planter involves several steps. First, thoroughly clean and remove any existing rust with a wire brush or sandpaper. Apply a rust-inhibiting primer specifically designed for metal surfaces. Once primed, use high-quality outdoor paint in your chosen color. For added protection, consider a clear sealant over the paint. Place your planter in a location with good air circulation to prevent moisture buildup. During winter in freezing climates, either move planters to a protected area or empty them completely to prevent cracking from frozen soil expansion. If rust spots do appear, address them promptly by cleaning the area and touching up with primer and paint. Regular maintenance will keep your milk can planter looking beautiful for years.