
Classic Buttermilk Pie: Incredibly Easy and Absolutely Irresistible!
You know that feeling when you’re craving something sweet, but you don’t want to spend hours in the kitchen? That’s exactly why I fell in love with classic buttermilk pie. I remember the first time I tried it at my grandma’s house – the creamy texture, the hint of tang, the golden top. It was simple, honest food that made everyone gather around the table with smiles.
I’m telling you, this pie is a game-changer. It’s one of those recipes that looks fancy but is actually so straightforward. You don’t need any special skills or fancy ingredients. Just a few pantry staples, a bowl, and a little bit of love. The classic buttermilk pie has been my go-to dessert for years now, whether I’m hosting friends or just treating myself on a quiet Sunday afternoon.
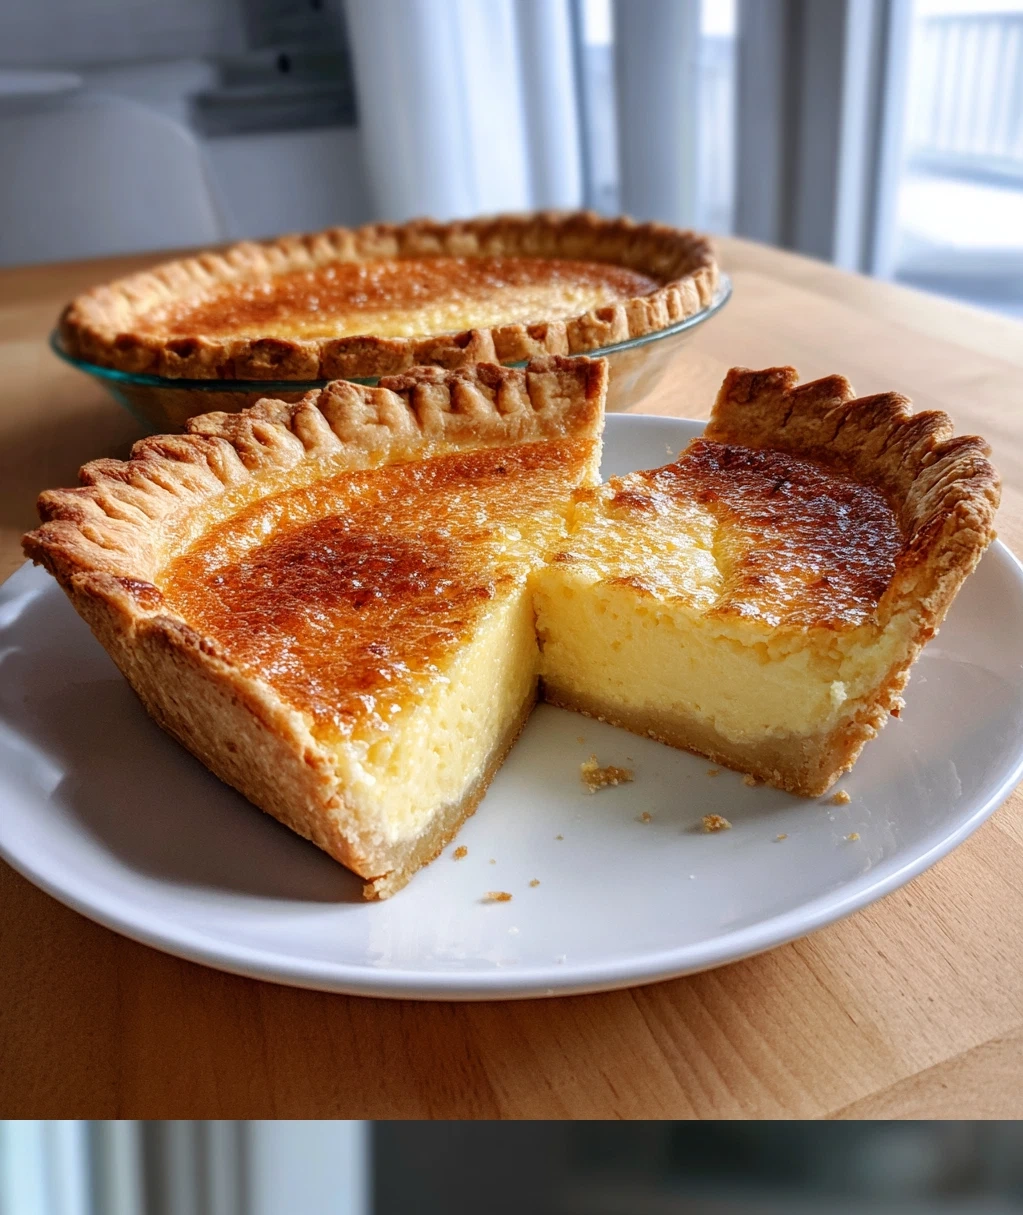
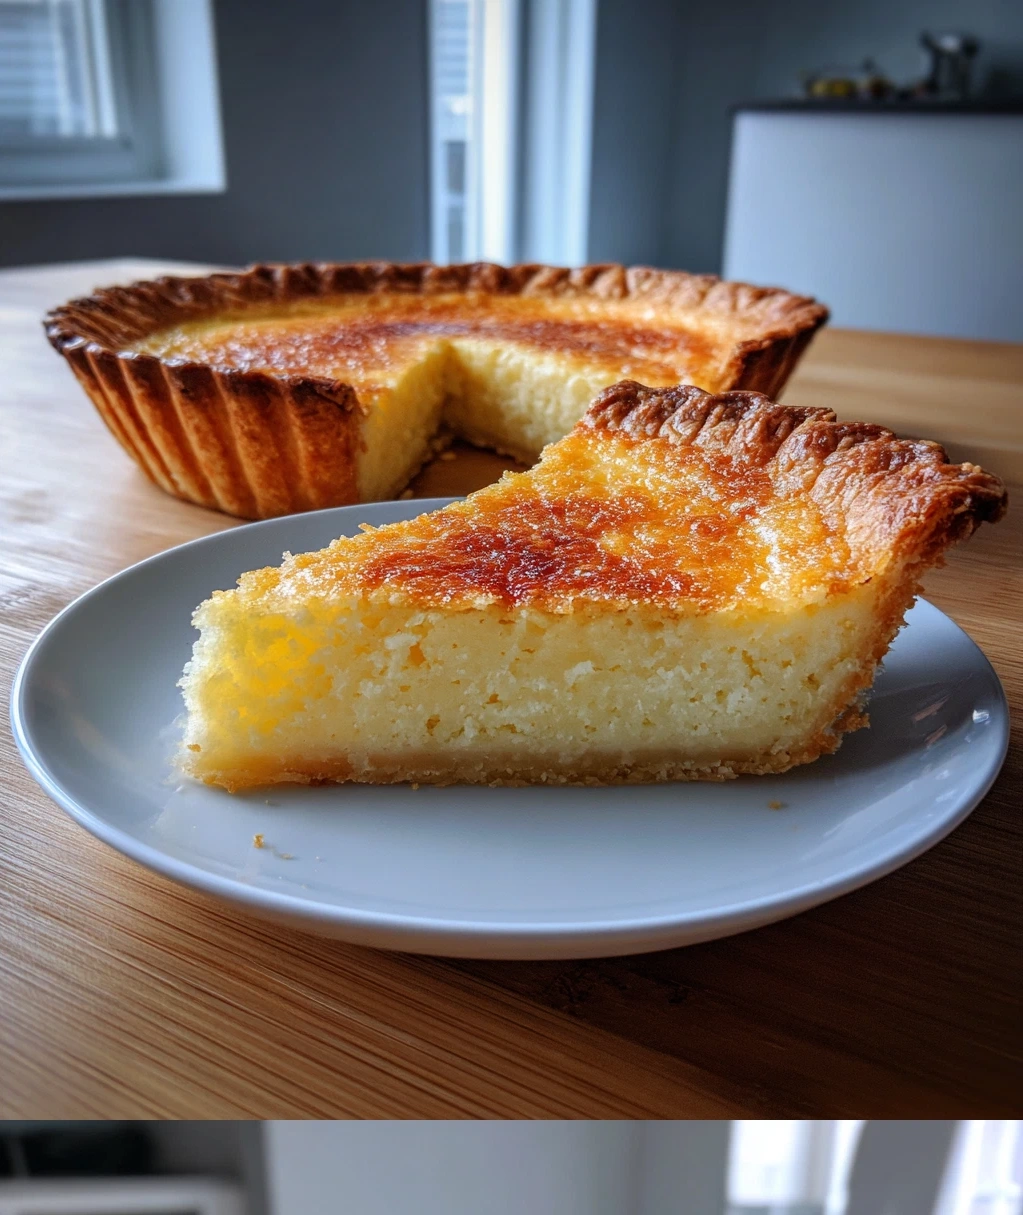
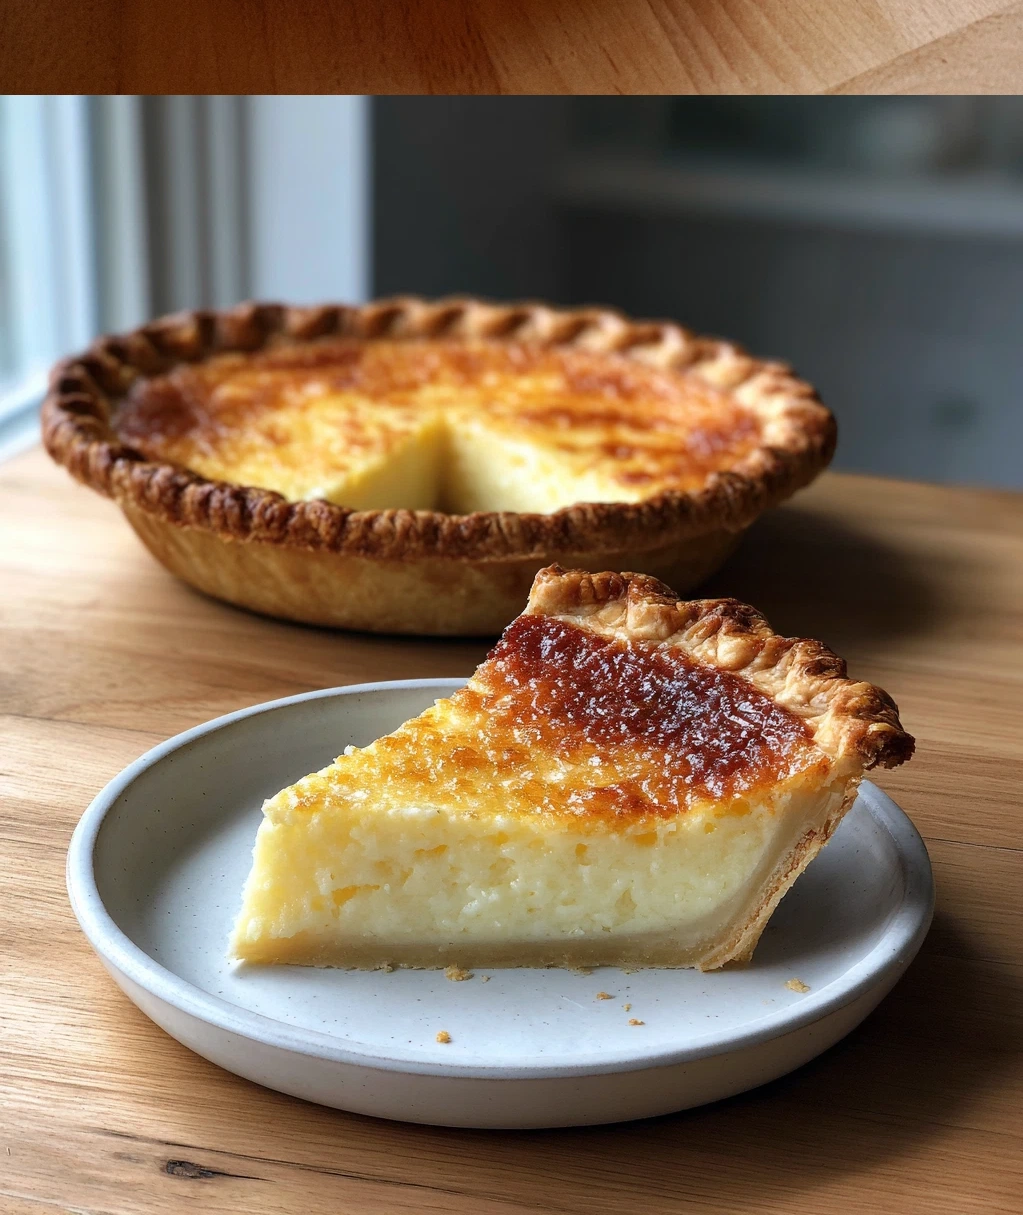
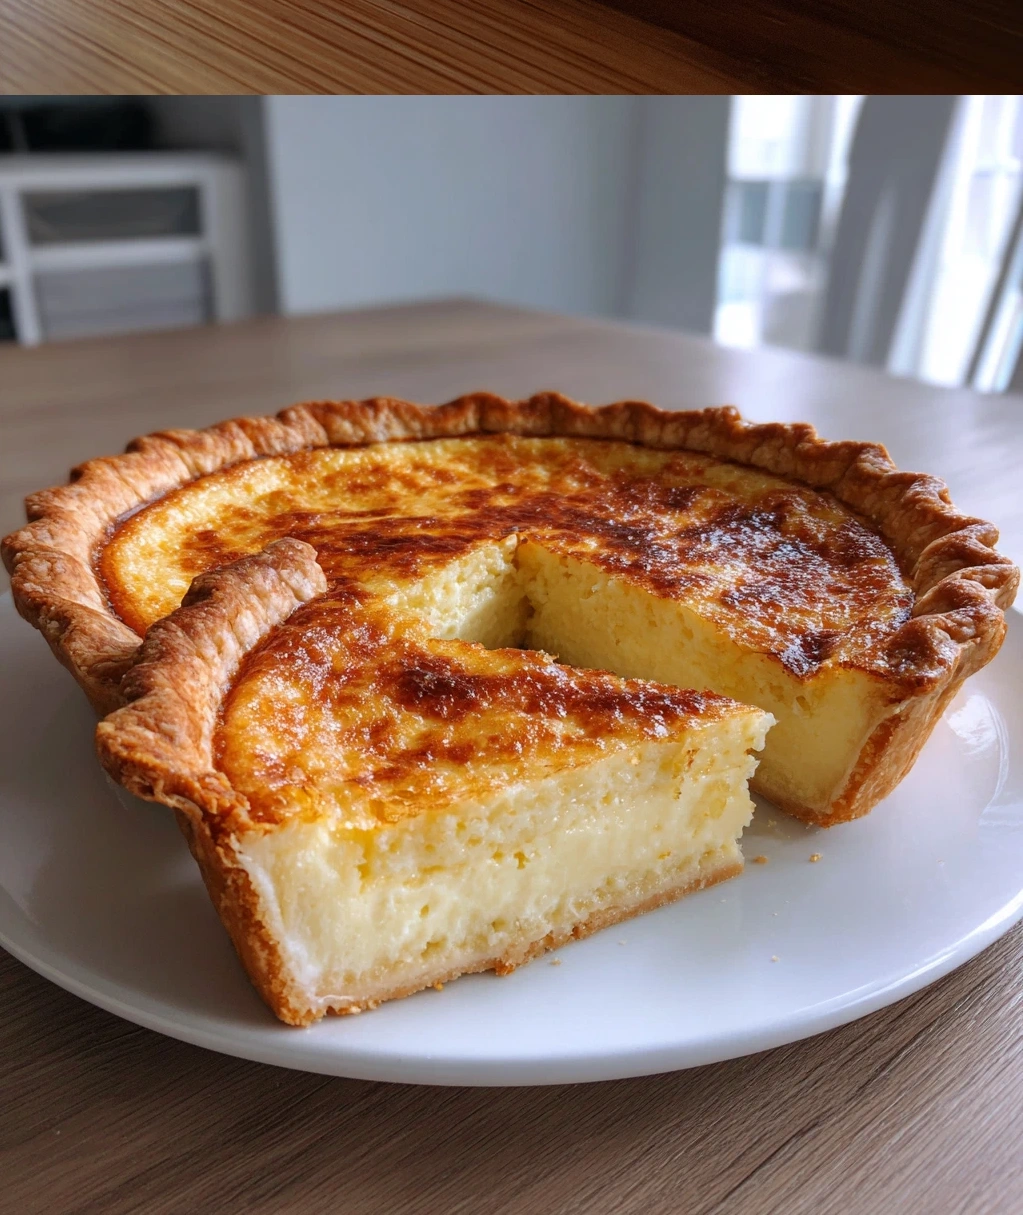
What I adore about it is how versatile it is. Serve it warm with a dollop of whipped cream, chill it for a cool treat, or enjoy it plain right out of the oven. The flavors just work together perfectly – sweet but not too sweet, creamy but light, with that wonderful buttermilk tang that makes it special. Trust me, once you try this, you’ll understand why it’s been a Southern favorite for generations.
Why This Classic Buttermilk Pie Will Become Your Favorite
Let me tell you why this pie is going to be your new best friend in the kitchen. First off, it’s incredibly forgiving. Don’t worry if your crust isn’t perfect or if your filling looks a little lumpy at first – it all comes together beautifully in the oven. My favorite part is how the top develops that gorgeous golden-brown color while the inside stays creamy and smooth.
Here’s what makes this classic buttermilk pie so special:
- It’s budget-friendly – You probably have most ingredients in your pantry already
- Minimal prep time – I can have it ready for the oven in under 15 minutes
- Perfect for any occasion – Fancy enough for holidays, simple enough for weeknights
- Amazing texture – Creamy, custardy filling with just the right amount of sweetness
- That tangy flavor – The buttermilk gives it a unique taste that’s just irresistible
Seriously, this pie has saved me more times than I can count. Unexpected guests? Classic buttermilk pie to the rescue. Need to bring something to a potluck? This is your answer. Want to impress someone with your baking skills without stressing? You’ve got it.
What You Need for the Perfect Classic Buttermilk Pie
Gathering your ingredients is the first step to pie perfection. The beauty of this recipe is its simplicity – no fancy ingredients required! Here’s everything you’ll need for one beautiful classic buttermilk pie:
- 1 unbaked 9-inch pie crust (store-bought or homemade – no judgment here!)
- 3 large eggs, at room temperature
- 1 cup granulated sugar
- 2 tablespoons all-purpose flour
- ½ cup (1 stick) unsalted butter, melted and cooled slightly
- 1 cup buttermilk (see my tip below if you don’t have any on hand)
- 1 tablespoon fresh lemon juice
- 1 teaspoon pure vanilla extract
- ¼ teaspoon salt
- A pinch of freshly grated nutmeg (optional, but it adds something special)
Quick tip about the buttermilk: If you don’t have any, you can make a substitute by adding 1 tablespoon of lemon juice or white vinegar to 1 cup of regular milk. Let it sit for 5 minutes until it thickens slightly. It works like a charm!
Make sure your eggs are at room temperature – this helps everything blend smoothly. If you forget to take them out ahead of time, just place them in a bowl of warm (not hot) water for 10 minutes. And don’t skip the vanilla – it really makes a difference in the flavor profile.
How to Make Your Classic Buttermilk Pie Step by Step
Ready to bake? Let’s get started! This process is so simple, you’ll be amazed at how quickly it comes together. First things first – preheat your oven to 350°F (175°C). Place your pie crust in a 9-inch pie dish and crimp the edges if you’re feeling fancy. I like to keep mine simple, but you do you!
- Prepare the filling: In a large mixing bowl, whisk the eggs until they’re well beaten and slightly frothy. This takes about a minute with a good whisk.
- Add the dry ingredients: Gradually whisk in the sugar, flour, and salt until everything is smooth and well combined. Don’t worry if it looks a bit thick at this stage – that’s normal!
- Incorporate the wet ingredients: Slowly pour in the melted butter while whisking continuously. Then add the buttermilk, lemon juice, and vanilla. Keep whisking until the mixture is smooth and creamy. You might see some bubbles – that’s a good sign!
- Pour and bake: Carefully pour the filling into your prepared pie crust. If you’re using nutmeg, sprinkle just a tiny pinch over the top. Place the pie on the middle rack of your preheated oven.
- Baking time: Bake for 45-55 minutes. You’ll know it’s done when the edges are set and the center has just a slight jiggle when you gently shake the pan. The top should be a beautiful golden brown.
- Cooling is crucial: Let the pie cool completely on a wire rack. I know it’s tempting to dive right in, but trust me – letting it set makes for the perfect texture. This usually takes about 2 hours.
Safety tip: Always use oven mitts when handling hot pans, and place your pie on a baking sheet if you’re worried about spills. Better safe than sorry!
Serving and Storing Your Classic Buttermilk Pie
Now for the best part – enjoying your creation! I love serving this pie slightly warm with a big scoop of vanilla ice cream melting over the top. The combination of warm, creamy pie and cold ice cream is absolute heaven. If you prefer something lighter, freshly whipped cream is perfect too.
Here are my favorite ways to serve classic buttermilk pie:
- Room temperature with a dusting of powdered sugar
- Chilled straight from the refrigerator on a hot day
- Warmed for 10-15 seconds in the microwave (just until the chill is off)
- With fresh berries on the side for a pop of color and freshness
For storage, cover any leftovers tightly with plastic wrap or transfer to an airtight container. It will keep in the refrigerator for 3-4 days. The texture actually improves after a day in the fridge – it becomes even creamier!
If you want to freeze your classic buttermilk pie, wrap individual slices tightly in plastic wrap, then place them in a freezer bag. They’ll keep for up to 2 months. To thaw, just transfer to the refrigerator overnight or let sit at room temperature for a few hours.
One more thing – this pie travels really well. If you’re bringing it to a gathering, just make sure it’s completely cooled before covering it. I like to use one of those pie carriers with the little raised center that keeps the plastic wrap from touching the top.
Conclusion
There you have it – my absolute favorite classic buttermilk pie recipe. It’s the kind of dessert that feels like a warm hug, simple yet special, familiar yet exciting. Every time I make it, I’m reminded of why I fell in love with baking in the first place – it’s about creating something delicious that brings people together.
I hope you give this recipe a try soon. Don’t be intimidated by the word ‘pie’ – this is one of the easiest desserts you’ll ever make. The ingredients are simple, the process is straightforward, and the results are absolutely worth it. Even if you’re new to baking, you can handle this. Just follow the steps, trust the process, and don’t stress about perfection.
The next time you’re looking for a dessert that’s sure to please everyone, remember this classic buttermilk pie. It never fails to impress, and it always disappears quickly. Share it with friends, enjoy it with family, or keep it all to yourself – I won’t tell! Happy baking, and I can’t wait to hear how yours turns out.
Frequently Asked Questions
Q: Can I make classic buttermilk pie without buttermilk?
Absolutely! If you don't have buttermilk, you can make a simple substitute. Just add 1 tablespoon of lemon juice or white vinegar to 1 cup of regular milk. Let it sit for 5-10 minutes until it thickens slightly, then use it in place of the buttermilk. The flavor and texture will be very similar.
Q: Why did my classic buttermilk pie crack on top?
Don't worry if your pie develops a small crack – it's still delicious! Cracking usually happens if the pie is slightly overbaked or cools too quickly. To prevent this, make sure you remove it from the oven when the center still has a slight jiggle, and let it cool gradually at room temperature rather than placing it in the refrigerator right away.
Q: How do I know when my classic buttermilk pie is done baking?
Your pie is ready when the edges are set and the center has just a gentle jiggle when you gently shake the pan. The top should be golden brown. Remember that the pie will continue to set as it cools, so it's better to slightly underbake than overbake. If you insert a knife near the center, it should come out mostly clean with just a few moist crumbs.
Q: Can I add other flavors to my classic buttermilk pie?
Definitely! While I love the traditional version, you can add ½ teaspoon of lemon zest for extra brightness, or a tablespoon of bourbon for a deeper flavor. Some people like to sprinkle cinnamon instead of nutmeg on top. Just keep any additions minimal so you don't overwhelm the delicate buttermilk flavor.
Q: How long does classic buttermilk pie last?
Properly stored in the refrigerator, your pie will stay fresh for 3-4 days. Make sure to cover it tightly with plastic wrap or store it in an airtight container. The texture actually improves after a day in the fridge. For longer storage, you can freeze individual slices for up to 2 months.
PrintClassic Buttermilk Pie
- Total Time: 65
- Yield: 8 servings 1x
Description
A creamy, tangy, and perfectly sweetened pie with a flaky crust, incredibly easy to make and absolutely irresistible!
Ingredients
1 9-inch unbaked pie crust
1 1/2 cups granulated sugar
1/2 cup unsalted butter, melted and cooled
3 large eggs
1 tablespoon all-purpose flour
1/4 teaspoon salt
1 cup buttermilk
1 teaspoon vanilla extract
1/4 teaspoon ground nutmeg
Instructions
Step 1: Preheat oven to 350°F (175°C).
Step 2: In a large bowl, whisk together sugar, melted butter, eggs, flour, and salt until smooth.
Step 3: Stir in buttermilk and vanilla extract until well combined.
Step 4: Pour filling into the unbaked pie crust.
Step 5: Sprinkle nutmeg evenly over the top.
Step 6: Bake for 45-50 minutes, or until center is set and edges are lightly golden.
Step 7: Let cool completely on a wire rack before serving.
- Prep Time: 15
- Cook Time: 50
- Category: Dessert
Nutrition
- Calories: 380
- Fat: 19g
- Carbohydrates: 48g
- Protein: 6g