
Antipasto Skewers Appetizer: Incredibly Simple Party Perfection
Okay, I have to tell you about my new favorite thing to make when friends come over – antipasto skewers appetizer! I know what you’re thinking: “Another appetizer recipe?” But trust me, this one’s different. It’s the kind of dish that looks fancy but takes barely any time to put together. I discovered these little gems when I was scrambling to prepare for a last-minute gathering. My kitchen was a mess, I had zero time, and then I remembered the antipasto platter ingredients I always keep on hand. Why not thread them onto skewers?
Here’s the beautiful part: antipasto skewers appetizer is basically all the best bits of an Italian charcuterie board, but portable and perfectly portioned. You get salty meats, tangy cheeses, briny olives, and sweet roasted peppers all in one bite. The colors alone make your table look festive. I love how customizable they are too – you can use whatever you have in your fridge or cater to different diets without much fuss. They’re my go-to when I want something impressive but don’t want to spend hours in the kitchen. Seriously, once you try these, you’ll never go back to plain cheese plates again.

Why You'll Love This Antipasto Skewers Appetizer
Let me count the ways! First off, these skewers are ridiculously easy. I’m talking 20 minutes from start to finish, even if you’re moving slowly with a glass of wine in hand. They’re perfect for when you’re hosting but still want to enjoy your own party. Here’s what makes them so special:
- Visually stunning: The reds, greens, and whites create such a beautiful display. People always compliment how pretty they look on the table.
- Minimal prep work: No cooking required! Just assemble. This is huge when you’re juggling multiple dishes.
- Make-ahead friendly: You can assemble these hours before guests arrive. Just cover them with plastic wrap and refrigerate until showtime.
- Crowd-pleasing: Everyone loves them – meat-eaters, cheese-lovers, even picky eaters. The flavors are familiar but feel special.
- Portable perfection: No plates or forks needed. Guests can grab and go, which keeps your living room cleaner. No more worrying about spills!
My favorite part is how flexible they are. Last week I made a vegetarian version for my sister, and she raved about it. You really can’t mess these up. They always taste delicious and look like you put in way more effort than you actually did. That’s my kind of entertaining!

What You Need for Perfect Antipasto Skewers
Here’s the fun part – gathering your ingredients! You don’t need anything fancy. I usually shop at my regular grocery store and pick up whatever looks good. The key is balancing flavors and textures. Here’s my go-to list:
- Skewers: 6-inch wooden or bamboo skewers (about 20-25). Soak them in water for 10 minutes first so they don’t burn if you’re serving near heat.
- Meats (pick 2-3): Salami slices (folded into quarters), prosciutto (rolled up), pepperoni, or ham cut into cubes
- Cheeses (pick 2-3): Fresh mozzarella balls (ciliegine size), cubed provolone, cubed fontina, or marinated mozzarella
- Vegetables: Marinated artichoke hearts (halved if large), roasted red peppers (cut into 1-inch pieces), cherry tomatoes, pepperoncini peppers
- Briny bits: Green olives, black olives, or kalamata olives (pitted!)
- Fresh herbs: Fresh basil leaves – these make everything smell amazing
- Optional extras: Mini balls of fresh mozzarella, marinated mushrooms, or sun-dried tomatoes
Don’t worry about exact amounts. For a party of 8-10 people, I usually get 1/2 pound of meats, 1/2 pound of cheeses, and about 1 cup each of the vegetables and olives. It’s better to have a little extra than to run out! And remember: everything should be bite-sized. Nobody wants to struggle with a giant piece of cheese on a stick.
How to Assemble Your Antipasto Skewers Step-by-Step
Ready to get stacking? This is where the magic happens. I like to set up a little assembly line on my kitchen counter – it makes the process go so much faster. Here’s exactly what I do:
- Prep your ingredients: Cut all your cheeses into 1-inch cubes. Slice meats if needed. Drain marinated vegetables well – you don’t want everything dripping oil. Pat things dry with a paper towel if they’re too wet.
- Soak skewers: While you’re prepping, let your skewers soak in warm water. This prevents splintering and keeps them from burning if you’re serving near candles or warm dishes.
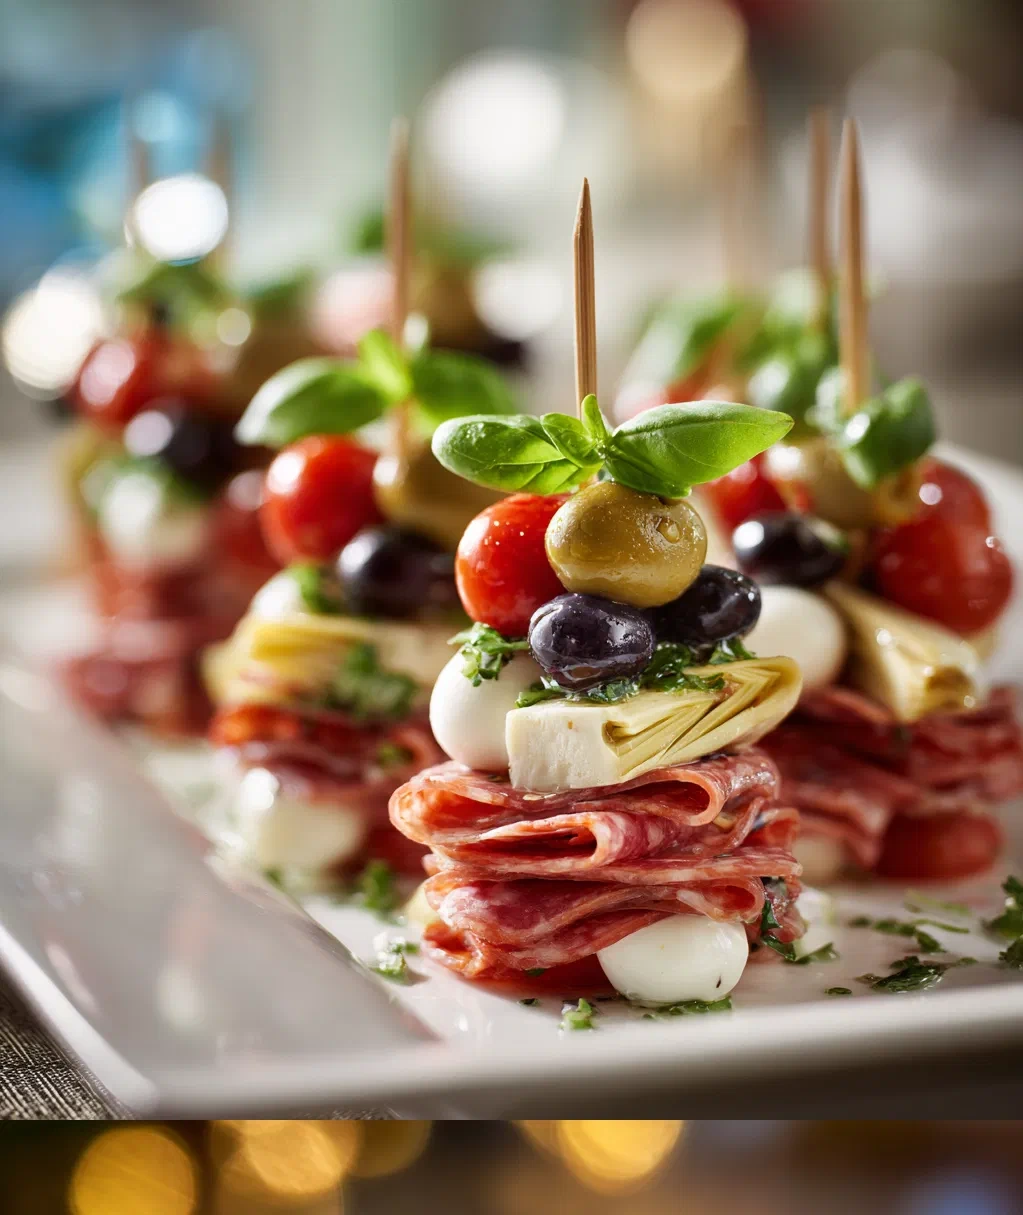
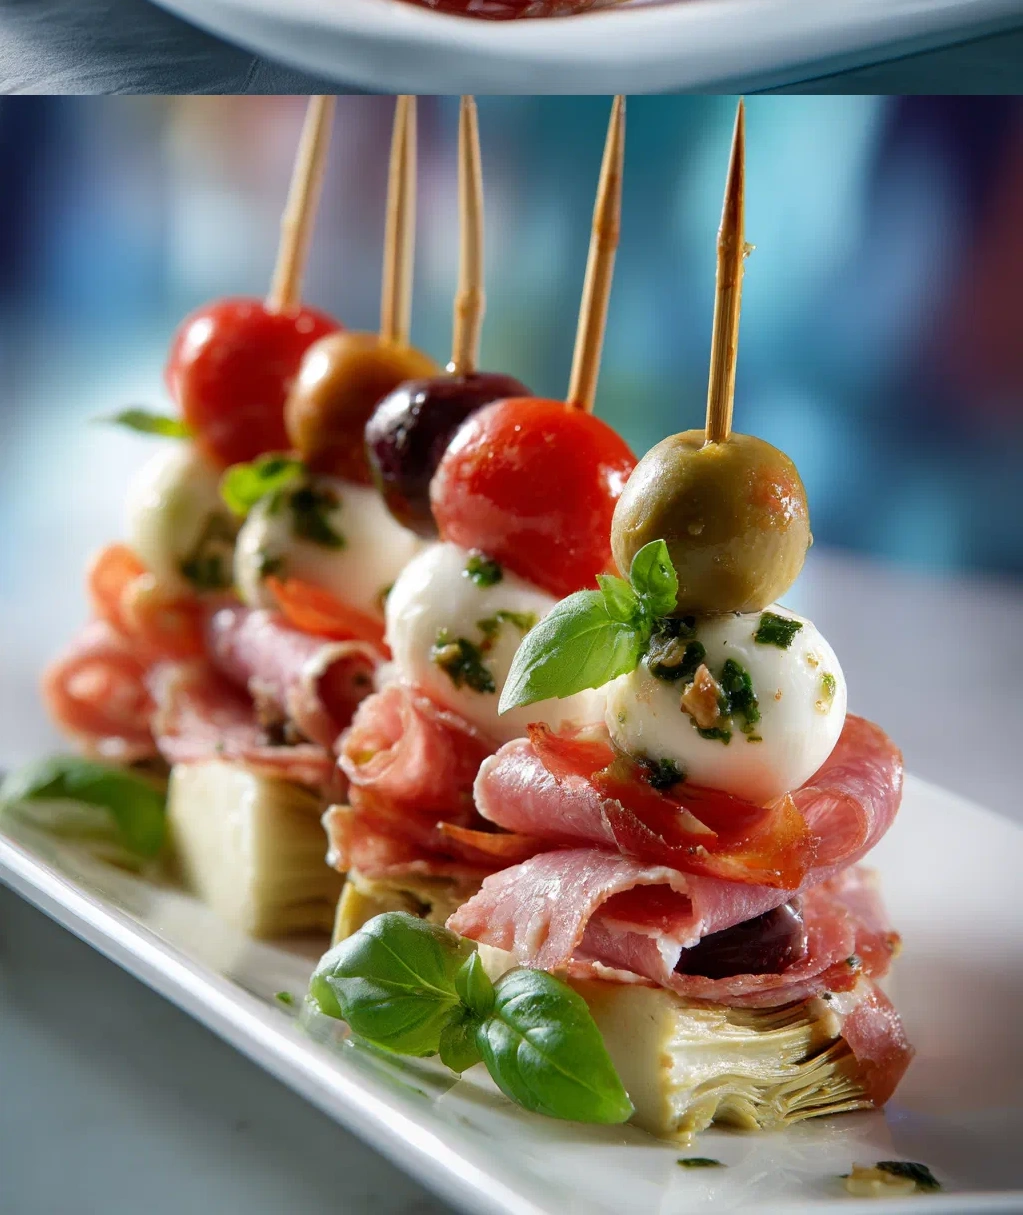
- Start threading: Begin with something sturdy like an olive or cheese cube as your base. Then add items in whatever order looks pretty! I like to alternate colors and textures. My favorite pattern: salami fold, mozzarella ball, basil leaf, roasted pepper, olive, repeat. But really, there’s no wrong way.
- Keep them balanced: Don’t overload your skewers. 4-5 items per skewer is perfect. Leave about 1 inch at the bottom for easy grabbing.
- Arrange and serve: Place finished skewers on a platter. You can line them up neatly or create a casual pile. I sometimes drizzle a little olive oil and sprinkle dried oregano over the top for extra flavor.
That’s it! Seriously, that’s all there is to it. The whole process takes me about 15 minutes once everything is prepped. If you’re making these ahead, cover the platter with plastic wrap and refrigerate. Take them out about 30 minutes before serving so the cheese isn’t too cold. The flavors really come together as they sit.
Creative Variations for Your Antipasto Skewers
Once you’ve mastered the basic antipasto skewers appetizer, it’s fun to mix things up! I love playing with different combinations based on who’s coming over or what’s in season. Here are some of my favorite twists:
- Mediterranean style: Swap the Italian meats for grilled chicken chunks, add feta cheese cubes, cucumber slices, and cherry tomatoes. Drizzle with tzatziki sauce on the side.
- Vegetarian delight: Skip the meats entirely and double up on cheeses and veggies. Add marinated mushrooms, blanched asparagus tips, and little balls of fresh mozzarella. So good!
- Spicy kick: Use spicy salami or pepperoni, add pickled jalapeño slices, and include pepper jack cheese cubes. Perfect for game day.
- Summer fresh: In warmer months, I use grilled zucchini slices, fresh mozzarella, cherry tomatoes, and basil. Light and refreshing.
- Holiday special: For Christmas, I use red and green ingredients – cherry tomatoes, green olives, roasted red peppers, and fresh basil. So festive!
Don’t be afraid to experiment. Last month I made a version with little balls of burrata cheese and grilled peaches – absolutely divine. The beauty of antipasto skewers is that they’re endlessly customizable. Just keep the balance of salty, tangy, fresh, and creamy elements, and you really can’t go wrong. Your guests will think you’re a culinary genius!
Serving Tips for Your Antipasto Skewers Appetizer
Presentation matters, right? These skewers already look gorgeous, but here are some tricks to make them even more impressive:
- Choose the right platter: I love using a large wooden board or a simple white platter. The colors of the antipasto skewers really pop against neutral backgrounds.
- Add dipping sauces: Place small bowls of balsamic glaze, olive oil with herbs, or marinara sauce in the center of your platter. Guests can dip if they want extra flavor.
- Create height: Stack some skewers vertically in a tall glass or prop them up against a small bowl. This adds visual interest to your table.
- Garnish smartly: Scatter extra olives, cherry tomatoes, or fresh herbs around the platter. It fills empty spaces and looks abundant.
- Temperature matters: Serve at room temperature! Cold cheese doesn’t have as much flavor. Take your antipasto skewers out of the fridge 20-30 minutes before serving.
For larger parties, I set up a DIY antipasto skewer station. I arrange all the ingredients in separate bowls with a pile of skewers, and let guests build their own. It’s such a fun interactive element, and everyone gets exactly what they want. Plus, it takes the pressure off you as the host! Just make sure to have a little sign with suggested combinations – some people get overwhelmed by too many choices. These antipasto skewers work for any occasion, from casual game nights to fancy dinner parties. They’re always the first thing to disappear from the table!
Conclusion
So there you have it – my complete guide to making the easiest, most impressive antipasto skewers appetizer you’ll ever serve. I can’t tell you how many times these little skewers have saved me when entertaining. They look like you spent hours in the kitchen, but we know the truth: it’s just smart, simple assembly. The best part is seeing people’s faces light up when they take that first bite. That perfect combination of salty, creamy, tangy, and fresh – it’s pure magic on a stick.
Next time you’re planning a get-together, give these a try. Start with the classic combination, then get creative with your own variations. Remember: there are no rules here. Use what you love, what’s in season, what’s on sale. The beauty of antipasto skewers is in their flexibility. I promise once you make them once, they’ll become your secret weapon for every party, potluck, or casual Friday night. Your friends will be asking for the recipe, and you can just smile and say “Oh, it’s nothing special” – while secretly knowing you’ve just served them the most delicious, fuss-free appetizer ever. Happy skewering!
Frequently Asked Questions
Q: How far in advance can I make antipasto skewers?
You can assemble them up to 24 hours ahead! Just cover the platter tightly with plastic wrap and refrigerate. Take them out about 30 minutes before serving so they come to room temperature – the flavors really shine when they're not ice cold.
Q: Can I make vegetarian antipasto skewers?
Absolutely! Just skip the meats and load up on extra cheeses and vegetables. Some great vegetarian options: marinated artichoke hearts, roasted peppers, different types of olives, fresh mozzarella balls, cherry tomatoes, and marinated mushrooms. They're just as delicious!
Q: What's the best way to store leftovers?
If you have any leftovers (rare in my house!), remove the skewers from the platter and place them in an airtight container. They'll keep in the refrigerator for 2-3 days. The vegetables might get a little softer, but they'll still taste great for quick snacks.
Q: Do I need to use wooden skewers?
Wooden or bamboo skewers work perfectly and are inexpensive. Just remember to soak them in water for 10 minutes before using – this prevents splintering. If you're serving near candles or warm dishes, soaked skewers won't burn. You can also use small metal skewers if you prefer something reusable.
Q: Can I prepare the ingredients ahead of time?
Yes! This is my favorite time-saver. You can cut all your cheeses, meats, and vegetables 1-2 days in advance. Store them separately in airtight containers in the refrigerator. Then when it's party time, just assemble – it takes minutes!
PrintItalian Antipasto Skewers
- Total Time: 15
- Yield: 12 skewers 1x
Description
Colorful skewers featuring classic Italian antipasto ingredients like mozzarella, salami, olives, and artichokes, perfect for easy entertaining.
Ingredients
12 small wooden skewers (6-inch)
24 cherry tomatoes
12 mini mozzarella balls (bocconcini)
24 slices of Genoa salami, folded into quarters
24 pitted Kalamata olives
24 marinated artichoke hearts, drained
24 fresh basil leaves
1/4 cup extra virgin olive oil
1 tablespoon balsamic glaze
Salt and freshly ground black pepper to taste
Instructions
Step 1: Soak wooden skewers in water for 10 minutes to prevent burning.
Step 2: Thread ingredients onto skewers in this order: cherry tomato, folded salami slice, mozzarella ball, basil leaf, artichoke heart, and Kalamata olive.
Step 3: Repeat the pattern for each skewer, creating two layers of ingredients per skewer.
Step 4: Arrange finished skewers on a serving platter.
Step 5: Drizzle with extra virgin olive oil and balsamic glaze.
Step 6: Season lightly with salt and pepper just before serving.
- Prep Time: 15
- Category: Appetizer
Nutrition
- Calories: 85
- Fat: 6g
- Carbohydrates: 4g
- Protein: 4g