
Volcano Roll: The Ultimate Explosive Sushi Recipe You’ll Love
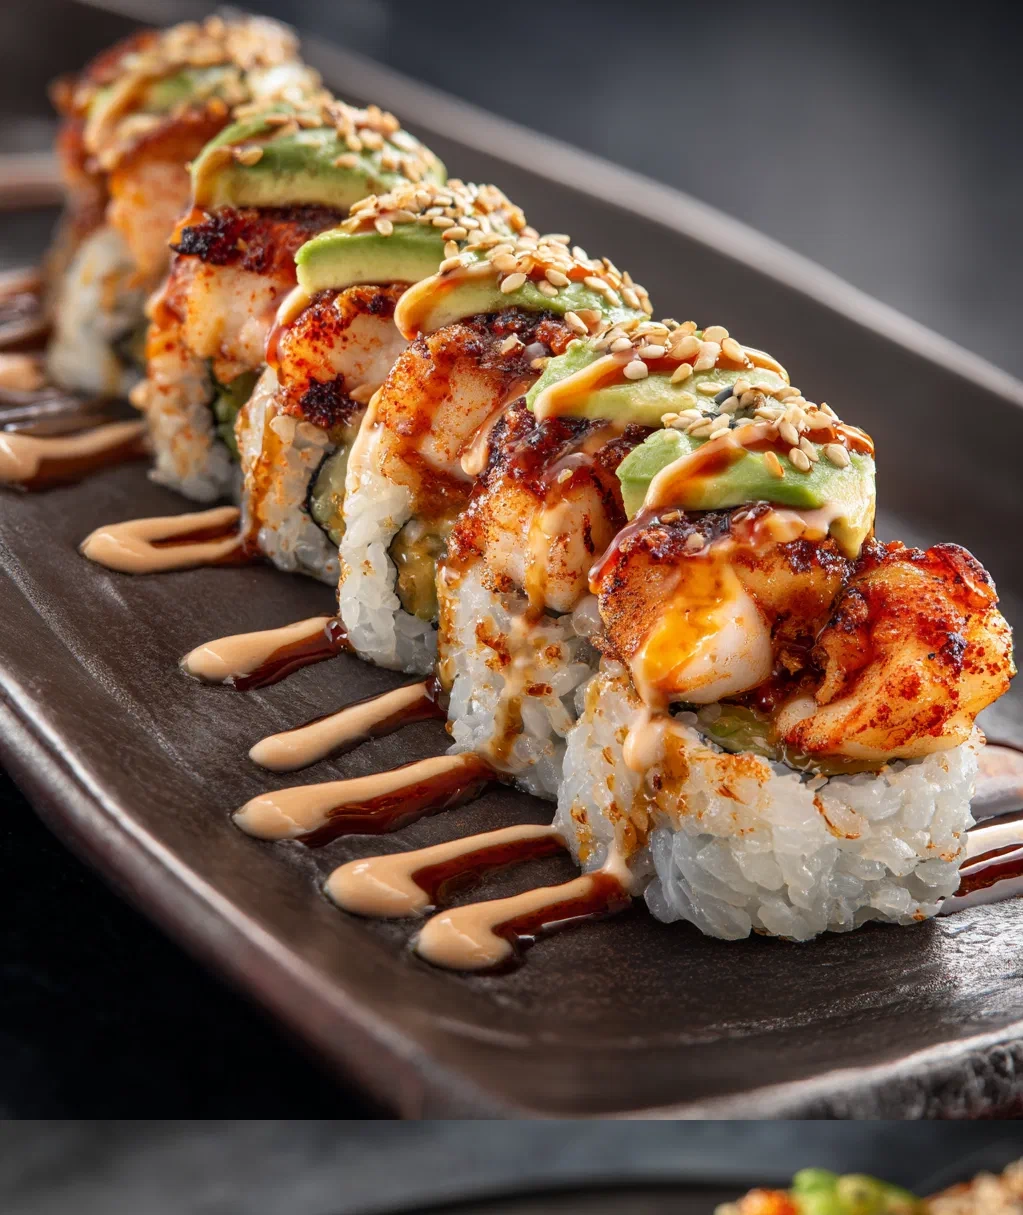
Okay, friends, I have to tell you about my latest kitchen obsession—the volcano roll. I know, it sounds intense, right? Like something that might erupt in your mouth. And trust me, it kind of does—but in the best possible way. I first tried this at a little sushi spot near my place and fell head over heels. The combination of warm, creamy topping over cool, fresh sushi rice? Absolute magic. So I did what any food-obsessed home cook would do: I spent weeks perfecting my own version until I could make it right in my own kitchen. And now I’m sharing it with you because everyone deserves to experience this flavor explosion.
Here’s the thing about making volcano rolls at home. It looks fancy, like something you’d only get at a restaurant. But I promise, it’s totally doable. You don’t need years of sushi training or fancy equipment. Just some fresh ingredients, a bit of patience, and a willingness to get your hands a little messy. My favorite part is watching people’s faces light up when they take that first bite—it’s like a little party in your mouth. So grab your bamboo mat and let’s make some magic happen together.
Why You'll Love This Volcano Roll Recipe
Let me tell you why this volcano roll recipe has become my go-to when I want to impress guests or just treat myself. First, it’s incredibly satisfying to make. There’s something therapeutic about spreading rice, arranging fillings, and rolling everything into a perfect cylinder. Plus, the results look restaurant-quality but cost a fraction of what you’d pay out.
Here’s what makes this particular version special:
- Perfect flavor balance: The warm, creamy topping plays beautifully against the cool rice and crisp vegetables.
- Customizable fillings: You can use whatever fish or vegetables you have on hand—I’ll share my favorites below.
- Great for gatherings: These rolls look impressive on a platter and always get compliments.
- Fun to make: Seriously, it’s like edible arts and crafts for adults.
My husband calls these ‘happy food’ because they never fail to brighten up our dinner table. And the best part? Once you get the hang of rolling, you can whip up a batch in about 30 minutes.
Volcano Roll Ingredients You'll Need
Gathering your ingredients is the first step to volcano roll success. I like to lay everything out on my counter before I start—it keeps me organized and makes the whole process smoother. Don’t stress if you can’t find exact ingredients; I’ll give you some easy swaps in the next section.
For the sushi rice:
- 2 cups sushi rice (short-grain Japanese rice)
- 2 ¼ cups water
- ¼ cup rice vinegar
- 2 tablespoons sugar
- 1 teaspoon salt
For the volcano roll filling:
- 8 ounces fresh salmon, cut into thin strips (make sure it’s sushi-grade!)
- 1 small cucumber, seeded and cut into matchsticks
- 1 avocado, sliced
- 4 sheets nori (seaweed sheets)
- Sesame seeds for sprinkling
For the volcano topping:
- ½ cup mayonnaise (I prefer Japanese kewpie mayo)
- 2 tablespoons sriracha sauce (adjust to your heat preference)
- 1 teaspoon soy sauce
- ½ teaspoon sesame oil
- Optional: tobiko (flying fish roe) for garnish
Quick safety note: When working with raw fish, make sure it’s labeled ‘sushi-grade’ or ‘sashimi-grade’ from a trusted source. If you’re unsure, you can use cooked shrimp or crab instead—still delicious!
How to Make Your Perfect Volcano Roll
Ready to roll? Literally! Follow these steps and you’ll have beautiful volcano rolls in no time. I’ve broken it down so it’s easy to follow. Don’t worry if your first roll isn’t perfect—mine definitely weren’t. You’ll get better each time.
- Cook the rice: Rinse the sushi rice under cold water until the water runs clear. Combine with water in a saucepan, bring to a boil, then reduce heat to low, cover, and simmer for 20 minutes. Remove from heat and let sit, covered, for 10 more minutes.
- Season the rice: While the rice cooks, heat the rice vinegar, sugar, and salt in a small pan until dissolved. Transfer the cooked rice to a large bowl (wooden if you have it) and gently fold in the vinegar mixture. Let it cool to room temperature—this is crucial for easy rolling.
- Prepare your station: Lay out your bamboo rolling mat and cover it with plastic wrap (this keeps rice from sticking). Have a bowl of water nearby to wet your hands—rice is sticky stuff!
- Assemble the roll: Place a nori sheet shiny-side down on the mat. Wet your hands and spread about ¾ cup of rice evenly over the nori, leaving a 1-inch border at the top. Sprinkle with sesame seeds.
- Add fillings: Flip the nori so rice is facing down. Arrange salmon strips, cucumber, and avocado along the bottom edge. Now, using the mat, roll tightly away from you, pressing gently as you go.
- Make the topping: Mix mayonnaise, sriracha, soy sauce, and sesame oil in a bowl. Slice your roll into 8 pieces, arrange on a plate, and spoon the topping over each piece. If you’re feeling fancy, use a kitchen torch to lightly brown the topping—that’s the ‘volcano’ effect!
My pro tip: Use a very sharp knife to slice your rolls, and wipe it clean between cuts. This gives you those beautiful, clean edges.
Delicious Volcano Roll Variations to Try
Once you’ve mastered the basic volcano roll, the fun really begins. You can mix and match fillings to create your own signature versions. Here are some of my favorites that I’ve tried over the years:
Spicy Tuna Volcano Roll: Swap the salmon for sushi-grade tuna mixed with a little sriracha and mayo. The texture is amazing, and the flavor packs a punch. I like to add some chopped scallions to this version for extra freshness.
Vegetable Volcano Roll: Perfect for my vegetarian friends! Use grilled asparagus, roasted sweet potato strips, and marinated mushrooms. The creamy topping works beautifully with these earthy flavors. Sometimes I’ll add a sprinkle of tempura flakes for crunch.
California-Style Volcano Roll: Use imitation crab, avocado, and cucumber for the filling, then top with the spicy mayo mixture. This is a crowd-pleaser that even sushi beginners love. Add some masago (capelin roe) on top for color and texture.
Tempura Volcano Roll: Add a piece of shrimp tempura to your filling before rolling. The warm, crispy shrimp against the cool rice is heavenly. Just make sure your tempura is cooled slightly so it doesn’t make your rice soggy.
Don’t be afraid to experiment with different sauces too. Sometimes I’ll add a bit of unagi (eel) sauce to the topping, or mix in some wasabi for extra heat. The beauty of homemade volcano rolls is making them exactly how you like them.
Serving and Storing Your Volcano Rolls
Presentation matters with volcano rolls—they’re almost too pretty to eat! Almost. Here’s how I like to serve and store them for maximum enjoyment.
Serving suggestions: Arrange your sliced volcano rolls on a simple white platter. I like to garnish with pickled ginger, wasabi, and extra sriracha on the side for those who want more heat. A small bowl of soy sauce for dipping is essential. If I’m feeling fancy, I’ll add some microgreens or edible flowers around the edges. Serve immediately after making—the contrast between warm topping and cool rice is what makes these special.
What to serve alongside: These rolls are pretty filling on their own, but I often pair them with:
- A simple miso soup to start
- Edamame sprinkled with sea salt
- A crisp cucumber salad with rice vinegar dressing
- Green tea or a light white wine
Storage tips: Honestly, volcano rolls are best eaten right away. But if you must store them, here’s what I do: Place any leftovers in a single layer in an airtight container with a damp paper towel over them. They’ll keep in the refrigerator for up to 24 hours, though the rice will harden a bit. Don’t freeze them—the texture won’t be great when thawed.
Reheating: I don’t recommend reheating the whole roll. If you have leftover topping, you can gently warm it in the microwave for a few seconds before spooning it over freshly made rice or using it as a dip for vegetables.
Conclusion
Well, there you have it—my complete guide to making incredible volcano rolls at home. I hope you’re feeling excited and ready to give it a try. Remember, your first attempt might not be perfect, and that’s okay. My early rolls looked more like abstract art than sushi, but they still tasted amazing. The important thing is to have fun with it and enjoy the process.
What I love most about this recipe is how it brings people together. There’s something special about serving homemade sushi to friends and family—it feels like a celebration. And once you get comfortable with the basic technique, you can start creating your own variations. Maybe you’ll discover the next great volcano roll combination!
So go ahead, gather your ingredients, clear some counter space, and get rolling. I’d love to hear how yours turn out. Share your creations with friends, or better yet, invite them over for a sushi-making night. There’s nothing quite like the satisfaction of biting into a volcano roll you made with your own hands. Happy rolling!
Frequently Asked Questions
Q: Can I make volcano rolls without raw fish?
Absolutely! You can use cooked shrimp, imitation crab, or even go fully vegetarian with roasted vegetables or tempura. The spicy mayo topping works with just about any filling. If you do use raw fish, just make sure it's labeled sushi-grade from a trusted source.
Q: What if I don't have a bamboo rolling mat?
No worries—you can use a clean kitchen towel or even plastic wrap. Just place your nori on the towel, add your fillings, and use the towel to help you roll. It might take a little more practice, but it works. Some people even use a silicone baking mat in a pinch.
Q: How spicy is the volcano roll topping?
The spiciness is totally adjustable. Start with 1 tablespoon of sriracha and taste as you go. You can make it mild or super spicy depending on your preference. If you're serving to kids or people who don't like heat, you can even make a plain mayo topping or mix in some sweet chili sauce instead.
Q: Can I prepare volcano rolls ahead of time?
You can prep components ahead—cook and season the rice up to 2 hours before, chop your vegetables, and mix your topping. But I recommend assembling and adding the topping right before serving. The rice dries out if left rolled too long, and you want that contrast of warm topping over cool rice.
Q: What's the best way to slice sushi rolls cleanly?
Use the sharpest knife you have, and wet it with water before each cut. Wipe the blade clean between slices. Press down firmly but gently—don't saw back and forth. Some people find a serrated knife works well too. If your rolls are falling apart when slicing, your rice might be too warm or you might be overfilling them.
PrintVolcano Roll Sushi
- Total Time: 45
- Yield: 4 servings (32 pieces) 1x
Description
A spicy and savory sushi roll topped with a creamy, baked seafood mixture that erupts with flavor like a volcano.
Ingredients
2 cups sushi rice
2 1/4 cups water
1/4 cup rice vinegar
2 tbsp sugar
1 tsp salt
4 nori sheets
8 oz imitation crab meat, shredded
1/4 cup mayonnaise
2 tbsp sriracha sauce
1 tbsp soy sauce
1/2 lb cooked shrimp, chopped
1 avocado, sliced
1 cucumber, julienned
1 tbsp sesame seeds
1 tbsp tobiko (flying fish roe)
Instructions
Step 1: Rinse sushi rice under cold water until water runs clear. Cook rice with water in a rice cooker or pot according to package instructions.
Step 2: In a small saucepan, heat rice vinegar, sugar, and salt until dissolved. Gently fold into cooked rice and let cool to room temperature.
Step 3: In a bowl, mix imitation crab, mayonnaise, sriracha, and soy sauce to create the volcano topping.
Step 4: Place a nori sheet on a bamboo sushi mat. Spread about 1/2 cup seasoned rice evenly over nori, leaving 1-inch border at top.
Step 5: Arrange avocado slices and cucumber strips horizontally across the center of the rice.
Step 6: Roll sushi tightly using the mat, moistening the nori border with water to seal.
Step 7: Repeat with remaining nori sheets and fillings to make 4 rolls.
Step 8: Slice each roll into 8 pieces and arrange on a baking sheet.
Step 9: Top each piece with a spoonful of the crab mixture and chopped shrimp.
Step 10: Broil in oven for 2-3 minutes until topping is bubbly and lightly browned.
Step 11: Garnish with sesame seeds and tobiko before serving.
- Prep Time: 25
- Cook Time: 20
- Category: Main Course
Nutrition
- Calories: 420
- Fat: 16g
- Carbohydrates: 55g
- Protein: 18g