
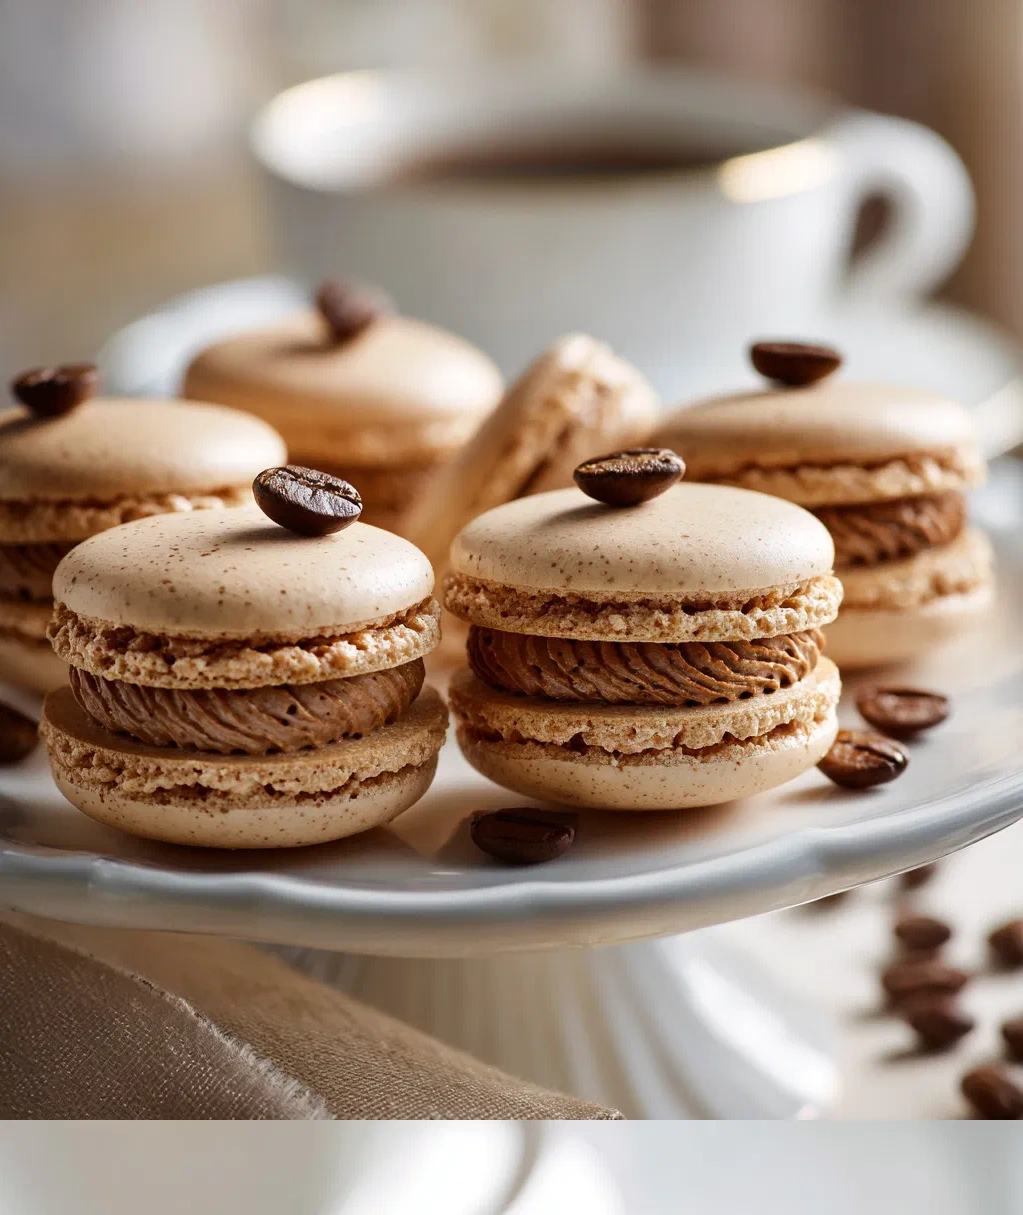
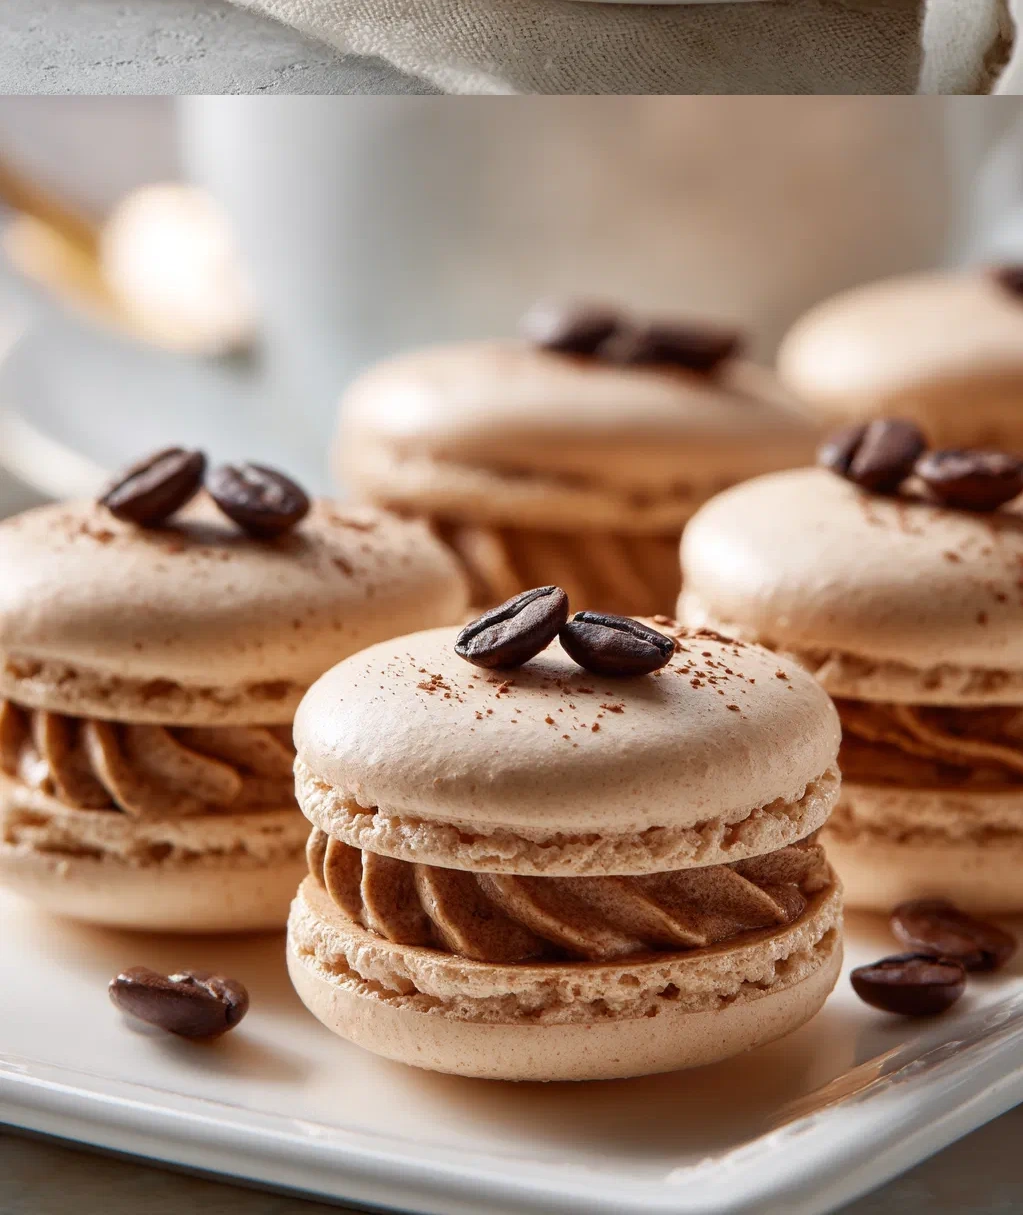
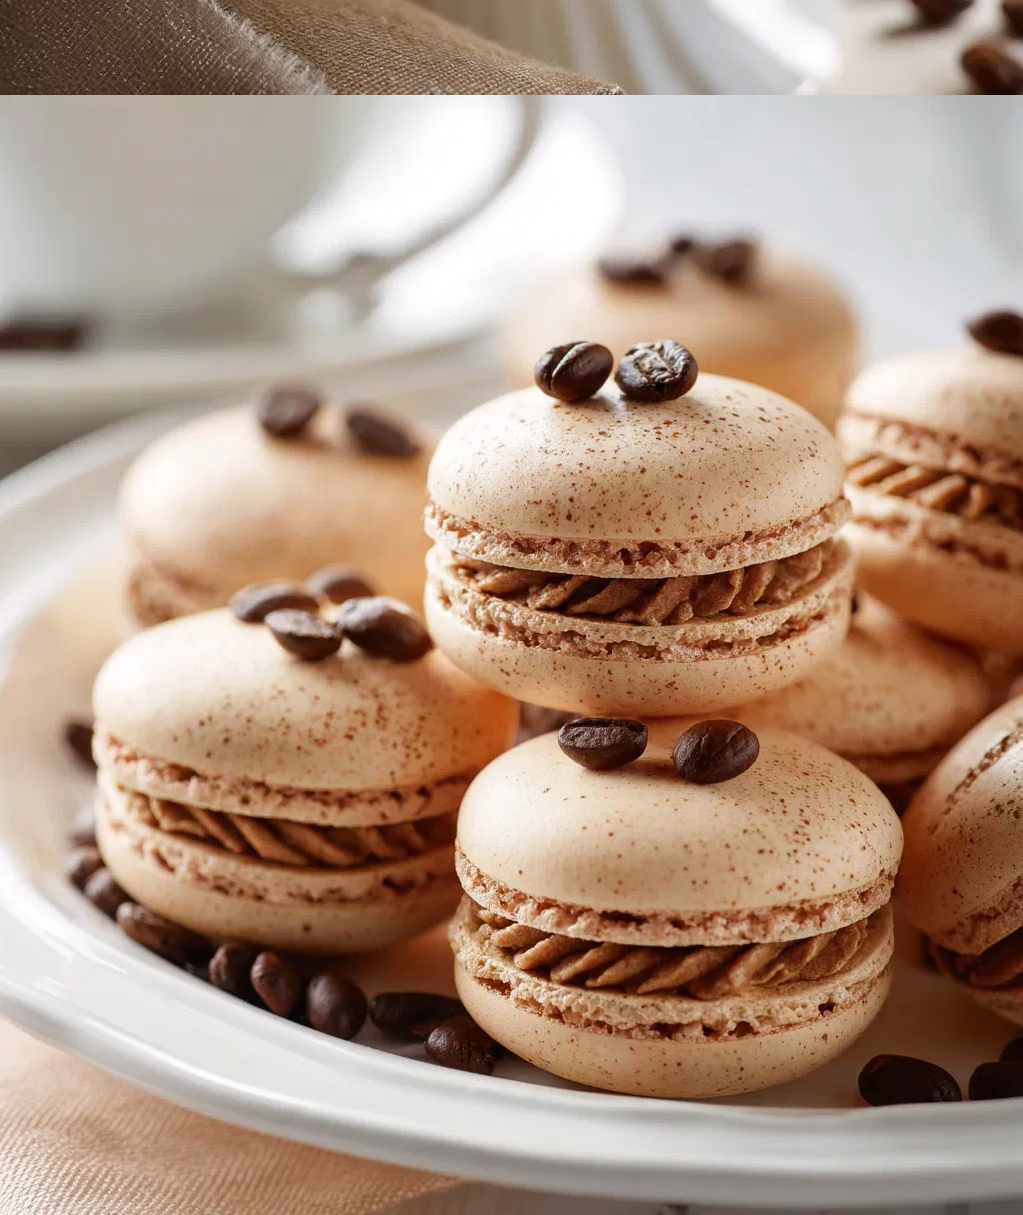
Coffee Macarons: Amazingly Simple Recipes That Taste Like Pure Magic
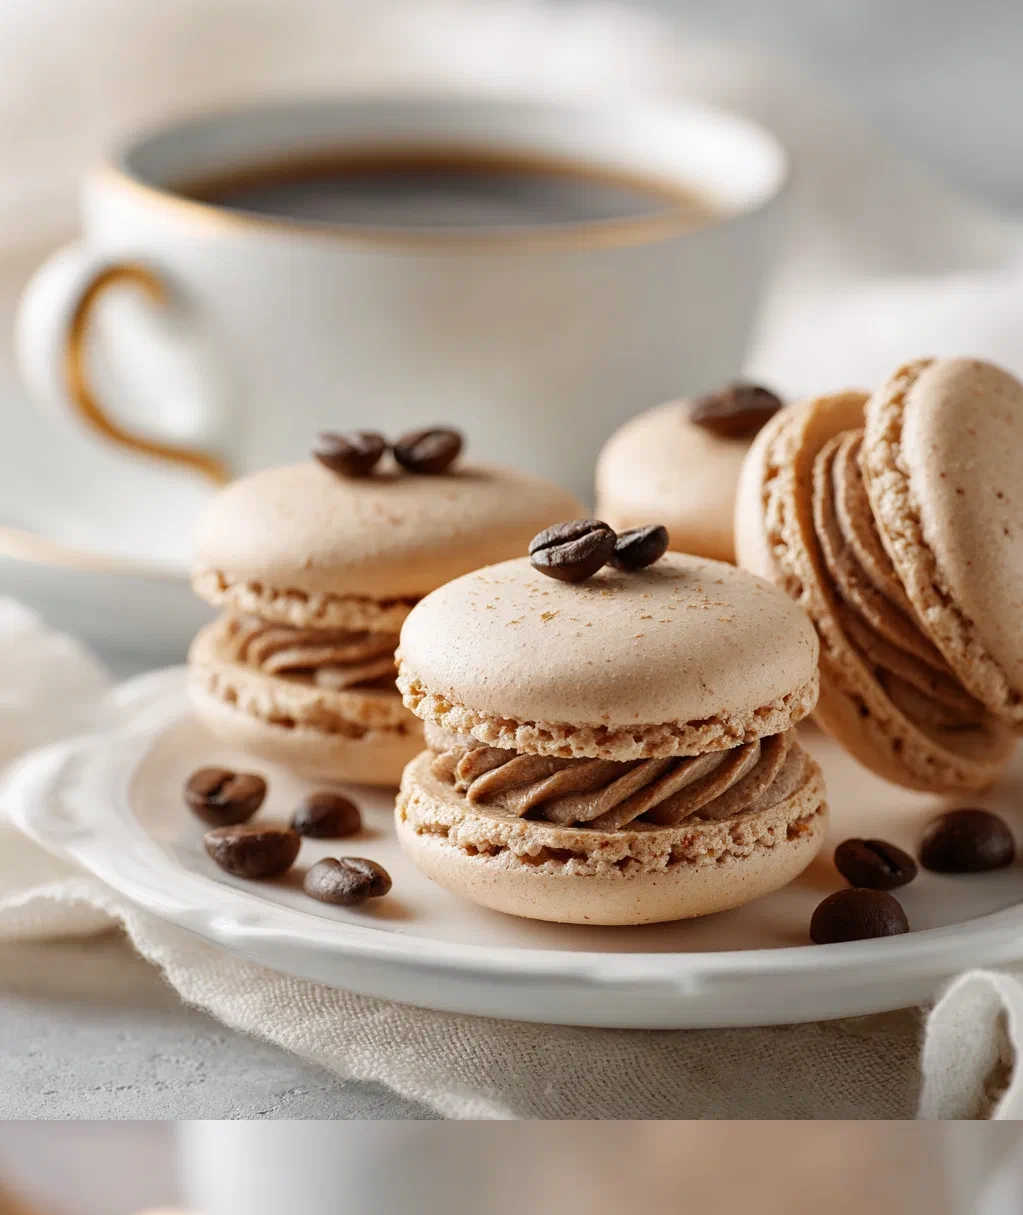
Hey there! If you’re anything like me, your day doesn’t truly start until that first sip of coffee hits your lips. That rich, warm aroma, that little jolt of energy—it’s pure comfort in a mug. But what if I told you we could take that beloved flavor and turn it into something even more magical? That’s right, I’m talking about coffee macarons!
I’ll be honest with you—the first time I tried making macarons, I was intimidated. All those fancy French techniques, the precise measurements, the fear of those little feet not forming… It felt like I needed a pastry degree just to attempt them. But then I discovered coffee macarons, and everything changed. That familiar coffee flavor gave me confidence, like I was working with an old friend instead of some mysterious dessert.
Now, these little treats have become my go-to for special occasions, hostess gifts, or just when I want to impress myself on a lazy Sunday afternoon. They’re the perfect marriage of my two favorite things: coffee and something sweet. And trust me, once you taste that crispy shell giving way to a chewy interior filled with coffee buttercream, you’ll understand why I’m so excited to share this with you.
Don’t worry if you’ve never made macarons before. I’ve broken down every step, learned from all my mistakes (and there were plenty!), and created a recipe that’s actually approachable. We’re going to take this one step at a time, and I promise you’ll end up with the most delicious coffee macarons that’ll make you feel like a pastry pro.
Why Coffee Macarons Are My Absolute Favorite Treat
Let me tell you why I’m so obsessed with coffee macarons. First, they’re incredibly versatile. You can make them as strong or as mild as you like depending on your coffee preference. I love using espresso powder for that deep, rich flavor, but instant coffee works beautifully too. The coffee flavor isn’t just in the filling—it’s in the shells themselves, which means every single bite is packed with that wonderful taste.
Here’s what makes them so special:
- Perfect balance: The bitterness of coffee cuts through the sweetness of the macaron, creating this amazing harmony that’s not too sugary.
- Impressive but approachable: People see macarons and think “fancy French pastry,” but with coffee as our guide, they feel more familiar and less intimidating.
- Customizable: You can play with different coffee types—try adding a touch of cinnamon for Mexican coffee macarons, or use decaf if you’re making these for later in the day.
- Great for gifting: These coffee macarons look professional in little boxes with tissue paper, and they taste even better than store-bought versions.
- Texture heaven: That crisp shell giving way to a chewy interior with creamy filling? It’s pure texture perfection.
My favorite part is how the coffee flavor develops. Right after baking, it’s subtle and lovely. But if you let the filled macarons rest in the fridge overnight (a process called “maturing”), the coffee flavor deepens and melds with the sweetness in the most magical way. It’s worth the wait, I promise!
Everything You Need for Perfect Coffee Macarons
Alright, let’s gather our ingredients! One of the keys to successful macarons is having everything measured and ready to go before you start. This is called “mise en place” in fancy cooking terms, but I just call it “being organized so I don’t panic.” Here’s what you’ll need:
For the coffee macaron shells:
- 1 cup (100g) almond flour (super-fine is best—sift it to remove any lumps)
- 1 ¾ cups (200g) powdered sugar
- 3 large egg whites (at room temperature—this is important!)
- ¼ cup (50g) granulated sugar
- 2 tablespoons espresso powder or instant coffee granules
- 1 teaspoon vanilla extract
- Pinch of salt
For the coffee buttercream filling:
- ½ cup (115g) unsalted butter, softened
- 1 ½ cups (180g) powdered sugar
- 1 tablespoon espresso powder dissolved in 1 teaspoon hot water
- 1 teaspoon vanilla extract
- Pinch of salt
A few notes from my kitchen: Use fresh almond flour if possible—it makes a difference in texture. For the egg whites, I leave them on the counter for about an hour before starting. If you’re in a hurry, you can place them in a bowl of warm (not hot) water for 5-10 minutes. And about that espresso powder—if you only have instant coffee, that works too! Just make sure it’s finely ground.
You’ll also need some equipment: a stand mixer or hand mixer, a sifter or fine-mesh strainer, piping bag with a round tip (about ½ inch), baking sheets, parchment paper or silicone mats, and a food scale if you have one (measuring by weight is more accurate for macarons). Don’t worry if you don’t have a piping bag—you can use a zip-top bag with the corner snipped off.
Step-by-Step Guide to Making Coffee Macarons
Ready to make some magic? Let’s do this step by step. I’ve made these coffee macarons so many times that I’ve worked out all the kinks, and I’m sharing all my tips with you. Set aside about 2 hours from start to finish, plus resting time.
- Prepare your workspace: Line two baking sheets with parchment paper or silicone mats. If using parchment, you can draw 1½-inch circles as guides, then flip the paper over so you’re piping on the clean side. Preheat your oven to 300°F (150°C).
- Make the dry mixture: In a medium bowl, sift together the almond flour, powdered sugar, and espresso powder. Yes, you really need to sift—this removes lumps and gives you those smooth tops we want. If you have a few larger almond bits that won’t go through, just discard them.
- Whip the egg whites: In your mixer bowl, combine egg whites and salt. Start mixing on medium speed until foamy. Gradually add the granulated sugar, about a tablespoon at a time. Then increase to high speed and whip until you get stiff, glossy peaks. This should take 3-5 minutes. Add vanilla extract at the end and mix just until combined.
- Fold it all together: Here’s the crucial part! Add about one-third of the dry ingredients to the egg whites and gently fold with a spatula. Once incorporated, add the rest. Fold until the batter flows like lava—when you lift the spatula, the batter should ribbon off and slowly disappear back into the bowl in about 10 seconds. This is called the “macaronage” stage. Don’t overmix or undermix!
- Pipe and rest: Transfer batter to your piping bag. Pipe circles onto your prepared sheets, holding the bag straight up and down. Tap the sheets firmly on the counter a few times to release air bubbles. Let them rest at room temperature for 30-60 minutes until they form a skin (you should be able to lightly touch them without batter sticking to your finger).
- Bake: Bake one sheet at a time for 15-18 minutes, rotating halfway through. They’re done when they don’t wiggle if you gently touch the top. Let cool completely on the sheet before removing.
- Make the filling: While shells cool, beat butter until creamy. Gradually add powdered sugar, then the coffee mixture, vanilla, and salt. Beat until light and fluffy.
- Assemble: Match shells of similar sizes. Pipe or spread filling on one shell, then sandwich with another. Gently press until filling reaches edges.
My biggest tip? Don’t get discouraged if your first batch isn’t perfect. My first coffee macarons had no feet, were hollow, and looked a bit sad. But they still tasted amazing! Practice makes progress, and even “imperfect” homemade macarons are better than none at all.
Creative Twists on Your Coffee Macarons
Once you’ve mastered the basic coffee macaron recipe, the fun really begins! Here are some variations I love playing with:
Mocha madness: Add 2 tablespoons of cocoa powder to your dry ingredients for the shells. For the filling, mix 1 tablespoon of cocoa powder with your coffee buttercream. It’s like your favorite mocha drink in cookie form!
Caramel coffee delight: Make a simple caramel sauce (or use a good store-bought one) and add a small dollop to the center of your coffee buttercream filling before sandwiching the shells. The caramel oozes out when you bite in—heaven!
Spiced coffee version: Add ½ teaspoon of cinnamon and a pinch of nutmeg to your dry ingredients. This gives your coffee macarons a warm, cozy flavor that’s perfect for fall.
Different fillings: While coffee buttercream is classic, you could try:
- Ganache made with dark chocolate and a shot of espresso
- Coffee-flavored Swiss meringue buttercream for something extra silky
- Even a simple whipped cream with instant coffee dissolved in it
Decoration ideas: Before baking, you can sprinkle a few coffee grounds or crushed espresso beans on top of the piped shells for texture. Or after baking and filling, drizzle with melted chocolate or dust with cocoa powder. I sometimes pipe little coffee bean shapes with leftover batter on a separate sheet—they make cute decorations when stuck into the filling.
Remember, the coffee flavor in your macarons can be adjusted to your taste. Love strong coffee? Add an extra teaspoon of espresso powder to the shells. Prefer it milder? Reduce it by half. These are your coffee macarons, so make them exactly how you like them!
Serving and Storing Your Homemade Treats
You’ve made beautiful coffee macarons—now let’s make sure they stay delicious! Here’s everything you need to know about serving and storing them.
Serving suggestions: These coffee macarons are perfect with… more coffee! Serve them with espresso for an after-dinner treat, or with a latte for afternoon tea. They also pair wonderfully with:
- A glass of cold milk (the classic combo!)
- Vanilla ice cream—sandwich a small scoop between two macarons for an incredible dessert
- Fresh berries on the side for a pop of color and freshness
I love arranging them on a tiered stand for parties, or packing them in small boxes tied with ribbon for gifts. They look so professional, and people are always impressed that you made them yourself.
Storage tips: This is important! Macarons actually get better after resting.
- Short-term: Store filled macarons in an airtight container in the refrigerator for up to 5 days. Let them come to room temperature for about 15 minutes before serving—this brings back their perfect texture.
- Long-term: You can freeze unfilled shells for up to 3 months. Place them in a single layer in an airtight container with parchment between layers. Thaw at room temperature, then fill. Filled macarons can also be frozen for 1-2 months.
- Unfilled shells: These can be kept at room temperature in an airtight container for 2-3 days before filling.
A note about humidity: If you live in a humid climate, your coffee macarons might get sticky. Store them with a silica gel packet in the container (like the ones that come in shoe boxes) to absorb moisture. And if they do get a bit sticky, don’t worry—they’ll still taste amazing!
One last pro tip: Write the date on your storage container. It’s easy to forget when you made them, and while they do last awhile, they’re best enjoyed fresh. Not that they usually last long in my house—my family devours them within days!
Conclusion
Well, there you have it—my complete guide to making coffee macarons that taste like they came from a fancy Parisian patisserie, but with that homemade heart and soul that makes them even better. I hope you feel inspired to give these a try, even if you’ve been nervous about macarons before. Remember, every baker has a first batch, and every batch teaches you something new.
What I love most about these coffee macarons is how they bring people together. I’ve made them for book clubs, birthday parties, just-because Tuesdays, and every time, they start conversations. People want to know how you made them, what that amazing coffee flavor is, and could they possibly have just one more? Sharing something you made with your own hands is one of life’s simple joys, and these little treats are perfect for that.
So go ahead—gather your ingredients, clear your counter, and put on some good music. Take your time with each step, enjoy the process, and don’t stress about perfection. The best coffee macarons are the ones made with joy, even if they’re not all exactly the same size or have slightly uneven feet. And when you take that first bite of your homemade creation, with that crisp shell and creamy coffee filling, you’ll know it was all worth it.
I’d love to hear how your coffee macarons turn out! What variations did you try? Did you discover any tips of your own? Baking is a journey we’re all on together, learning and improving with each batch. Now, I’m off to make another pot of coffee—all this talk about coffee macarons has me craving the real thing too!
Frequently Asked Questions
Q: Can I make coffee macarons without a stand mixer?
Absolutely! A hand mixer works just fine. The key is getting your egg whites to stiff peaks, which might take a bit longer with a hand mixer, but it's totally doable. Just make sure your bowl and beaters are completely clean and dry—any grease can prevent the egg whites from whipping properly.
Q: Why do my macaron shells crack or don't develop feet?
This usually comes down to a few common issues: First, your batter might be undermixed or overmixed. It should flow like lava off your spatula. Second, they might not have rested long enough to form a skin before baking—wait until you can touch them lightly without batter sticking. Third, oven temperature can be tricky—use an oven thermometer to make sure it's accurate. And finally, tapping the baking sheets firmly after piping helps release air bubbles that can cause cracks.
Q: Can I use regular coffee instead of espresso powder?
You can, but it's trickier. If using brewed coffee, you'd need to reduce it to a concentrate or syrup to get enough flavor without adding too much liquid. Instant coffee granules (the fine kind, not the crystals) work well too—just grind them as fine as possible. Espresso powder is ideal because it's concentrated and dissolves completely, giving you strong coffee flavor without altering the batter consistency.
Q: How long should I let filled macarons mature before eating?
For the best texture and flavor development, let your filled coffee macarons rest in the refrigerator for 24 hours. This allows the shells to soften slightly from the filling's moisture, creating that perfect chewy texture, and lets the coffee flavor deepen and meld with the sweetness. If you can't wait that long (I often can't!), at least give them 4-6 hours. But honestly, the overnight wait is worth it!
Q: Are there any substitutes for almond flour in macarons?
Traditional French macarons require almond flour for their signature texture. However, if you need a nut-free option, you can try sunflower seed flour (make sure it's super fine) or pumpkin seed flour. The color might be different—sunflower seed flour can turn green due to a chemical reaction—and the flavor will vary. For your first attempt at coffee macarons, I'd stick with almond flour if possible, then experiment with alternatives once you're comfortable with the basic technique.
PrintCoffee Macarons with Espresso Buttercream
- Total Time: 63
- Yield: 24 macarons 1x
Description
Delicate coffee-flavored almond macarons filled with rich espresso buttercream, creating a perfect balance of flavors.
Ingredients
100g almond flour
100g powdered sugar
75g granulated sugar
80g egg whites (aged 24–48 hours)
2 tsp instant espresso powder
1/4 tsp cream of tartar
Pinch of salt
For buttercream: 113g unsalted butter (softened)
200g powdered sugar
2 tsp instant espresso powder
2 tbsp heavy cream
1 tsp vanilla extract
Instructions
Step 1: Sift almond flour and powdered sugar together twice to remove lumps.
Step 2: In a clean bowl, whip egg whites with cream of tartar and salt until foamy.
Step 3: Gradually add granulated sugar while whipping to stiff peaks.
Step 4: Fold in sifted dry ingredients and 2 tsp espresso powder gently until batter flows like lava.
Step 5: Pipe 1.5-inch circles on parchment-lined baking sheets, then tap to release air bubbles.
Step 6: Let shells rest 30-60 minutes until dry to the touch.
Step 7: Bake at 300°F (150°C) for 15-18 minutes, rotating halfway.
Step 8: Cool completely on wire racks before removing from parchment.
Step 9: For buttercream: Beat butter until light, then add powdered sugar, espresso powder, cream and vanilla.
Step 10: Pipe buttercream onto half the shells and sandwich with remaining shells.
Step 11: Refrigerate 24 hours for best texture before serving.
- Prep Time: 45
- Cook Time: 18
- Category: Dessert
Nutrition
- Calories: 85
- Fat: 5g
- Carbohydrates: 9g
- Protein: 1g