Coil Pot Tutorial: Incredible Success with Simple Hand-Building Techniques
Creating pottery with your own hands is one of the most satisfying creative experiences you can have at home. This coil pot tutorial will guide you through the timeless hand-building technique that humans have used for thousands of years to create functional and beautiful vessels. Whether you’re an absolute beginner or looking to refine your skills, coil building offers a gentle introduction to ceramics that doesn’t require expensive equipment or extensive training. The process of rolling, stacking, and smoothing clay coils into three-dimensional forms is both meditative and rewarding, allowing you to create everything from simple bowls to elaborate sculptural pieces. Learning this technique opens up a world of creative possibilities for your home decor, allowing you to craft unique vases, planters, storage containers, and decorative objects that reflect your personal style. The tactile nature of working with clay provides a wonderful break from digital screens and fast-paced living, offering a chance to reconnect with traditional craft methods. This tutorial will provide all the fundamental knowledge you need to get started, from selecting the right clay to finishing your first successful pot. With practice, you’ll discover that coil building is not just about making pottery—it’s about developing patience, attention to detail, and a deeper appreciation for handmade objects in your living space.
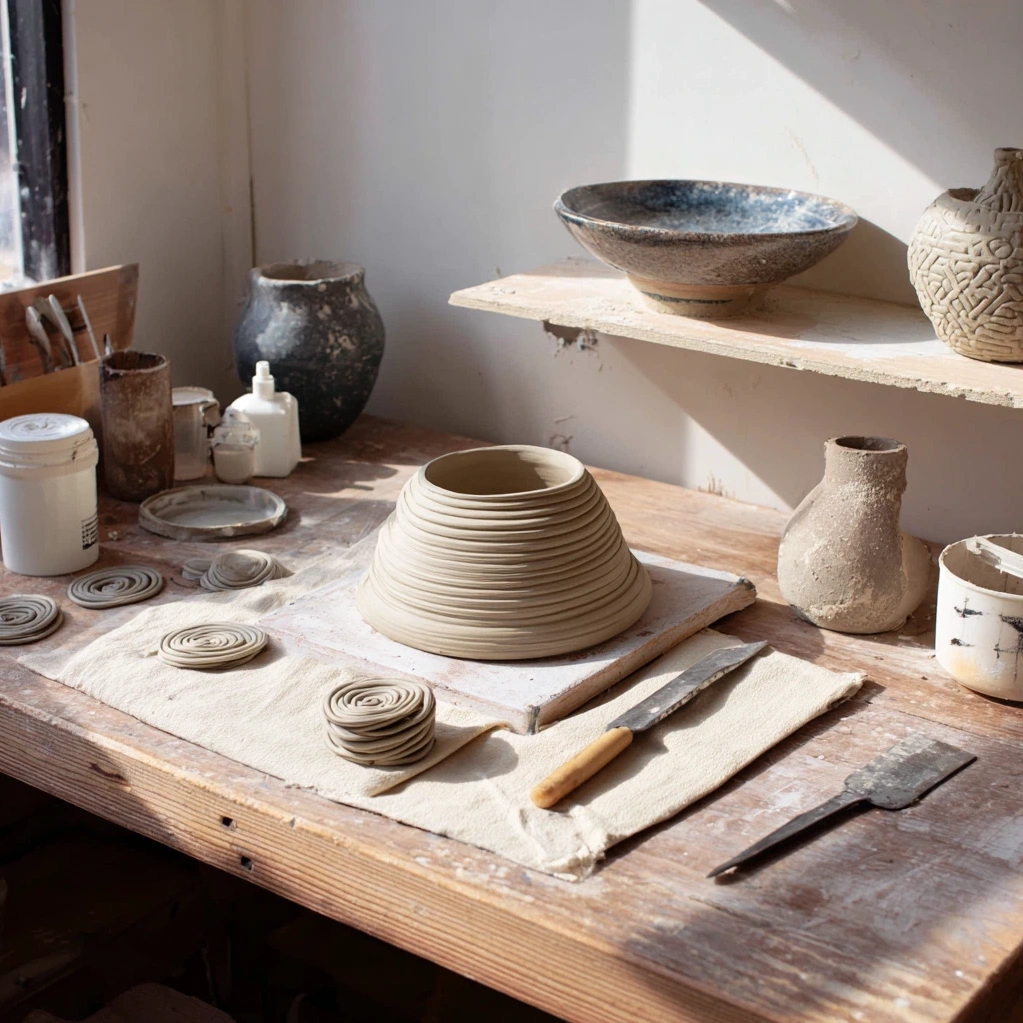
Essential Materials for Your Coil Pot Tutorial
Before beginning your coil pot tutorial project, gathering the right materials is crucial for success. Start with a clay selection that suits your needs—earthenware clay is excellent for beginners because it's forgiving and fires at lower temperatures, while stoneware offers greater durability for functional pieces. You'll need approximately 2-3 pounds of clay for a medium-sized pot. Essential tools include a rolling pin or slab roller for creating your base, a needle tool for scoring, a wooden rib for smoothing, and a sponge for adding moisture. A canvas-covered work surface prevents sticking, while a simple scoring tool can be made from a fork if you don't have specialized equipment. Consider your drying and firing options—air-dry clay eliminates the need for a kiln but produces less durable results, while kiln-fired clay requires access to ceramic facilities. For surface decoration, gather slip (liquid clay) for joining coils, basic underglazes or acrylic paints for color, and clear sealant for air-dry pieces. A simple spray bottle helps maintain clay moisture during extended work sessions. Remember that many household items can substitute for specialized tools: a butter knife works for cutting, a plastic card serves as a scraper, and smooth stones become excellent burnishing tools. This coil pot tutorial emphasizes starting with basic supplies and expanding your toolkit as your skills develop. Proper material preparation ensures your creative process flows smoothly without frustrating interruptions.
Step-by-Step Process in This Coil Pot Tutorial
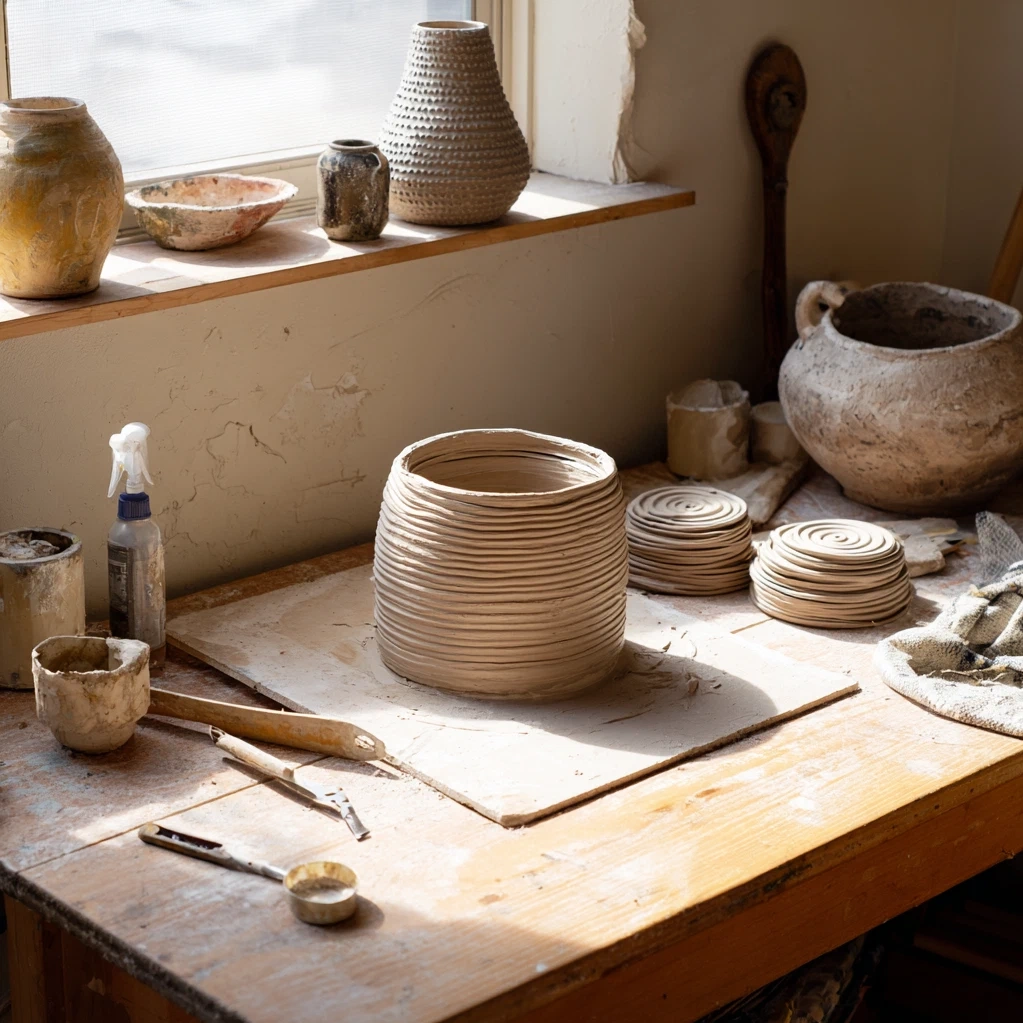
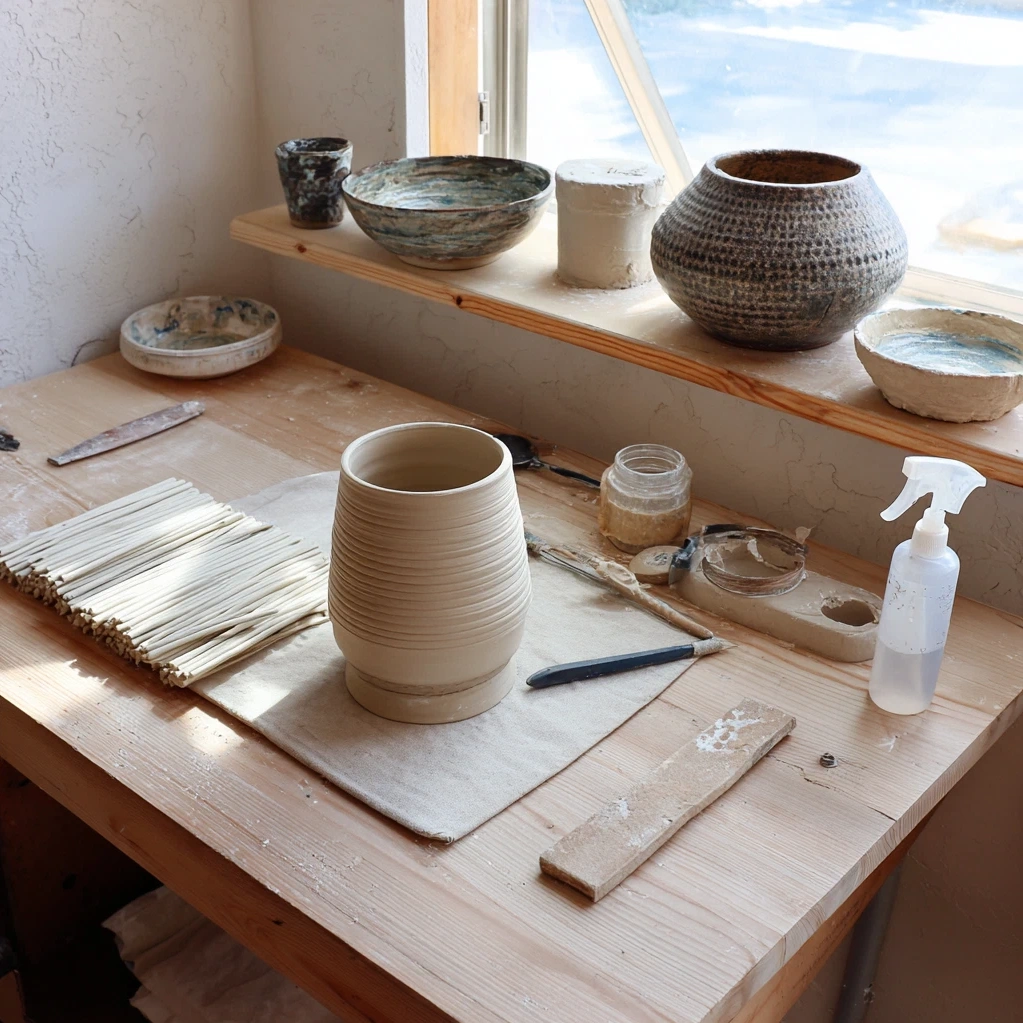
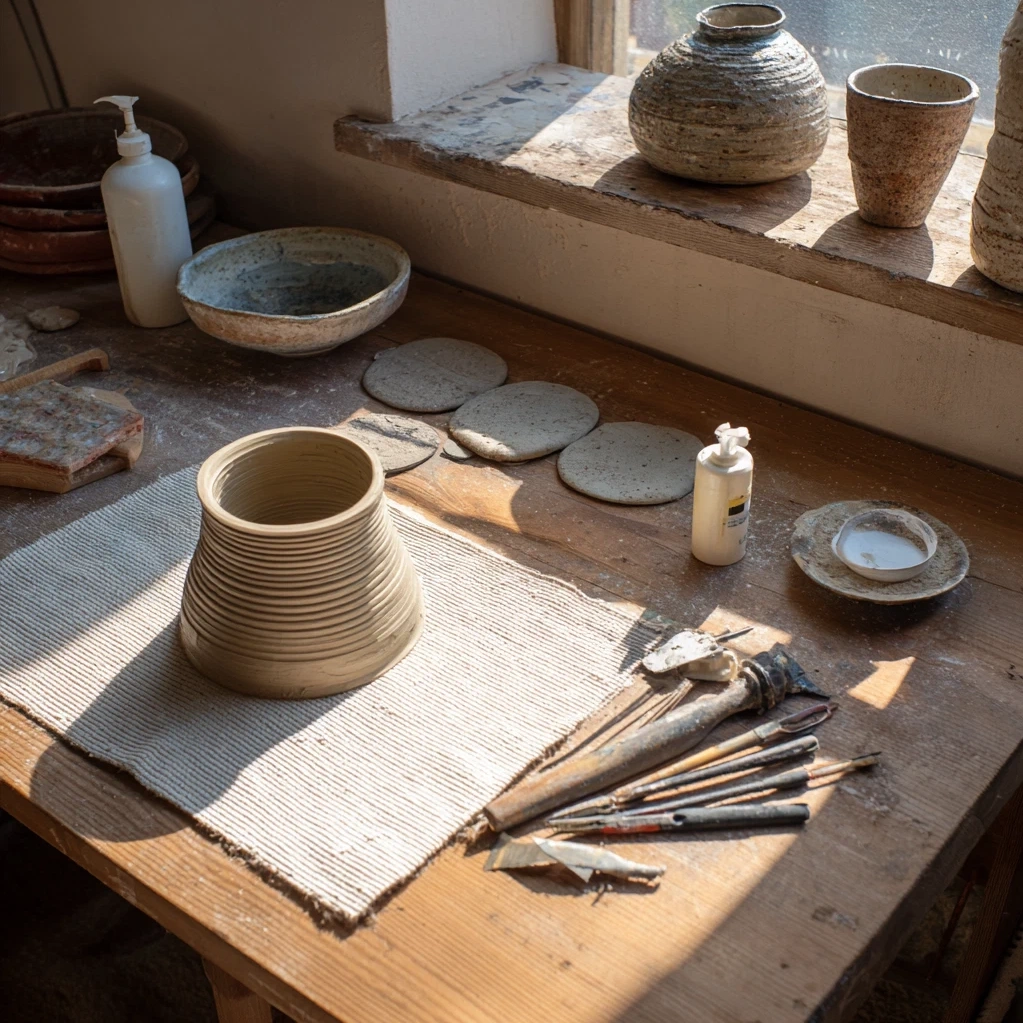
This coil pot tutorial breaks the hand-building process into manageable stages that ensure success. Begin by wedging your clay to remove air bubbles—a crucial step that prevents cracking during drying. Roll out a flat base approximately 1/4 inch thick, cutting it to your desired shape using a template or freehand technique. Create your first coils by rolling clay between your palms or on a flat surface, aiming for consistent thickness throughout. Score both the edge of your base and the bottom of your first coil using cross-hatch patterns, then apply slip to create a strong bond. Press the coil firmly into place, ensuring good contact between scored surfaces. Continue adding coils in a spiral pattern, smoothing the joints from both inside and outside as you build upward. Maintain even pressure to prevent weak spots, and periodically check your pot's symmetry by viewing it from different angles. When your pot reaches the desired height, use a wooden rib to blend the coils together, creating a smooth surface. Refine the shape by gently compressing the walls and correcting any irregularities. Allow your pot to dry slowly under plastic to prevent cracking—this leather-hard stage typically takes several days. Once completely dry, you can sand any rough edges before proceeding to decoration and firing. This coil pot tutorial approach emphasizes patience over speed, as rushing any step can compromise your final result. Each completed layer builds confidence and skill.
Creative Variations for Your Coil Pot Tutorial Projects
Once you've mastered basic cylinder forms through this coil pot tutorial, explore creative variations that transform simple vessels into unique decorative pieces. Experiment with different coil thicknesses—thin coils create delicate, refined pots while thick coils produce robust, textured vessels. Try irregular or tapered coils for organic, asymmetrical forms that mimic natural shapes. Incorporate different colored clays by rolling two colors together before forming coils, creating beautiful marbled effects. Add surface texture by impressing objects into soft clay: leaves, lace, or textured rollers create patterns that enhance visual interest. Consider functional adaptations like adding handles for mugs, creating lids for storage containers, or building spouts for pouring vessels. Sculptural elements can elevate your coil pot tutorial projects—attach small clay additions like flowers, geometric shapes, or abstract forms to the pot's surface. For garden use, create drainage holes in the base before drying. Explore different finishing techniques: burnishing creates a smooth, shiny surface without glaze, while terra sigillata produces a fine, polished finish. Combine coil building with other techniques—add slab-built elements or incorporate thrown components if you have wheel access. This coil pot tutorial encourages viewing each project as an opportunity for creative problem-solving. Document your experiments in a pottery journal, noting what works well and what you'd adjust next time. The most successful variations often emerge from playful experimentation rather than rigid planning.
Conclusion
This comprehensive coil pot tutorial has demonstrated that creating beautiful handmade pottery is within everyone's reach. The coil building technique offers a perfect balance of structure and creativity, allowing you to produce functional art pieces that enhance your living spaces. As you continue practicing, you'll develop an intuitive understanding of clay behavior—how it responds to pressure, moisture, and shaping. Each completed pot becomes not just a decorative object, but a record of your growing skills and creative journey. Looking forward, consider expanding your ceramic knowledge by exploring glazing techniques that transform bisque-fired pieces into vibrant, food-safe vessels. Join local pottery classes or online communities to share techniques and inspiration with fellow enthusiasts. For your home, create matching sets of coil-built pots that establish visual harmony in your decor—a collection of planters for your indoor garden or nesting bowls for kitchen storage. Remember that imperfections often add character, telling the story of handmade creation. As you gain confidence, challenge yourself with larger or more complex forms, perhaps incorporating multiple coil pot tutorial techniques into single pieces. The satisfaction of using or displaying something you created with your own hands is unmatched in today's mass-produced world. Keep your first pot as a reminder of where you started, and watch as your skills evolve with each new project.
Frequently Asked Questions
Q: What type of clay is best for beginners following a coil pot tutorial?
For beginners starting with a coil pot tutorial, earthenware clay is often the best choice. It's more forgiving than other clay types, with good plasticity that makes it easy to roll into consistent coils. Earthenware fires at lower temperatures (around 1800°F), which is suitable for most home kilns or community studio equipment. It comes in various colors from white to terracotta red, providing good options for different aesthetic preferences. If you don't have access to kiln firing, air-dry clay is a practical alternative—just remember that finished pieces will be more fragile and not waterproof unless properly sealed. Avoid porcelain for your first coil pot tutorial projects, as it can be challenging to work with due to its finicky drying characteristics. Whatever clay you choose, ensure it's fresh and properly stored in airtight containers to maintain optimal moisture content.
Q: How long does it take to complete a coil pot from start to finish?
The timeline for completing a coil pot varies based on size, complexity, and drying conditions. Active construction time typically ranges from 2-4 hours for a medium-sized pot (6-8 inches tall). However, the drying process requires patience—pots should dry slowly over 5-7 days to prevent cracking, with thicker pieces needing up to two weeks. If you're using kiln-fired clay, add firing time: bisque firing takes 8-12 hours plus cooling, and glaze firing adds another similar cycle. For air-dry clay, the drying period is the main time consideration, followed by sealing and decorating. This coil pot tutorial emphasizes that rushing the drying stage is the most common cause of failure, so plan your project timeline accordingly. Many potters work on multiple pieces simultaneously to maximize their creative time while individual pots dry.
Q: Can I make functional pots for food or plants using coil building techniques?
Absolutely! Coil-built pots can be both functional and durable when properly constructed. For food-safe items like bowls or mugs, use stoneware or porcelain clay and food-safe glazes that vitrify during firing, creating a non-porous surface. Ensure your coils are thoroughly blended and the walls are thick enough (at least 1/4 inch) to withstand regular use. For plant pots, drainage is crucial—create holes in the base during the leather-hard stage. Terra cotta pots made through coil building are excellent for plants because the porous clay allows soil to breathe. This coil pot tutorial recommends testing your first functional pieces before regular use: check for water leakage in planters and heat tolerance in items meant for hot foods. With proper technique and materials, coil-built pottery can be just as functional as wheel-thrown pieces, often with more interesting organic shapes that enhance your home's character.