
DIY Mud Kitchen: Transform Your Outdoor Space with Creative Fun
Imagine stepping into your backyard and finding a vibrant, imaginative play area that sparks endless creativity in your children. That’s the magic of a DIY mud kitchen—a simple, cost-effective project that transforms ordinary outdoor space into a haven of sensory exploration and learning. In today’s fast-paced digital world, providing children with hands-on, screen-free activities is more valuable than ever. A mud kitchen offers just that: a tactile experience where kids can mix, pour, and create with natural elements like soil, water, and leaves. This isn’t just about play; it’s about fostering developmental skills such as fine motor coordination, problem-solving, and scientific curiosity. As parents and caregivers seek meaningful ways to engage children outdoors, building a DIY mud kitchen has emerged as a popular trend in family-friendly home projects. It encourages sustainable play by repurposing materials, reduces waste, and connects young minds to nature. Whether you have a sprawling garden or a cozy patio, this project adapts to any setting. The process itself can be a bonding activity, involving the whole family in design and construction. From selecting reclaimed wood to adding personalized touches, each step builds anticipation for the finished product. Ultimately, a DIY mud kitchen isn’t just a piece of outdoor furniture; it’s an investment in childhood memories, creativity, and a love for the natural world.
Essential Materials for Your DIY Mud Kitchen
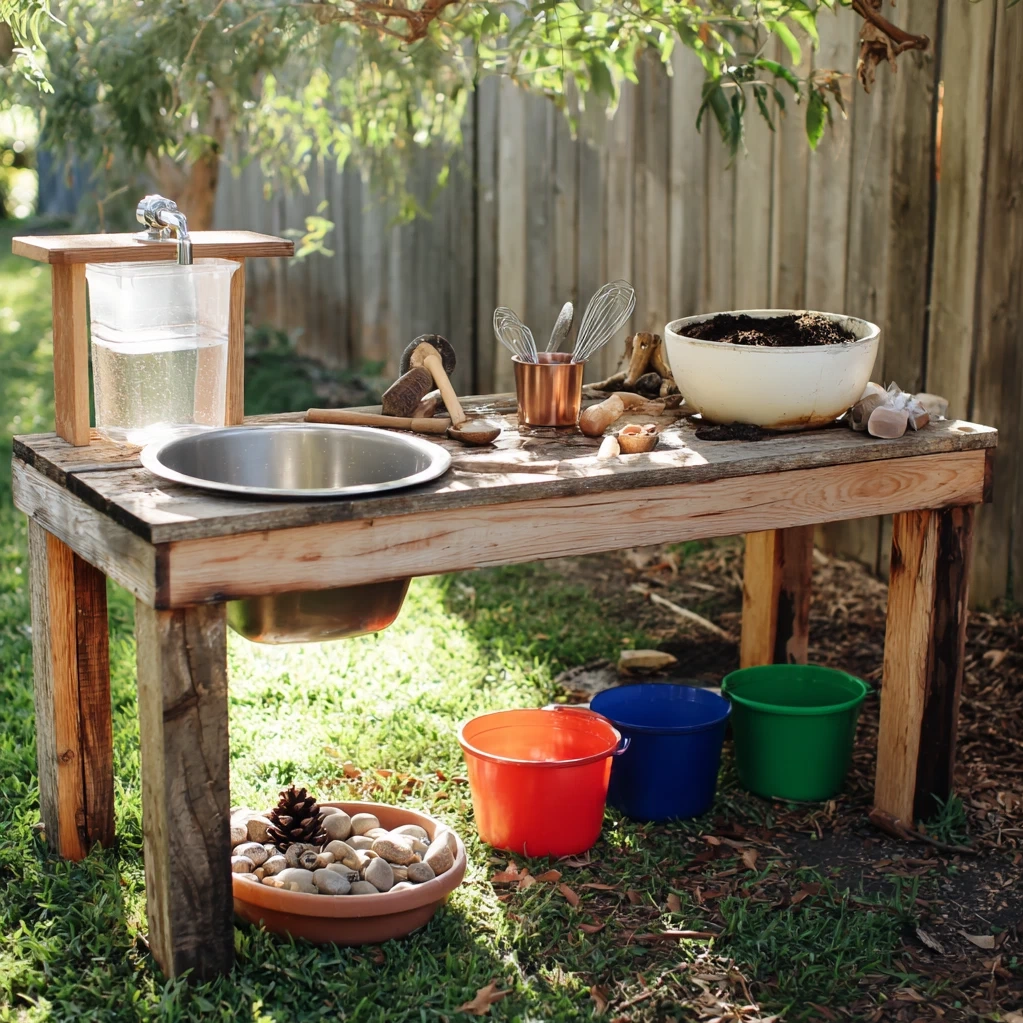
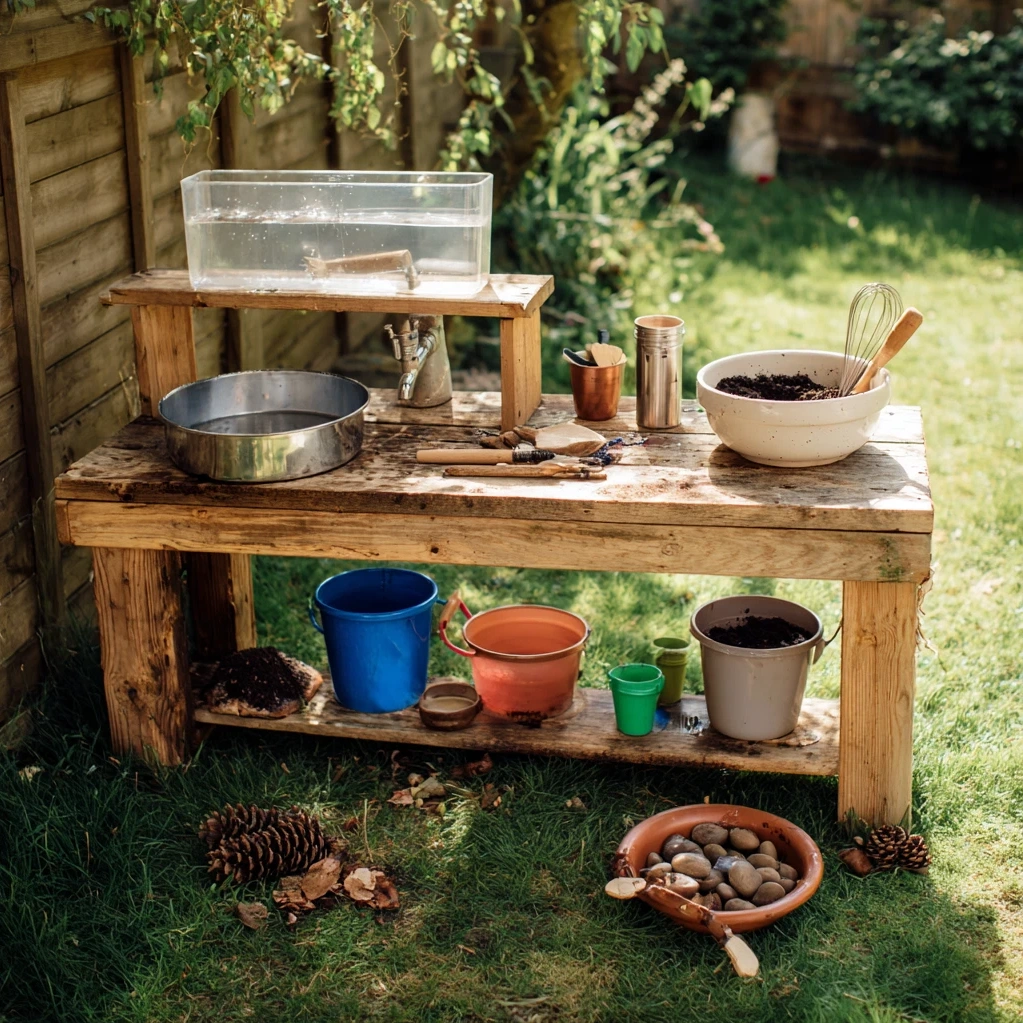
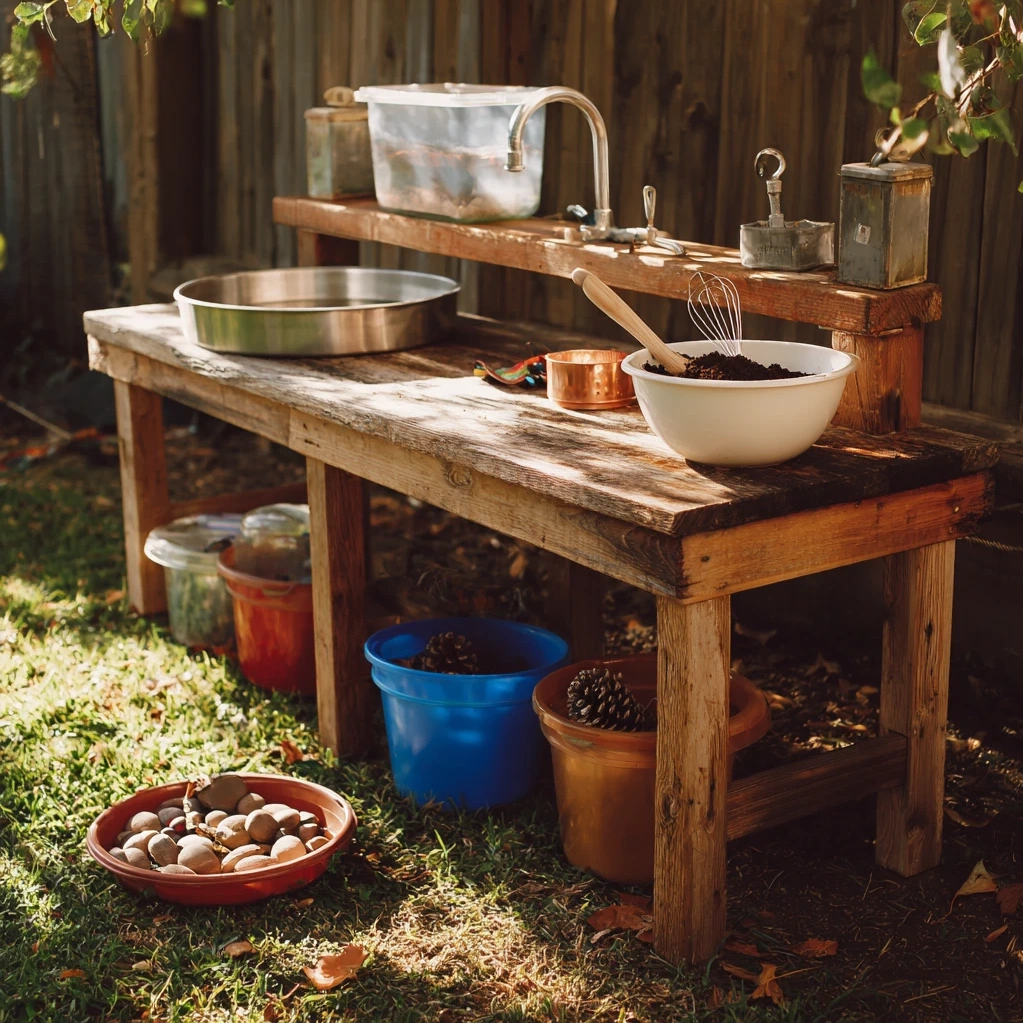
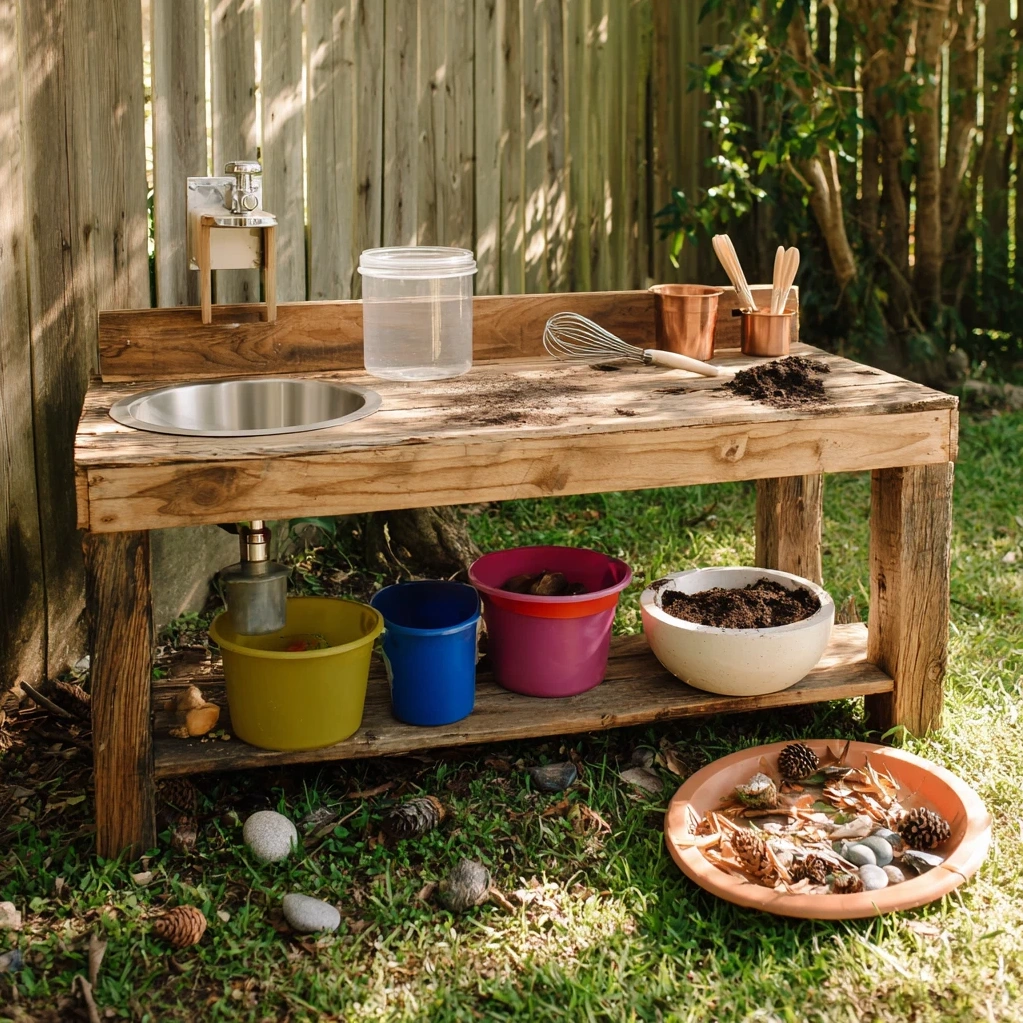
Starting your DIY mud kitchen begins with gathering the right materials, which can often be sourced affordably or even for free. Focus on durable, weather-resistant items that ensure safety and longevity. For the base structure, reclaimed wood like pallets or old cabinets works perfectly, providing a sturdy frame that withstands outdoor elements. Avoid treated wood that might contain harmful chemicals, opting instead for untreated pine or cedar. You'll need basic tools such as a saw, drill, screws, and sandpaper to assemble everything smoothly. For the 'kitchen' components, include items like old bowls, pots, pans, and utensils—these can be thrifted or repurposed from your home. A small water source, such as a portable water dispenser or bucket, adds functionality for mixing mud creations. Don't forget about storage: add hooks or shelves for organizing tools, and consider a simple sink area using a basin with a drain hole. Natural elements like stones, leaves, and sticks can serve as decorative or functional accessories. Safety is key, so sand down any rough edges and secure all parts firmly. By choosing eco-friendly materials, your DIY mud kitchen becomes a sustainable project that teaches kids about resourcefulness. Keep it simple; the goal is to create a space that encourages play, not perfection. With these essentials, you'll build a durable, engaging setup that lasts through seasons of imaginative fun.
Step-by-Step Guide to Building a DIY Mud Kitchen
Building your DIY mud kitchen is a straightforward process that can be completed in a weekend, even with basic carpentry skills. Begin by planning the layout: sketch a simple design that includes counter space, storage, and a sink area. If using pallets, disassemble them carefully to remove nails and sand the wood smooth. Construct the main frame by attaching vertical supports to a stable base, ensuring it's level and secure. For the countertop, use a solid piece of wood or an old tabletop, drilling holes if needed for sink placement. Attach shelves or hooks on the sides for hanging utensils, keeping everything within easy reach for little hands. To create a sink, cut a hole in the countertop for a basin or use a large bowl that can be removed for cleaning. Add a faucet by repurposing an old garden hose or a simple spigot attached to a water container. Paint or stain the wood with non-toxic, outdoor-safe finishes to protect it from weather and add a splash of color—involve your kids in choosing hues for a personal touch. Finally, accessorize with items like measuring cups, spoons, and bins for storing 'ingredients' like sand or dirt. Test the structure for stability, making sure all parts are firmly attached and free of sharp edges. This hands-on project not only results in a functional play area but also teaches valuable DIY skills. Remember, the beauty of a DIY mud kitchen lies in its adaptability; you can always modify or expand it as your children's interests grow.
Creative Ideas to Enhance Your DIY Mud Kitchen
Once your DIY mud kitchen is built, the fun continues with creative enhancements that make it even more engaging. Start by adding thematic elements: label storage bins with words like 'Flour' for sand or 'Spices' for dried leaves, encouraging literacy and organization. Incorporate natural materials by planting herbs or flowers nearby, which kids can use in their mud 'recipes' for sensory exploration. Consider building a small roof or canopy overhead to provide shade on sunny days, using waterproof fabric or recycled materials. For added realism, include a chalkboard or waterproof sign where children can write menus or prices, fostering role-play and social skills. Introduce tools like old muffin tins, sieves, and funnels to diversify play, helping develop fine motor skills through pouring and sorting. Create a 'mud station' with different soil types or colored water for experimenting with textures and colors. If space allows, add a seating area with stools or benches, making it a social hub for playdates. Seasonal decorations, such as pinecones in winter or flowers in spring, keep the space fresh and connected to nature. Encourage sustainability by setting up a compost bin nearby for organic 'ingredients.' These ideas not only boost creativity but also extend the lifespan of your DIY mud kitchen, adapting it as children grow. By personalizing the space, you create a unique outdoor haven that reflects your family's style and values, turning simple play into cherished memories.
Conclusion
Building a DIY mud kitchen is more than a weekend project; it's a gateway to endless outdoor adventure and learning for children. By repurposing materials and embracing simplicity, you create a sustainable play space that nurtures creativity, sensory development, and a connection to nature. This article has guided you through the essentials, from gathering materials to adding creative touches, ensuring your setup is both functional and fun. As you complete your DIY mud kitchen, remember that its value lies in the experiences it fosters—whether it's a child's first 'mud pie' or a collaborative cooking session with friends. Looking ahead, consider how this space can evolve: perhaps by integrating gardening elements or expanding into a larger outdoor play area. The trend toward hands-on, screen-free activities continues to grow, making projects like these invaluable for modern families. Share your creation with others to inspire more DIY endeavors in your community. Ultimately, a DIY mud kitchen isn't just about play; it's about building memories, skills, and a love for the outdoors that lasts a lifetime. Start your project today, and watch as your backyard transforms into a hub of imagination and joy.
Frequently Asked Questions
Q: What safety precautions should I take when building a DIY mud kitchen for children?
Safety is paramount when constructing a DIY mud kitchen. Start by using non-toxic, untreated wood to avoid exposure to harmful chemicals. Sand all surfaces thoroughly to remove splinters and sharp edges, ensuring a smooth finish. Secure the structure firmly to prevent tipping, especially if it has elevated parts. Avoid small, detachable items that could pose choking hazards for younger children. If including a water source, supervise its use to prevent slipping or spills, and ensure any electrical components, like lighting, are waterproof and out of reach. Regularly inspect the kitchen for wear and tear, repairing loose screws or damaged parts promptly. By prioritizing these precautions, you create a safe environment where kids can play freely and creatively.
Q: How can I make my DIY mud kitchen durable for outdoor use throughout the year?
To ensure your DIY mud kitchen withstands various weather conditions, choose materials wisely. Opt for weather-resistant wood like cedar or use sealants on softer woods to protect against moisture and rot. Apply outdoor-safe paint or stain to shield surfaces from sun and rain. Design with drainage in mind; for example, add slight slopes to countertops or use basins that can be emptied easily. Store removable items like utensils indoors during harsh weather to prolong their lifespan. Consider adding a cover or storing the kitchen in a sheltered area during winter if possible. Regular maintenance, such as cleaning and reapplying sealant annually, will keep it looking great and functional for years.
Q: What are some budget-friendly tips for sourcing materials for a DIY mud kitchen?
Creating a DIY mud kitchen on a budget is easy with resourcefulness. Start by scavenging reclaimed materials: check local listings for free pallets, old cabinets, or furniture that can be repurposed. Visit thrift stores or garage sales for kitchen items like pots, bowls, and utensils at low cost. Use natural elements from your yard, such as stones or branches, for decorative touches. Borrow tools from friends or family to avoid purchase costs. If buying new, prioritize essentials like screws and sealant, and skip expensive accessories. Involve your community by organizing a swap for unused items. With these tips, you can build an engaging mud kitchen for minimal expense, focusing creativity over cost.
