
Homemade John Legend’s Baked Mac and Cheese Recipe: Incredible Comfort Food Perfection

Hey there, friend. If you’re like me, you’ve probably watched that video of Chrissy Teigen gushing over John Legend’s baked mac and cheese and thought, “I need that in my life.” I’m here to tell you—you absolutely do. I first tried making this recipe on a cozy Sunday when my family was craving something special, and let me tell you, it was love at first bite. The creamy, cheesy goodness with that perfect golden crust? It’s everything you dream about in comfort food.
This homemade John Legend’s baked mac and cheese has become my go-to for potlucks, holiday dinners, and those nights when only something indulgent will do. It’s surprisingly straightforward to make, and the results are just magical. Trust me, once you taste it, you’ll understand why it’s become legendary in its own right. So grab your favorite baking dish and let’s get cooking together—I promise it’s worth every minute.
Why This Homemade John Legend's Baked Mac and Cheese Is So Special
You might wonder what makes this mac and cheese different from all the others. Well, let me share what I’ve discovered after making it countless times. First, it’s all about the cheese combination. John Legend’s version uses a mix that creates this incredible depth of flavor—creamy, sharp, and just a little bit fancy without being complicated. My favorite part is how the different cheeses melt together into something truly magical.
Then there’s the texture. Oh, that texture! It’s creamy enough to scoop easily but firm enough to hold its shape on a plate. And the top? That golden, slightly crispy crust that gives way to the soft, cheesy interior underneath. It’s the kind of dish that makes everyone at the table go quiet for a moment, then start talking about how good it is.
Here’s what really sets it apart:
- Perfect cheese balance: Not too sharp, not too mild—just right
- Amazing texture: Creamy inside with that irresistible crispy top
- Comfort food magic: Feels special but also like home
- Crowd-pleaser: Works for kids and adults alike
- Versatile: Great as a main or side dish
Don’t worry if you’re not a seasoned cook. This recipe is forgiving and friendly. The steps are simple, and the result is always impressive. I’ve served this to picky eaters and food lovers alike, and everyone comes back for seconds.
What You'll Need for Your Homemade Mac and Cheese
Gathering your ingredients is the first step to mac and cheese success. I like to get everything out on the counter before I start—it makes the process so much smoother. Here’s what you’ll need for this homemade John Legend’s baked mac and cheese recipe. Most of these are pantry staples, and the cheese is easy to find at any grocery store.
For the pasta and cheese:
- 1 pound elbow macaroni (the classic choice!)
- 8 ounces sharp cheddar cheese, shredded
- 8 ounces Gruyère cheese, shredded
- 4 ounces cream cheese, softened
- 1 cup grated Parmesan cheese (divided—you’ll use some in the sauce and some on top)
For the creamy sauce:
- 4 tablespoons unsalted butter
- 1/4 cup all-purpose flour
- 4 cups whole milk (trust me on this—it makes the sauce extra creamy)
- 1 teaspoon salt (or to taste)
- 1/2 teaspoon black pepper
- 1/2 teaspoon paprika (adds nice color and subtle flavor)
- 1/4 teaspoon cayenne pepper (optional, but gives a nice little kick)
For the topping:
- 1 cup panko breadcrumbs
- 2 tablespoons melted butter
- The remaining Parmesan cheese from above
A quick tip: shred your own cheese if you can. Pre-shredded cheese has anti-caking agents that can make your sauce grainy. I know it’s an extra step, but it really makes a difference in how smooth your homemade John Legend’s baked mac and cheese turns out. Also, make sure your milk isn’t ice cold—room temperature or slightly warmed works best for a smooth sauce.
How to Make Homemade John Legend's Baked Mac and Cheese Step by Step
Ready to create some kitchen magic? Let’s walk through this together. I’ve made this recipe so many times I could probably do it in my sleep, but I’ll share all my little tricks along the way. Set aside about an hour from start to finish—most of that is baking time when you can relax or prep the rest of your meal.
Step 1: Cook the pasta
Bring a large pot of salted water to a boil. Add your elbow macaroni and cook according to package directions, but stop about 1 minute before it’s fully cooked. We want it al dente because it will continue cooking in the oven. Drain the pasta and set it aside. Don’t rinse it! The starch helps the cheese sauce stick better.
Step 2: Make the cheese sauce
This is where the magic happens. In a large saucepan or Dutch oven, melt the butter over medium heat. Add the flour and whisk constantly for about 2 minutes until it forms a smooth paste (this is called a roux). Slowly pour in the milk while whisking continuously to prevent lumps. Keep whisking until the mixture thickens enough to coat the back of a spoon—this usually takes 5-7 minutes.
Reduce the heat to low. Add the salt, pepper, paprika, and cayenne if using. Now for the good part: stir in the cream cheese until it melts completely, then add the shredded cheddar and Gruyère a handful at a time, stirring until each addition melts before adding more. Finally, stir in half of the Parmesan cheese. Your sauce should be smooth, creamy, and incredibly fragrant.
Step 3: Combine and bake
Preheat your oven to 375°F (190°C). Add the drained pasta to the cheese sauce and stir until every piece is coated. Pour everything into a 9×13 inch baking dish that you’ve lightly greased. In a small bowl, mix the panko breadcrumbs with the melted butter and remaining Parmesan. Sprinkle this evenly over the top of your mac and cheese.
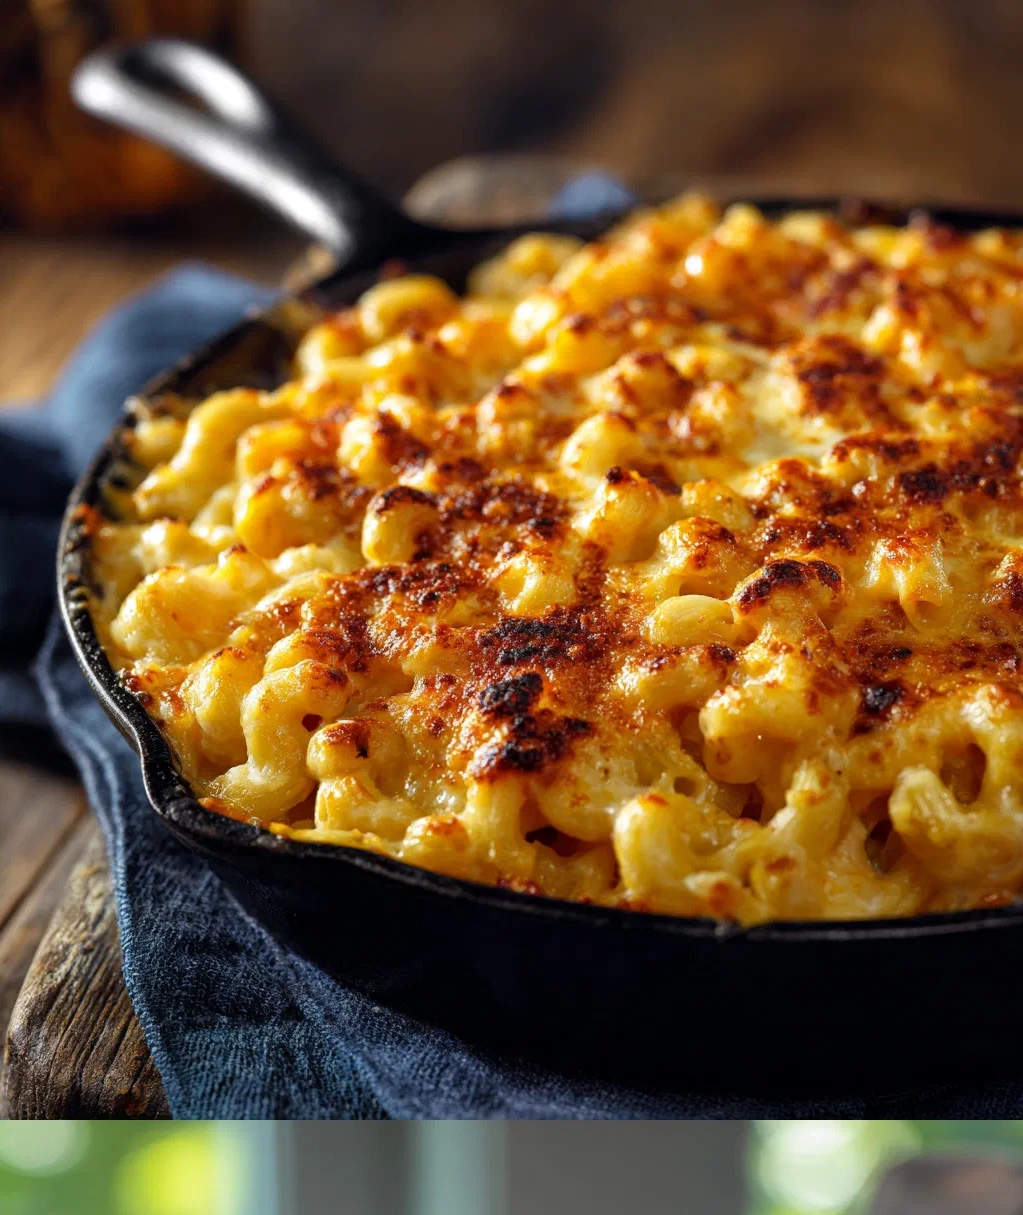
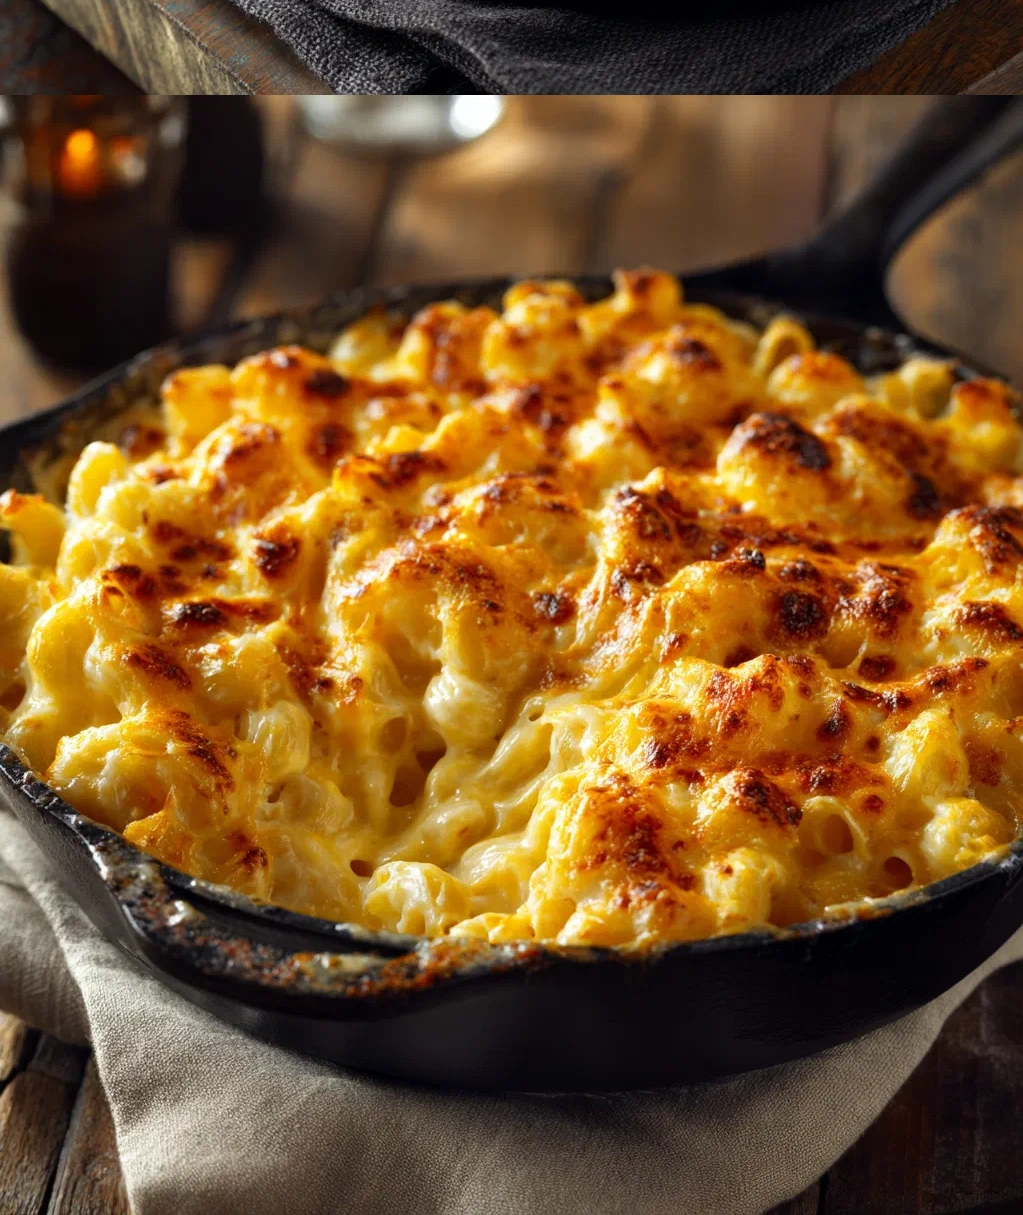
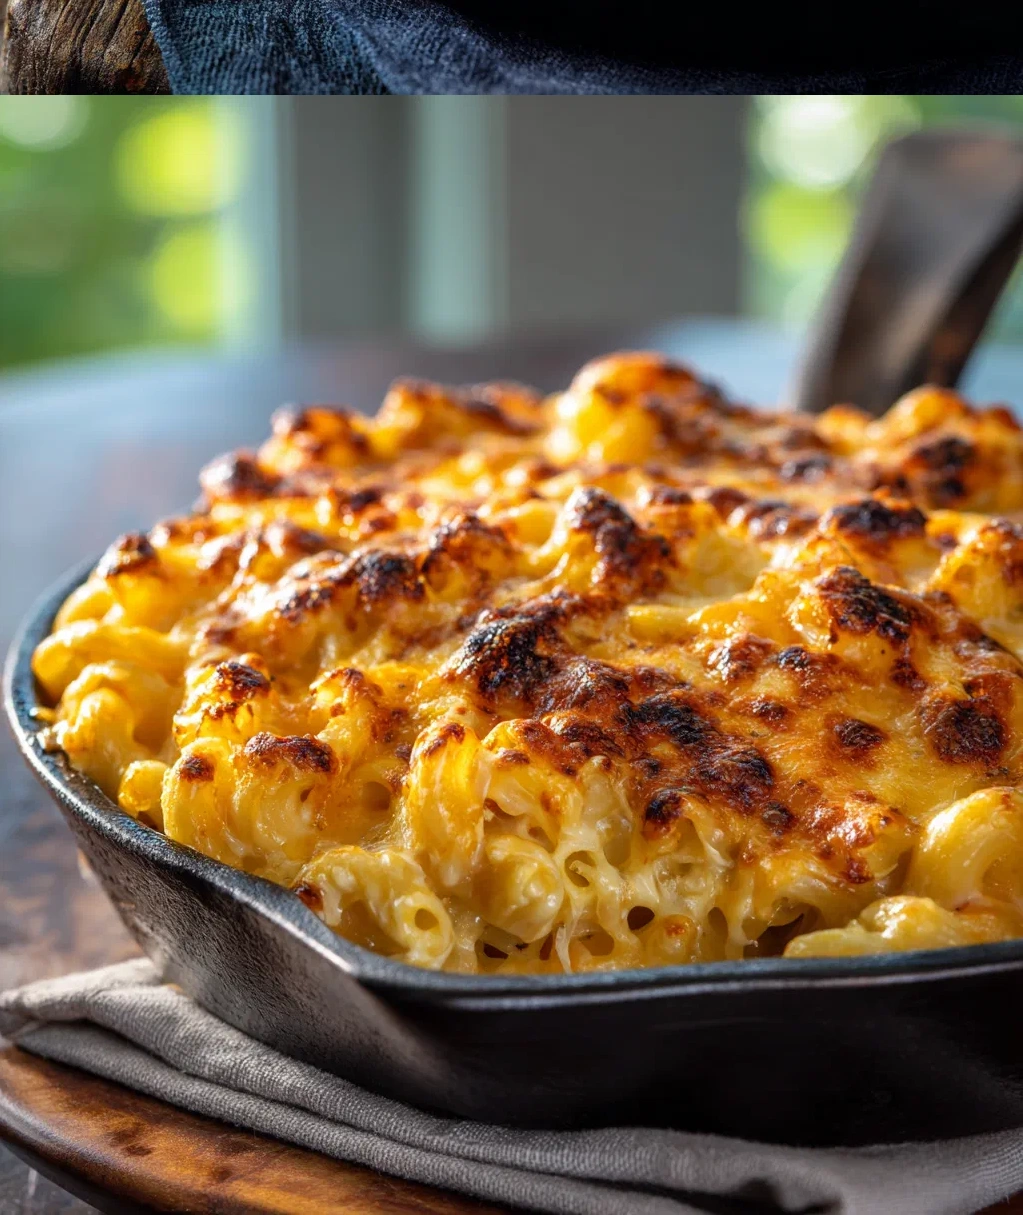
Bake for 25-30 minutes until the top is golden brown and the edges are bubbling. I like to check at the 25-minute mark—if the top isn’t browned enough, I’ll broil it for just a minute or two, watching carefully so it doesn’t burn. Let it sit for 5-10 minutes before serving. This resting time helps it set up perfectly.
My favorite moment is when you pull it from the oven—that beautiful golden crust, the amazing smell filling your kitchen, and knowing you’re about to serve something truly special. This homemade John Legend’s baked mac and cheese is always worth the wait.
Serving Suggestions and Storage Tips for Your Mac and Cheese
Now that you’ve made this amazing dish, let’s talk about how to enjoy it to the fullest. I love serving this homemade John Legend’s baked mac and cheese as the star of the show, but it also makes a fantastic side. Here are my favorite ways to serve it and how to handle any leftovers (if you’re lucky enough to have any!).
Serving ideas:
- As a main dish: Serve generous portions with a simple green salad on the side. The freshness of the greens balances the richness perfectly.
- For holidays: This is my go-to for Thanksgiving and Christmas dinners. It pairs beautifully with turkey, ham, or roast beef.
- Potluck perfect: Bring it in the baking dish with a festive towel wrapped around it. It travels well and always disappears fast.
- Weeknight comfort: Sometimes I make a batch on Sunday and we enjoy it throughout the week. It reheats beautifully.
Storage and reheating:
If you do have leftovers, let the mac and cheese cool completely before covering it tightly with plastic wrap or transferring it to an airtight container. It will keep in the refrigerator for 3-4 days. To reheat, I recommend using the oven for best results. Preheat to 350°F (175°C), transfer the mac and cheese to an oven-safe dish, cover with foil, and bake for 15-20 minutes until heated through. You can add a splash of milk before reheating if it seems dry.
For longer storage, you can freeze it for up to 2 months. Thaw in the refrigerator overnight before reheating. The texture might be slightly different after freezing, but it’s still delicious. One more tip: if you’re making this ahead for a gathering, you can prepare it up to the baking step, cover it tightly, and refrigerate overnight. Just add 5-10 minutes to the baking time since it’s starting cold.
No matter how you serve it or store it, this homemade John Legend’s baked mac and cheese brings joy to any table. It’s become such a beloved recipe in my home, and I hope it finds a special place in yours too.
Conclusion
Well, there you have it—my absolute favorite way to make baked mac and cheese. This homemade John Legend’s baked mac and cheese recipe has brought so much comfort and joy to my kitchen, and I’m thrilled to share it with you. It’s the kind of dish that feels like a warm hug, perfect for sharing with loved ones or treating yourself after a long day.
What I love most about this recipe is how it balances simplicity with incredible results. You don’t need fancy techniques or hard-to-find ingredients, just good cheese, a little patience, and the willingness to create something truly special. Every time I make it, I’m reminded why comfort food holds such an important place in our lives—it nourishes more than just our bodies.
So next time you’re planning a family dinner, hosting friends, or just need something to brighten your day, give this recipe a try. I promise it will become one of those dishes people ask you to make again and again. Happy cooking, and enjoy every cheesy, creamy, golden-brown bite!
Frequently Asked Questions
Q: Can I use different types of cheese in this mac and cheese recipe?
Absolutely! While the combination of sharp cheddar, Gruyère, and Parmesan is what makes this homemade John Legend's baked mac and cheese so special, you can experiment. Try adding some fontina for extra creaminess or a little gouda for smokiness. Just keep the total cheese amount about the same, and make sure at least half is a good melting cheese like the cheddar or Gruyère.
Q: How can I make this recipe gluten-free?
You can easily adapt this for gluten-free needs. Use gluten-free elbow pasta (many brands work well) and replace the all-purpose flour in the sauce with a gluten-free flour blend. For the topping, use gluten-free breadcrumbs or crushed gluten-free crackers. The result will be just as delicious—I've made it this way for friends with gluten sensitivities, and they loved it.
Q: My sauce seems too thick or too thin—what should I do?
Don't worry, this happens to everyone! If your cheese sauce is too thick, simply whisk in a little more milk until it reaches your desired consistency. If it's too thin, cook it a bit longer over low heat, stirring constantly. Remember, the sauce will thicken more as it bakes and cools, so aim for a pourable but coating consistency when you mix it with the pasta.
Q: Can I add protein like chicken or bacon to this mac and cheese?
Definitely! This homemade baked mac and cheese is wonderful with added protein. I love stirring in cooked, chopped bacon or shredded rotisserie chicken before baking. Just make sure any additions are fully cooked and well-drained. For chicken, about 2 cups shredded works well. For bacon, 6-8 slices cooked and crumbled adds great flavor without overwhelming the cheese.
Q: How do I prevent the top from burning while getting that golden crust?
This is a common concern. First, make sure your oven rack is in the middle position—not too close to the top heating element. Check your mac and cheese at the 25-minute mark. If the top is browning too fast, loosely tent it with aluminum foil for the remaining baking time. If it needs more browning at the end, you can broil it for just 1-2 minutes, but stay right there and watch it closely—it goes from golden to burnt very quickly!
PrintHomemade John Legend’s Baked Mac and Cheese Recipe: Incredible Comfort Food Perfection
- Total Time: 45
- Yield: 8 servings 1x
Description
A creamy, cheesy baked macaroni and cheese dish inspired by John Legend’s family recipe, featuring three types of cheese and a buttery breadcrumb topping.
Ingredients
1 lb elbow macaroni
4 tbsp unsalted butter
1/4 cup all-purpose flour
4 cups whole milk
2 cups sharp cheddar cheese, shredded
1 cup Gruyère cheese, shredded
1/2 cup Parmesan cheese, grated
1 tsp salt
1/2 tsp black pepper
1/2 tsp paprika
1 cup panko breadcrumbs
2 tbsp melted butter
Instructions
Step 1: Preheat oven to 375°F (190°C) and grease a 9×13 inch baking dish.
Step 2: Cook macaroni according to package directions until al dente, then drain and set aside.
Step 3: In a large saucepan, melt 4 tbsp butter over medium heat, then whisk in flour to create a roux and cook for 2 minutes.
Step 4: Gradually whisk in milk until smooth, then cook for 5-7 minutes until thickened.
Step 5: Remove from heat and stir in cheddar, Gruyère, and Parmesan cheeses until melted and smooth.
Step 6: Season cheese sauce with salt, pepper, and paprika, then fold in cooked macaroni until well coated.
Step 7: Transfer macaroni mixture to prepared baking dish.
Step 8: In a small bowl, combine panko breadcrumbs with 2 tbsp melted butter, then sprinkle evenly over macaroni.
Step 9: Bake for 25-30 minutes until golden brown and bubbly.
Step 10: Let rest for 5 minutes before serving.
- Prep Time: 15
- Cook Time: 30
- Category: Main Course
Nutrition
- Calories: 520
- Fat: 28g
- Carbohydrates: 45g
- Protein: 22g