
Mini Cheeseburgers: Irresistible Party Bites That Will Wow Your Guests
I’ve got a confession to make: I’m absolutely obsessed with mini cheeseburgers. There’s just something about those little bites of perfection that makes me grin every time I serve them. I remember the first time I made them for my niece’s birthday party – I was nervous they’d be too fussy or wouldn’t turn out right, but let me tell you, they disappeared faster than I could refill the platter! That’s when I realized these aren’t just cute food; they’re little flavor bombs that bring people together.
If you’re looking for a crowd-pleaser that’s surprisingly simple to make, you’re in the right place. Mini cheeseburgers are my go-to for everything from game day gatherings to casual dinner parties. They’re approachable enough for beginners but impressive enough to make you feel like a pro. The best part? You can customize them endlessly to suit your taste or whatever you have in the pantry. Trust me, once you try making these, you’ll understand why I’m so passionate about them. They’re not just food – they’re edible happiness.
What I love most about mini cheeseburgers is how they transform the ordinary burger experience into something special. That first bite gives you everything you love about a regular cheeseburger – the juicy meat, melted cheese, soft bun – but in a perfectly portioned package. You get to enjoy all the flavors without feeling overwhelmed. And honestly, they’re just fun to eat! There’s something about holding those little burgers that brings out the kid in everyone. So grab your apron and let’s dive into making the most delicious mini cheeseburgers you’ve ever tasted.
Why Mini Cheeseburgers Are My Favorite Party Food
Let me share why I reach for mini cheeseburgers time and time again when I’m hosting. First off, they’re incredibly versatile. You can serve them as appetizers, main dishes, or even as part of a buffet spread. Unlike regular burgers that might sit heavy on the plate, these little guys keep the party going without weighing anyone down.
Here’s what makes them so special:
- Perfect portion control: Everyone gets to try a little bit of everything without committing to a whole burger. This is especially great when you’re serving multiple dishes.
- Endless customization: You can mix and match toppings to suit different tastes. I often set up a mini burger bar with various cheeses, sauces, and veggies so guests can build their own.
- Great conversation starters: There’s something about mini food that gets people talking and laughing together. They’re just inherently fun!
- Easy to eat standing up: No need for plates and forks – just grab and go. This keeps the party flowing naturally.
- Kid-friendly: The smaller size is perfect for little hands, and you can control the toppings to suit even the pickiest eaters.
I’ve found that mini cheeseburgers work for every season too. In summer, they’re perfect for backyard barbecues. In winter, they bring warmth to holiday gatherings. And during football season? They’re practically required viewing snacks! The beauty is in their simplicity – you’re taking familiar flavors and presenting them in a new, exciting way.
Essential Ingredients for Perfect Mini Cheeseburgers
Now, let’s talk about what you’ll need to make these little beauties. Don’t worry – nothing here is fancy or hard to find. I always recommend using what you have on hand and adjusting based on your preferences.
For the burgers:
- 1 pound ground beef (80/20 blend works best for juiciness)
- 1 teaspoon salt
- 1/2 teaspoon black pepper
- 1 teaspoon garlic powder
- 1 teaspoon onion powder
- Optional: 1 tablespoon Worcestershire sauce for extra flavor
For assembly:
- 12 slider buns or small dinner rolls (I prefer potato rolls for their softness)
- 6 slices American or cheddar cheese, each cut into quarters
- Butter for toasting buns
Topping suggestions (pick your favorites):
- Small lettuce leaves or shredded lettuce
- Thinly sliced tomatoes
- Pickle chips
- Red onion slices
- Ketchup and mustard
- Special sauce (mix equal parts mayo and ketchup with a dash of relish)
Here’s my pro tip: don’t stress about exact measurements. I often eyeball the seasonings based on how many people I’m feeding. The key is to taste as you go – mix a small patty and cook it quickly to test your seasoning before making all the mini cheeseburgers. This little trick has saved me from bland burgers more times than I can count!
When shopping, look for fresh ground beef with a bit of fat content. The fat keeps the burgers juicy as they cook. For the buns, any soft, small roll will work – just make sure they’re not too crusty or they’ll overwhelm the delicate burgers.
Step-by-Step Guide to Making Mini Cheeseburgers
Ready to get cooking? Here’s my foolproof method for creating perfect mini cheeseburgers every single time. I’ve made these so many times I could probably do it with my eyes closed, but I’ll walk you through each step carefully.
Step 1: Prepare the patties
In a medium bowl, combine the ground beef with all your seasonings. Use your hands to mix gently – don’t overwork the meat or your burgers will be tough. Divide the mixture into 12 equal portions (about 1.5 ounces each). Roll each portion into a ball, then flatten into a patty about 2 inches in diameter. Make the center slightly thinner than the edges – this prevents them from puffing up into meatballs during cooking.
Step 2: Cook the burgers
Heat a large skillet or griddle over medium-high heat. You don’t need oil if you’re using a non-stick surface. Place the patties in the pan, making sure not to overcrowd them. Cook for 2-3 minutes per side, or until they reach your desired doneness. I prefer mine medium, so I cook them until they’re nicely browned with just a hint of pink in the center.
Step 3: Add the cheese
Right before the burgers are done, place a quarter slice of cheese on each patty. Cover the pan for about 30 seconds to help the cheese melt beautifully. This little trick gives you that perfect melted cheese look without overcooking the burgers.
Step 4: Toast the buns
While the burgers are cooking, split your buns and spread a thin layer of butter on the cut sides. Toast them in a separate pan or under the broiler until golden brown. This step makes all the difference – it adds texture and prevents the buns from getting soggy.
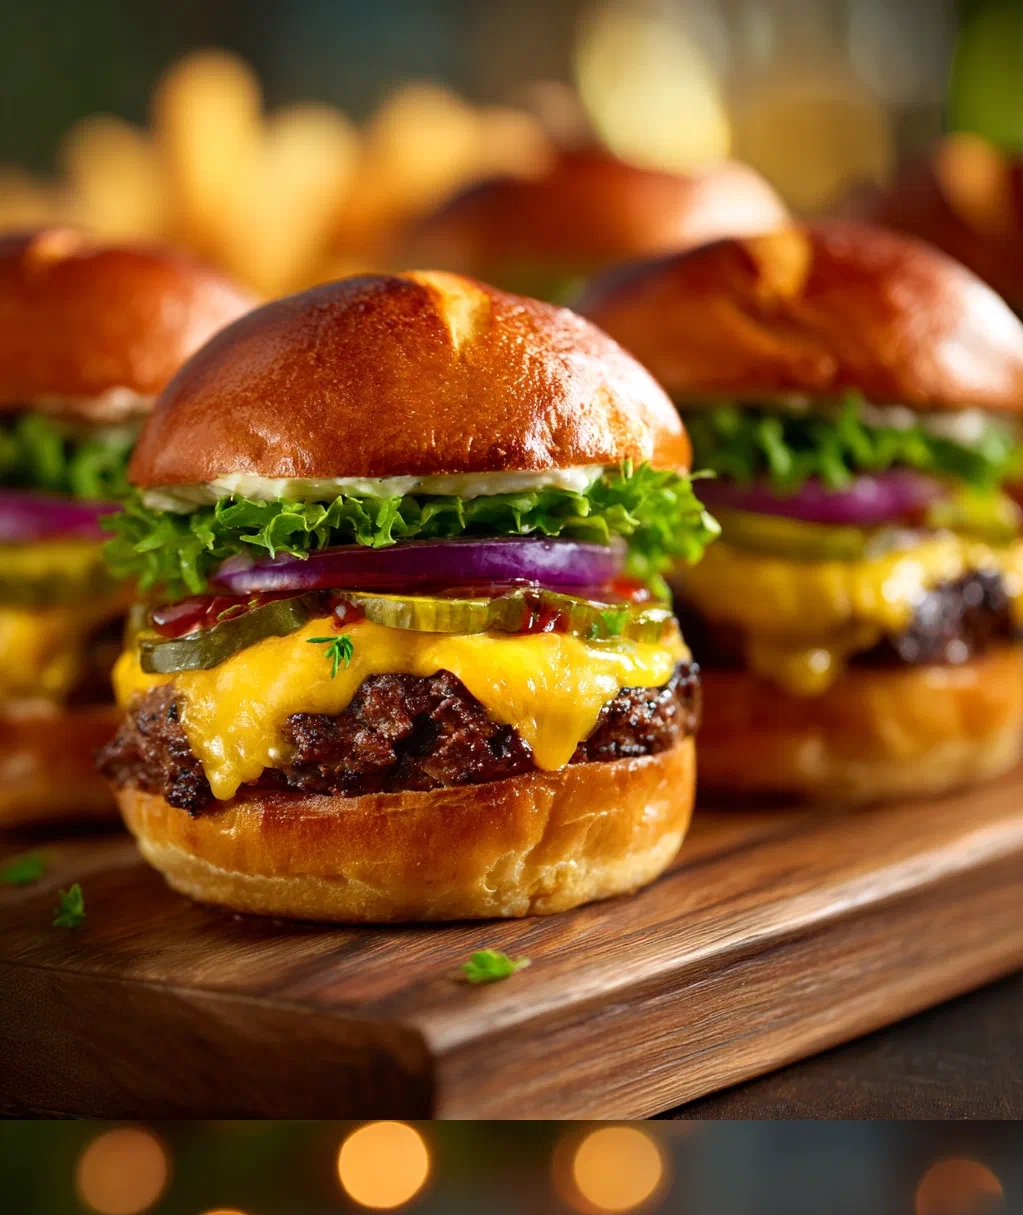
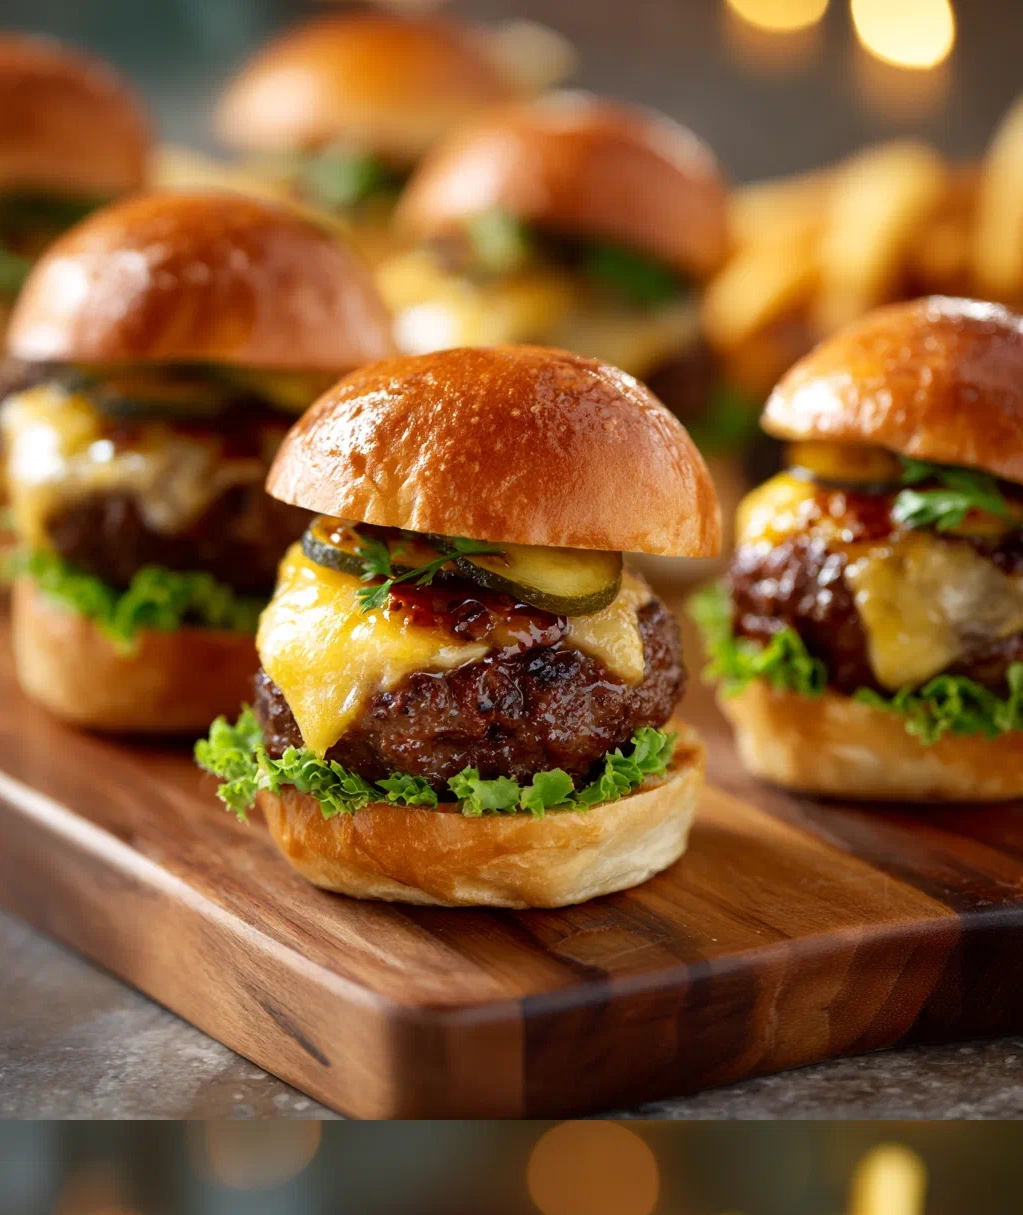
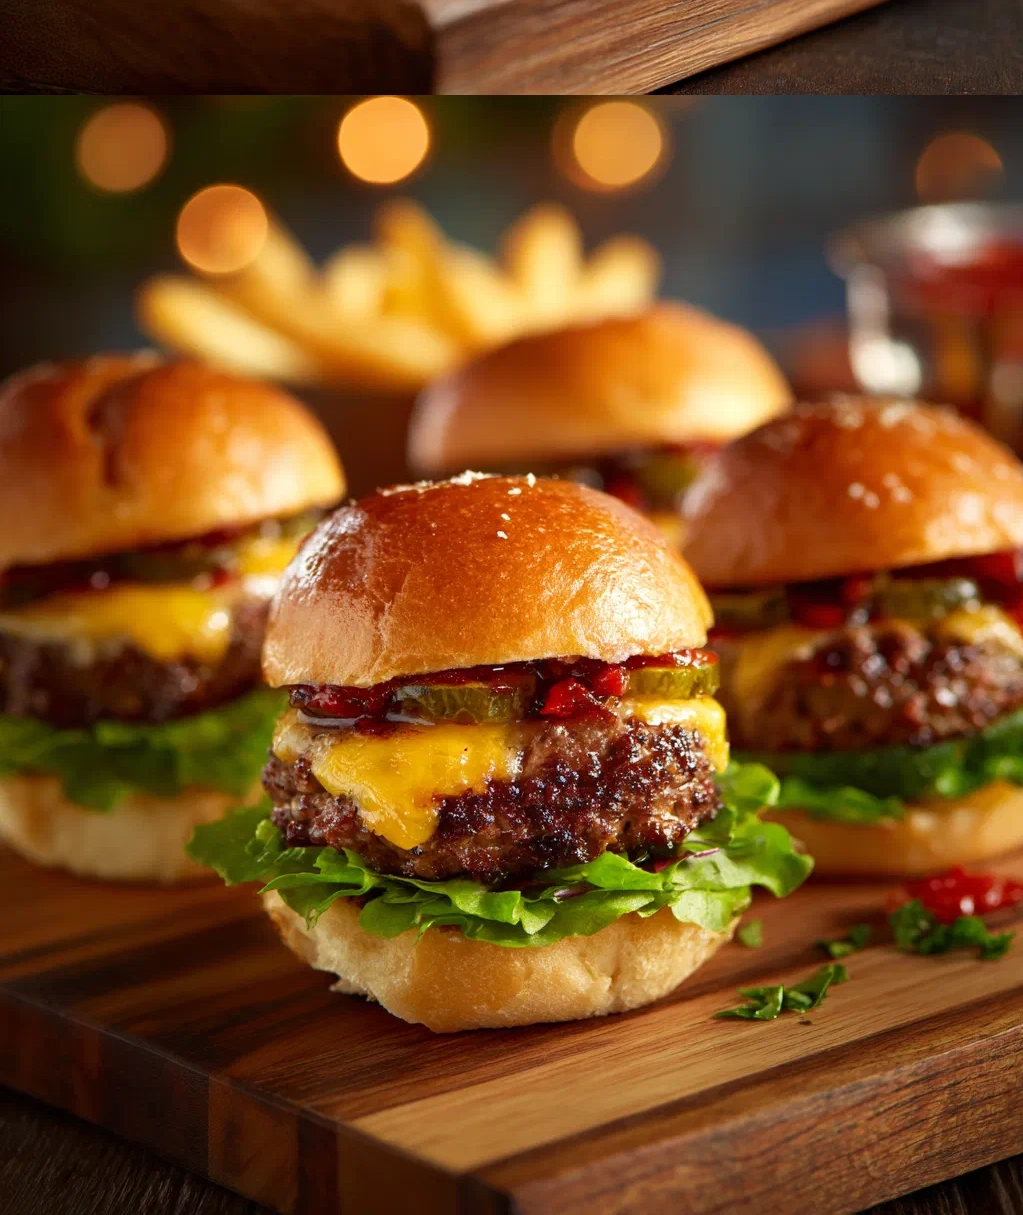
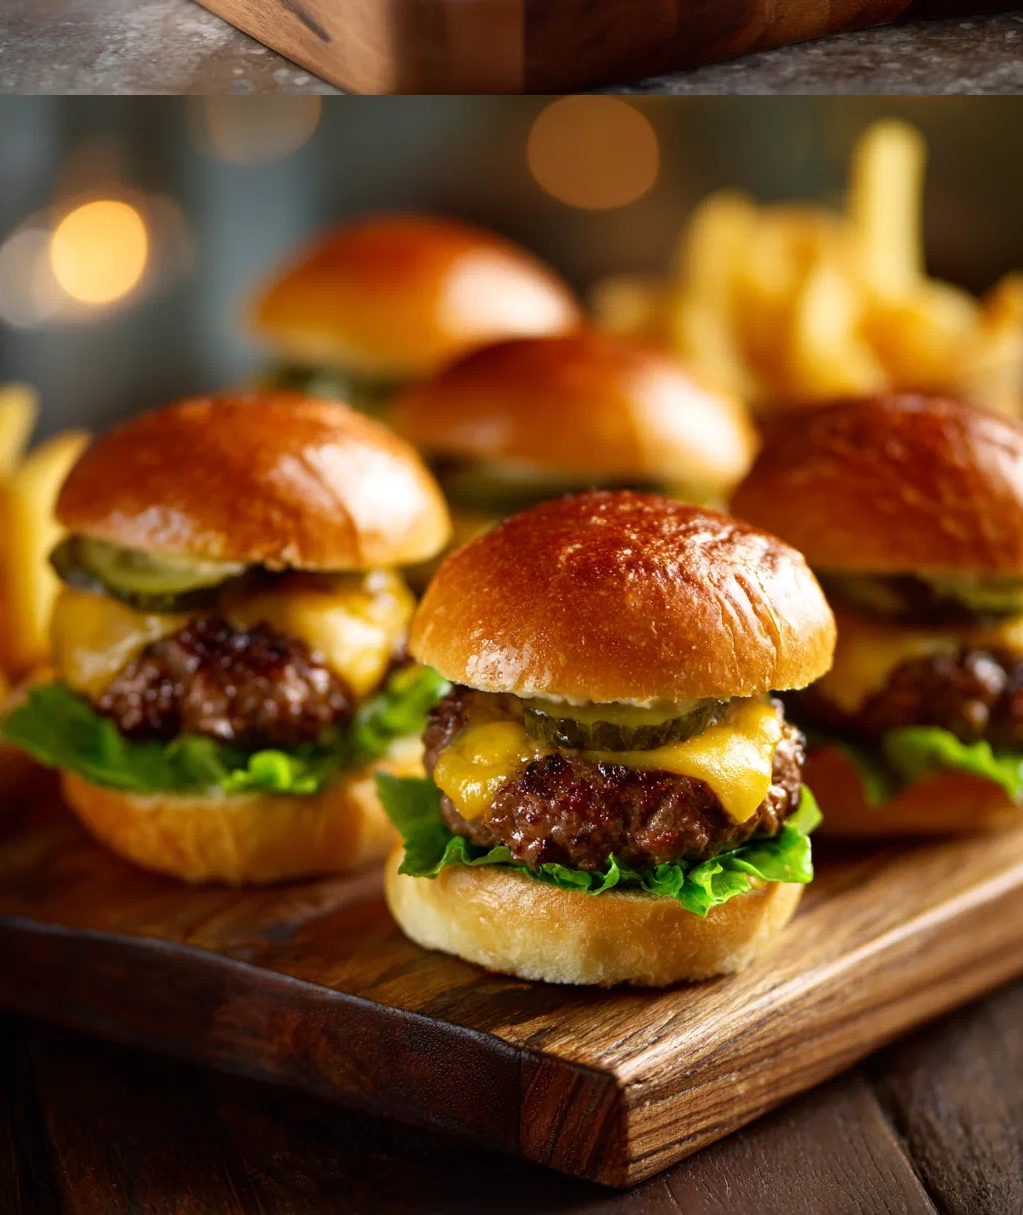
Step 5: Assemble your mini cheeseburgers
Place the cheesy patties on the bottom buns. Add your chosen toppings – I like to start with lettuce (it creates a barrier against moisture), then tomato, then onion. Add pickles if you’re using them, then spread your sauce on the top bun. Press gently to bring everything together.
My timing tip: Have all your toppings prepped and ready before you start cooking. That way, you can assemble while everything is still warm. Serve immediately for the best texture and flavor!
Creative Variations for Your Mini Cheeseburgers
Once you’ve mastered the basic mini cheeseburgers, the real fun begins! Here are some of my favorite twists that keep things interesting. Don’t be afraid to experiment – that’s how I discovered some of my best combinations.
Different meat options:
- Turkey burgers: Mix ground turkey with grated apple and sage for a lighter option
- Chicken burgers: Combine ground chicken with grated zucchini and Italian seasoning
- Vegetarian: Use store-bought veggie burger patties or make your own with black beans and oats
Cheese variations:
- Pepper jack for a spicy kick
- Blue cheese for bold flavor lovers
- Swiss with sautéed mushrooms
- Provolone with roasted peppers
Specialty mini cheeseburgers:
- BBQ bacon: Add crispy bacon and barbecue sauce
- Hawaiian: Top with grilled pineapple and teriyaki sauce
- Greek style: Use feta cheese, tzatziki, and sliced cucumber
- Breakfast burgers: Add a fried quail egg or small fried egg on top
Here’s a personal favorite: I sometimes mix finely chopped cooked bacon right into the burger meat before forming the patties. It adds incredible flavor throughout every bite. Another trick is to brush the patties with a little maple syrup during the last minute of cooking – it creates a delicious sweet-savory crust.
Remember, the beauty of mini cheeseburgers is that you can make several different types for the same party. Last summer, I made three varieties for a picnic: classic, bacon-blue cheese, and Hawaiian. Everyone loved being able to try different flavors!
Serving and Storing Your Mini Cheeseburgers
Presentation matters, especially with something as cute as mini cheeseburgers. Here’s how I like to serve and store them to keep everything looking and tasting its best.
Serving suggestions:
Arrange your mini cheeseburgers on a large platter or wooden board. I like to garnish with fresh herbs like parsley or chives around the edges – it adds color and makes everything look more appetizing. For larger gatherings, I’ll set up a mini burger bar with separate bowls of toppings and sauces so guests can customize their own.
Pair your mini cheeseburgers with:
- Sweet potato fries or regular fries
- A simple green salad
- Coleslaw or potato salad
- Pickle spears and olives on the side
- For drinks, cold beer or lemonade work perfectly
Storage tips:
If you have leftovers (which is rare in my house!), here’s how to handle them:
- Store assembled mini cheeseburgers in an airtight container in the refrigerator for up to 2 days
- Keep components separate if possible – store patties, buns, and toppings in different containers
- For longer storage, you can freeze uncooked patties for up to 3 months. Place parchment paper between them so they don’t stick together
Reheating:
To reheat cooked patties, place them in a 350°F oven for 5-7 minutes or until warmed through. You can also use a toaster oven or air fryer. Re-toast the buns separately to keep them from getting soggy. Microwave works in a pinch, but it might make the buns a bit soft.
Safety note: Always make sure reheated burgers reach 165°F internally. Use a meat thermometer if you’re unsure – it’s better to be safe than sorry when dealing with ground meat.
One last serving tip: If you’re making mini cheeseburgers ahead of time for a party, cook the patties and prepare all the components, but don’t assemble until just before serving. This keeps everything fresh and prevents the buns from getting soggy.
Conclusion
Well, there you have it – my complete guide to creating amazing mini cheeseburgers that will have everyone asking for your recipe. I hope you can feel my excitement about these little bites of joy through these words. They’ve brought so much happiness to my gatherings, and I know they’ll do the same for yours.
What I love most about this recipe is how it grows with you. Start with the basics, then let your creativity run wild. Add your favorite spices, try different cheeses, experiment with toppings – make these mini cheeseburgers truly your own. That’s the real secret: there’s no wrong way to make them as long as you’re having fun and enjoying the process.
Next time you’re planning a get-together, give these a try. I promise you’ll love the smiles they bring to your guests’ faces. And don’t be surprised if people start requesting them for every event – that’s what happened in my circle! The best part is watching someone take that first bite, their eyes lighting up as all those familiar burger flavors come together in perfect miniature form.
Remember, cooking should be enjoyable, not stressful. If your first batch isn’t perfect, that’s okay. You’ll get better each time. The most important ingredient is always the love you put into it. So gather your ingredients, put on some good music, and get ready to create some delicious memories with these irresistible mini cheeseburgers.
Frequently Asked Questions
Q: Can I make mini cheeseburgers ahead of time for a party?
Absolutely! You can prepare the patties up to a day in advance and store them covered in the refrigerator. You can also cook them ahead and reheat just before serving. For best results, I recommend keeping components separate until you're ready to assemble – this prevents the buns from getting soggy.
Q: What's the best way to keep mini cheeseburgers warm for serving?
If you need to keep them warm for extended serving, place cooked patties in a baking dish, cover with foil, and keep in a 200°F oven. Toast the buns separately and assemble just before serving. You can also use a warming tray or chafing dish. Avoid keeping assembled burgers warm for too long as the steam will soften the buns.
Q: Can I use frozen burger patties for mini cheeseburgers?
You sure can! Look for frozen slider-sized patties or cut regular frozen patties into smaller pieces. Thaw them completely in the refrigerator before cooking. Frozen patties might release more moisture, so pat them dry with paper towels before seasoning and cooking for better browning.
Q: How do I prevent mini cheeseburgers from falling apart?
Two key tips: First, don't overmix the meat – handle it gently just until combined. Second, make sure your pan or grill is hot before adding the patties. A hot surface creates an instant sear that helps hold everything together. Also, avoid flipping too often – just once is usually enough.
Q: What are some good dipping sauces for mini cheeseburgers?
I love offering a variety of sauces! Classic ketchup and mustard are always popular, but try garlic aioli, chipotle mayo, or honey mustard for something different. Barbecue sauce works great too, especially if you add bacon to your burgers. For a fun twist, serve small ramekins of different sauces so guests can mix and match.
PrintClassic Mini Cheeseburgers with Secret Sauce
- Total Time: 25
- Yield: 12 mini cheeseburgers 1x
Description
Juicy mini beef patties topped with melted cheese and a tangy sauce on soft slider buns, perfect for parties and gatherings.
Ingredients
1 lb ground beef (80/20)
1 tsp salt
1/2 tsp black pepper
1/2 tsp garlic powder
12 slider buns
12 slices American cheese
1/4 cup mayonnaise
2 tbsp ketchup
1 tbsp sweet pickle relish
1 tsp yellow mustard
1 small onion, thinly sliced
12 dill pickle slices
1 tbsp vegetable oil
Instructions
Step 1: In a bowl, combine ground beef, salt, pepper, and garlic powder. Mix gently until just combined.
Step 2: Divide the mixture into 12 equal portions and shape into small patties, about 2 inches in diameter.
Step 3: Heat vegetable oil in a large skillet over medium-high heat. Cook patties for 2-3 minutes per side until browned and cooked through.
Step 4: Place a slice of cheese on each patty during the last minute of cooking to melt.
Step 5: While patties cook, mix mayonnaise, ketchup, pickle relish, and mustard in a small bowl to make the sauce.
Step 6: Lightly toast slider buns if desired. Spread sauce on both halves of each bun.
Step 7: Assemble burgers by placing a patty on each bottom bun, then adding onion slices and pickle slices. Top with bun halves.
Step 8: Serve immediately while warm.
- Prep Time: 15
- Cook Time: 10
- Category: Appetizer
Nutrition
- Calories: 280
- Fat: 16g
- Carbohydrates: 18g
- Protein: 15g