
No Bake Mini Cheesecakes: The Absolute Easiest, Most Delicious Dessert You’ll Ever Make
Hey there! Can I tell you about my favorite kitchen shortcut? It’s those perfect little no bake mini cheesecakes. Honestly, I think they’re the best thing since sliced bread when it comes to dessert. I remember the first time I tried making them – it was for a last-minute get-together with friends, and I was panicking about what to serve. Then I stumbled across this idea, and let me tell you, it saved the day!
These no bake mini cheesecakes are my go-to when I want something impressive but don’t have hours to spend in the kitchen. They come together so quickly, and the best part? You don’t even need to turn on your oven. No worrying about water baths, no cracks in the top, no waiting for things to cool just right. It’s just mix, pour, chill, and enjoy.
What I love most is how versatile they are. You can make them fancy with fresh berries or keep them simple with just a drizzle of chocolate. They’re perfect for parties, potlucks, or just treating yourself on a Tuesday night. And trust me, once you try these little gems, you’ll understand why I’m so obsessed. They’re creamy, dreamy, and absolutely foolproof.
Why You'll Love These No Bake Mini Cheesecakes
Let me count the ways! First off, these no bake mini cheesecakes are incredibly easy. I mean it – if you can stir things together, you can make these. No special skills required. They’re also perfect for portion control. Sometimes you just want a little treat without committing to a whole slice, you know?
- No oven needed: Perfect for hot summer days when you don’t want to heat up your kitchen.
- Quick prep time: From start to finish, you’re looking at about 20 minutes of active work.
- Make-ahead friendly: They actually get better after chilling overnight.
- Endless customization: Change up the crust, add different mix-ins, or top with whatever you like.
- Great for crowds: Easy to make in large batches for parties or gatherings.
My favorite part is how they always turn out perfectly creamy. The texture is just right – not too dense, not too light. And because they’re individual servings, everyone gets their own little treat. No fighting over who gets the corner piece!
What You Need for Perfect No Bake Mini Cheesecakes
Here’s everything you’ll need to make about 12 mini cheesecakes. Don’t worry if you don’t have exactly these things – I’ll give you some swaps in a minute.
For the crust:
- 1 1/2 cups graham cracker crumbs (that’s about 12 full sheets)
- 6 tablespoons unsalted butter, melted
- 2 tablespoons granulated sugar
- Pinch of salt
For the filling:
- 16 ounces cream cheese, softened at room temperature (this is crucial!)
- 1/2 cup granulated sugar
- 1 cup heavy whipping cream, cold
- 1 teaspoon pure vanilla extract
- 1 tablespoon fresh lemon juice
A quick note about the cream cheese: make sure it’s full-fat. Low-fat versions just don’t set up the same way. And please, please let it come to room temperature before you start. Trying to mix cold cream cheese is like trying to spread cold butter – it just doesn’t work well.
You’ll also need a standard muffin tin and some cupcake liners. I prefer the foil ones because they hold their shape better, but paper works too. If you want to get fancy, you could use a mini cheesecake pan with removable bottoms, but honestly, the muffin tin method works perfectly.
How to Make No Bake Mini Cheesecakes Step-by-Step
Ready to get started? Here’s exactly how I make my no bake mini cheesecakes every single time. Follow these steps and you’ll have perfect little desserts in no time.
- Prepare your crust: First, crush your graham crackers. You can use a food processor or just put them in a zip-top bag and roll with a rolling pin. Mix the crumbs with melted butter, sugar, and salt until it looks like wet sand. Press about 1 1/2 tablespoons into the bottom of each muffin liner. Use the bottom of a glass or measuring cup to press it down firmly. Pop these in the fridge while you make the filling.
- Make the filling: In a large bowl, beat your room-temperature cream cheese until it’s completely smooth. No lumps allowed! Add the sugar and beat again until it’s well combined. Now add the vanilla and lemon juice and mix just until incorporated.
- Whip the cream: In a separate bowl, whip the heavy cream until stiff peaks form. This means when you lift the beaters, the cream stands up straight. Be careful not to over-whip or you’ll get butter!
- Combine everything: Gently fold the whipped cream into the cream cheese mixture. Use a spatula and fold gently – we want to keep all that air in there. Don’t stir aggressively or you’ll deflate your beautiful filling.
- Assemble and chill: Spoon the filling into your prepared crusts. I like to use an ice cream scoop for even portions. Smooth the tops with the back of a spoon. Now comes the hard part – waiting! Chill them in the refrigerator for at least 4 hours, but overnight is even better.
That’s it! See how simple that was? The key is taking your time with each step. Rushing leads to lumpy filling or crusts that fall apart. Trust me on this – patience pays off with these no bake mini cheesecakes.
Delicious Variations for Your No Bake Mini Cheesecakes
Once you’ve mastered the basic recipe, the fun really begins! Here are some of my favorite ways to change up these no bake mini cheesecakes.
Different Crusts:
- Chocolate crust: Use chocolate graham crackers or crushed Oreos (without the filling)
- Nut crust: Try crushed pecans or almonds mixed with butter and a touch of brown sugar
- Ginger snap crust: Perfect for the holidays – just swap graham crackers for ginger snaps
Flavor Twists:
- Chocolate chip: Fold in 1/2 cup mini chocolate chips after you combine everything
- Lemon zest: Add the zest of one lemon to the filling for a bright, citrusy kick
- Peanut butter: Replace 4 ounces of cream cheese with creamy peanut butter
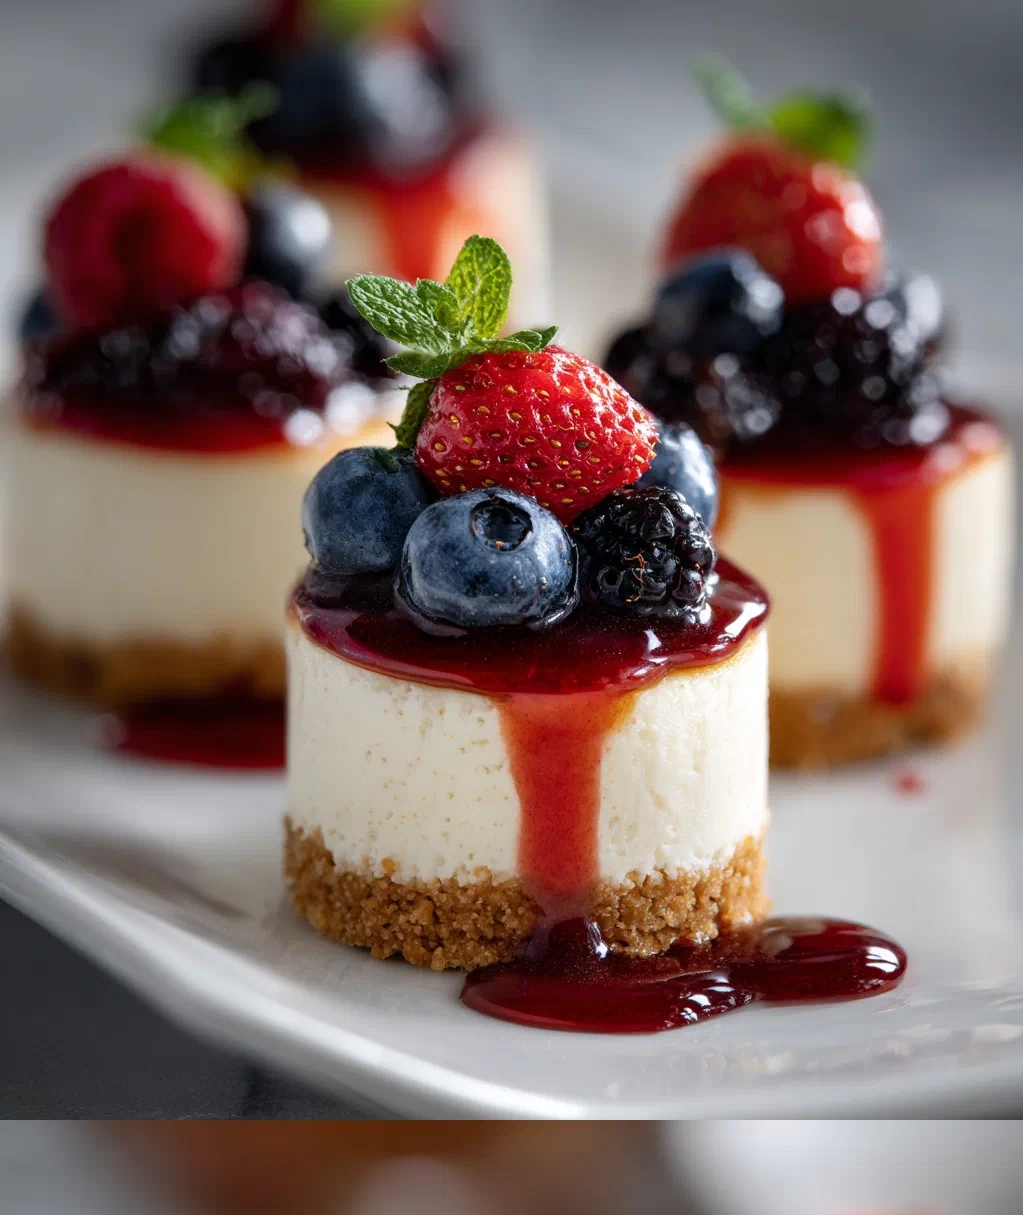
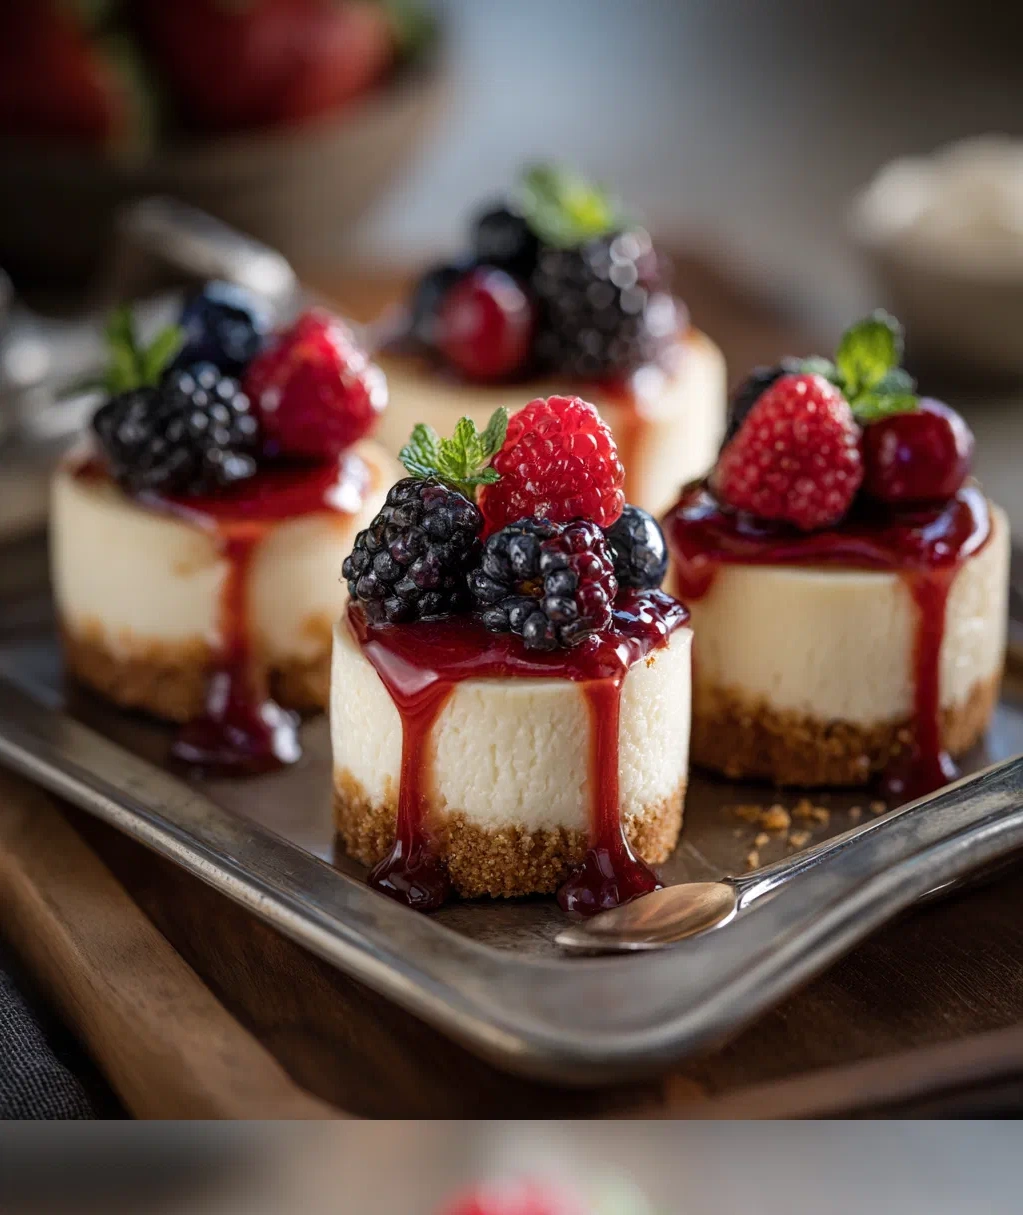
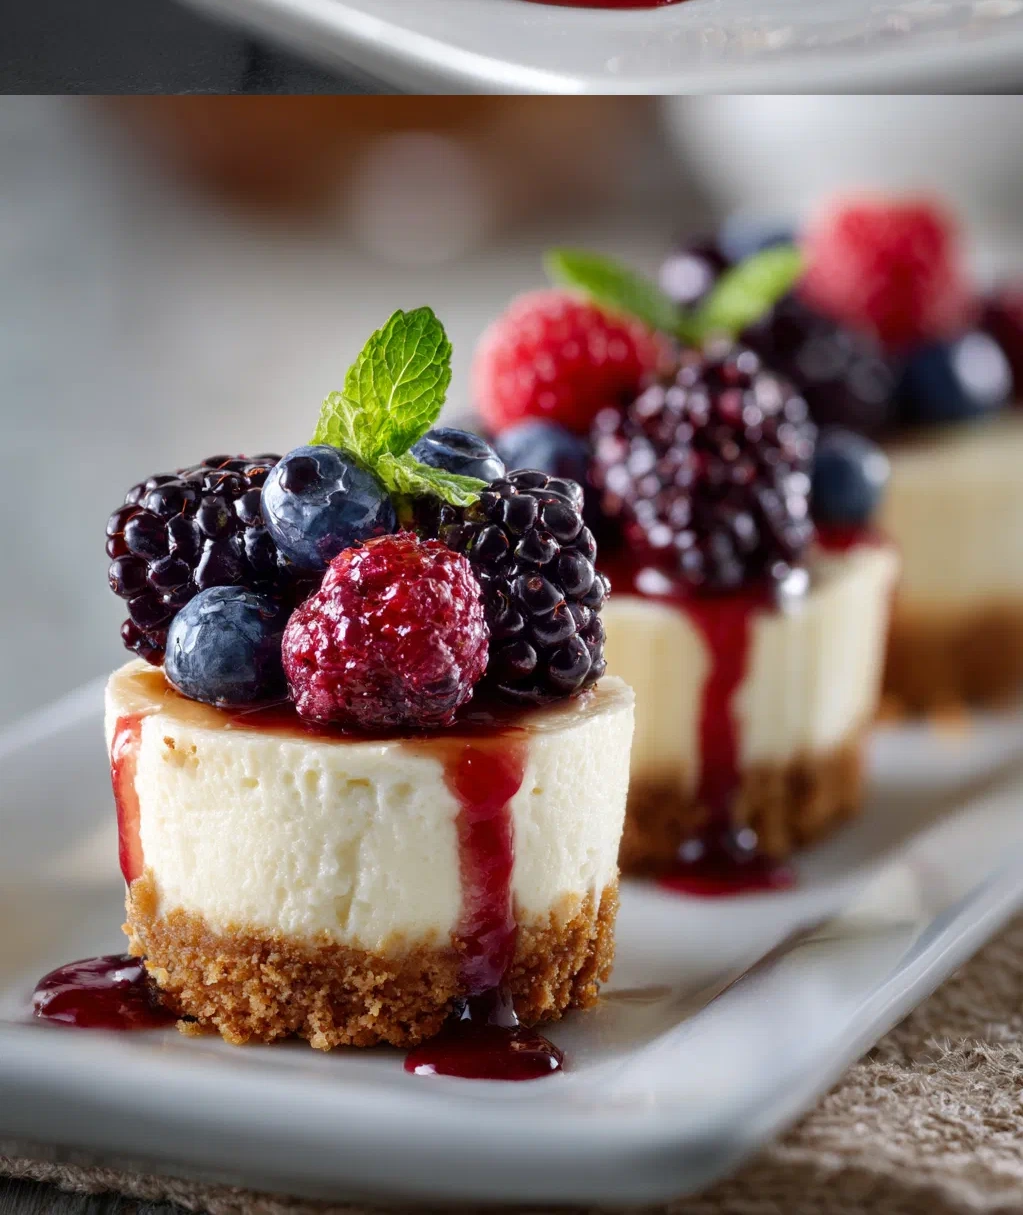
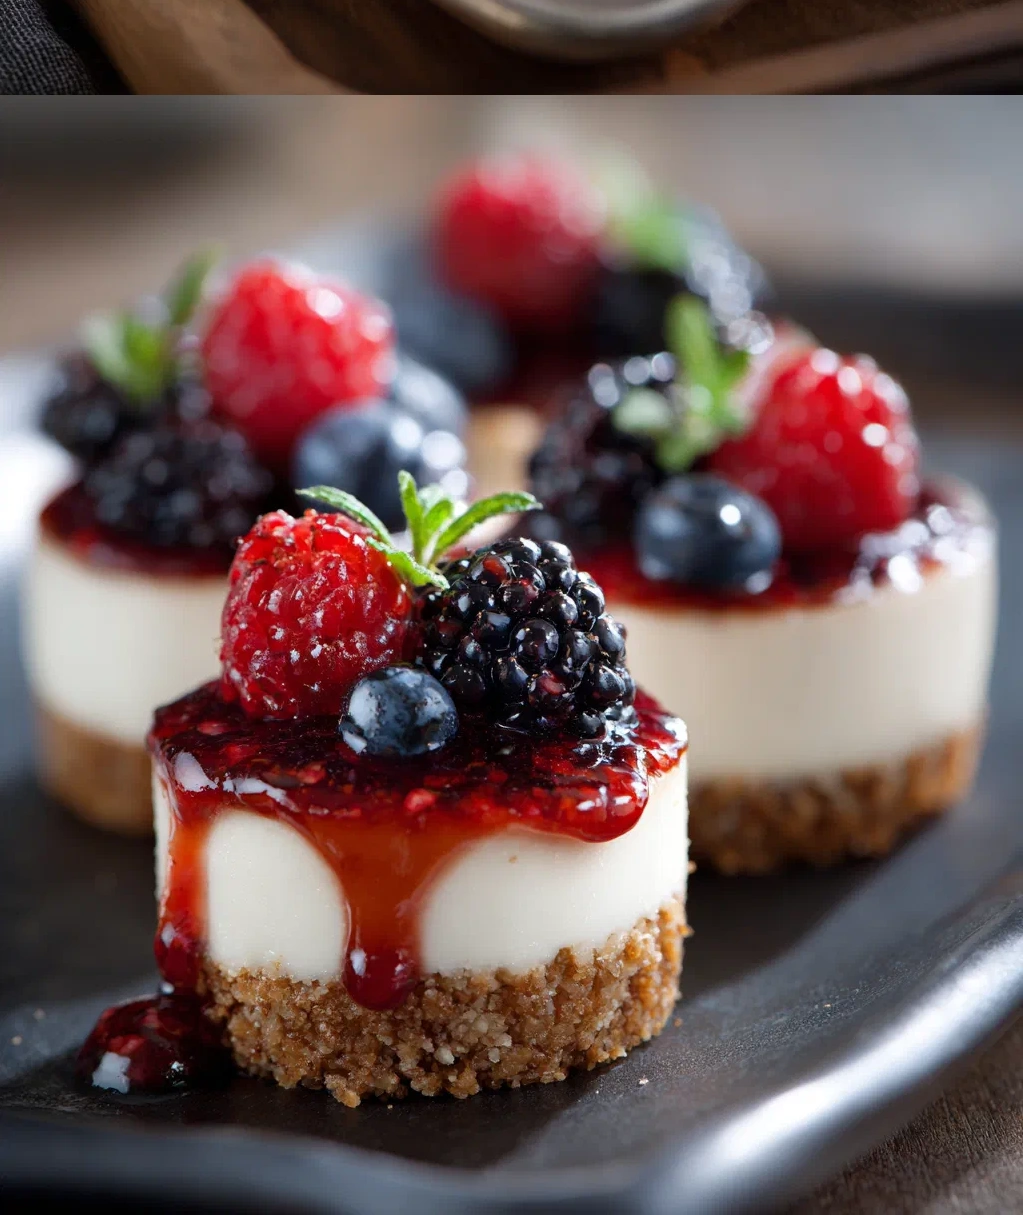
- Berry swirl: Before chilling, drop spoonfuls of berry jam on top and swirl with a toothpick
Toppings Galore:
The sky’s the limit here! Fresh berries are always a classic. You could also try:
- A drizzle of caramel or chocolate sauce
- Crushed cookies or candies
- Whipped cream rosettes
- Toasted coconut or chopped nuts
- A simple dusting of powdered sugar
My personal favorite is fresh raspberries with a little mint leaf. It looks so elegant but takes seconds to put together. The beauty of these no bake mini cheesecakes is that you can make a few different varieties at once. Set up a topping bar and let people customize their own – it’s always a hit at parties!
Serving and Storing Your Mini Cheesecakes
Okay, you’ve made your beautiful no bake mini cheesecakes. Now what? Here’s everything you need to know about serving and keeping them fresh.
Serving Tips:
Let your cheesecakes sit at room temperature for about 10 minutes before serving. This helps the filling soften just enough to be perfectly creamy. Use a small offset spatula or butter knife to gently lift them out of the muffin tin. If you used foil liners, you can just peel those off – they come off cleanly every time.
Presentation matters! I like to arrange mine on a pretty platter or cake stand. If you’re feeling fancy, you could even place each one on a small dessert plate with a doily underneath. But honestly, they look gorgeous just as they are.
Storage Instructions:
These keep wonderfully in the refrigerator. Just cover them tightly with plastic wrap or store in an airtight container. They’ll stay fresh for up to 5 days. The texture actually improves after the first day as all the flavors meld together.
You can also freeze no bake mini cheesecakes! Place them on a baking sheet in the freezer until solid (about 2 hours), then transfer to a freezer bag or container. They’ll keep for up to 2 months. When you’re ready to eat, just thaw in the refrigerator overnight. Don’t try to microwave them – the texture will suffer.
A quick safety note: because these contain dairy, don’t leave them out at room temperature for more than 2 hours. If you’re serving them at a party, keep them on ice or refrigerated until right before serving. Better safe than sorry!
Conclusion
Well, there you have it – everything I know about making the most delicious no bake mini cheesecakes. I hope you give them a try soon. They really are as easy and wonderful as I’ve made them sound.
What I love most about this recipe is how it brings people together. I’ve made these for birthday parties, holiday gatherings, and just because Tuesdays. Every single time, people ask for the recipe. There’s something so special about individual desserts – each person gets their own little masterpiece.
The next time you need a dessert that looks like you spent all day in the kitchen but actually took barely any time at all, remember these no bake mini cheesecakes. They’re my secret weapon, and now they can be yours too. Play with the flavors, try different toppings, make them your own. That’s the beauty of cooking – making something that brings joy to you and the people you share it with.
I’d love to hear how yours turn out! What variations did you try? What did your family think? These little cheesecakes have brought so much happiness to my kitchen, and I hope they do the same for yours. Happy baking – or should I say, happy no-baking!
Frequently Asked Questions
Q: Can I make no bake mini cheesecakes without a muffin tin?
Absolutely! You can use small mason jars, ramekins, or even disposable plastic cups. Just make sure whatever you use can hold the crust and filling securely. The key is having something that will support the cheesecakes while they set in the refrigerator.
Q: Why did my no bake cheesecakes turn out runny?
There are a few common reasons for runny no bake cheesecakes. First, make sure your cream cheese was truly at room temperature before mixing. Cold cream cheese won't incorporate properly. Second, you might not have whipped the heavy cream enough – it needs stiff peaks. Third, they might just need more chilling time. Give them at least 4 hours, but overnight is ideal for perfect texture.
Q: Can I use low-fat cream cheese for this recipe?
I don't recommend it. Full-fat cream cheese has the right texture and fat content to set up properly. Low-fat versions contain more water and stabilizers that can prevent your no bake mini cheesecakes from firming up correctly. If you need a lighter option, you could try using Greek yogurt in part of the filling, but the texture will be different.
Q: How far in advance can I make no bake mini cheesecakes?
They're actually better made ahead! You can prepare them up to 2 days in advance. Store them covered in the refrigerator until you're ready to serve. If you want to make them even further ahead, they freeze beautifully for up to 2 months. Just thaw overnight in the refrigerator before serving.
Q: What's the best way to crush graham crackers for the crust?
My favorite method is using a food processor – it gives you perfectly even crumbs in seconds. If you don't have one, put the graham crackers in a zip-top bag, seal it well, and use a rolling pin to crush them. You want fine crumbs, not big chunks, so the crust holds together nicely when you press it into the liners.
PrintNo-Bake Mini Cheesecakes with Graham Cracker Crust
- Total Time: 260
- Yield: 12 mini cheesecakes 1x
Description
Creamy, tangy mini cheesecakes with a buttery graham cracker crust, requiring no baking and perfect for easy entertaining.
Ingredients
1 1/2 cups graham cracker crumbs
1/4 cup unsalted butter, melted
2 tablespoons granulated sugar
16 oz cream cheese, softened to room temperature
1/2 cup granulated sugar
1 teaspoon vanilla extract
1 cup heavy whipping cream
Fresh berries or fruit for garnish (optional)
Instructions
Step 1: In a medium bowl, combine graham cracker crumbs, melted butter, and 2 tablespoons sugar until evenly moistened.
Step 2: Press about 2 tablespoons of the crumb mixture into the bottom of each of 12 lined muffin cups, using the back of a spoon to compact it firmly.
Step 3: In a large bowl, beat the softened cream cheese with 1/2 cup sugar and vanilla extract until smooth and creamy.
Step 4: In a separate bowl, whip the heavy cream until stiff peaks form.
Step 5: Gently fold the whipped cream into the cream cheese mixture until fully combined and no streaks remain.
Step 6: Spoon or pipe the cheesecake filling over the crusts in the muffin cups, smoothing the tops with a spatula.
Step 7: Refrigerate for at least 4 hours, or until set.
Step 8: Garnish with fresh berries or fruit if desired, then serve chilled.
- Prep Time: 20
- Category: Dessert
Nutrition
- Calories: 280
- Fat: 22g
- Carbohydrates: 18g
- Protein: 4g