
One Pan Balsamic Chicken: Deliciously Simple Weeknight Magic
Hey there! If you’re anything like me, weeknights can feel like a marathon—you’re juggling work, family, maybe even a pet or two, and somehow dinner has to magically appear. That’s exactly why I fell head over heels for this one pan balsamic chicken recipe. Seriously, it’s been a game-changer in my kitchen, and I’m so excited to share it with you today.
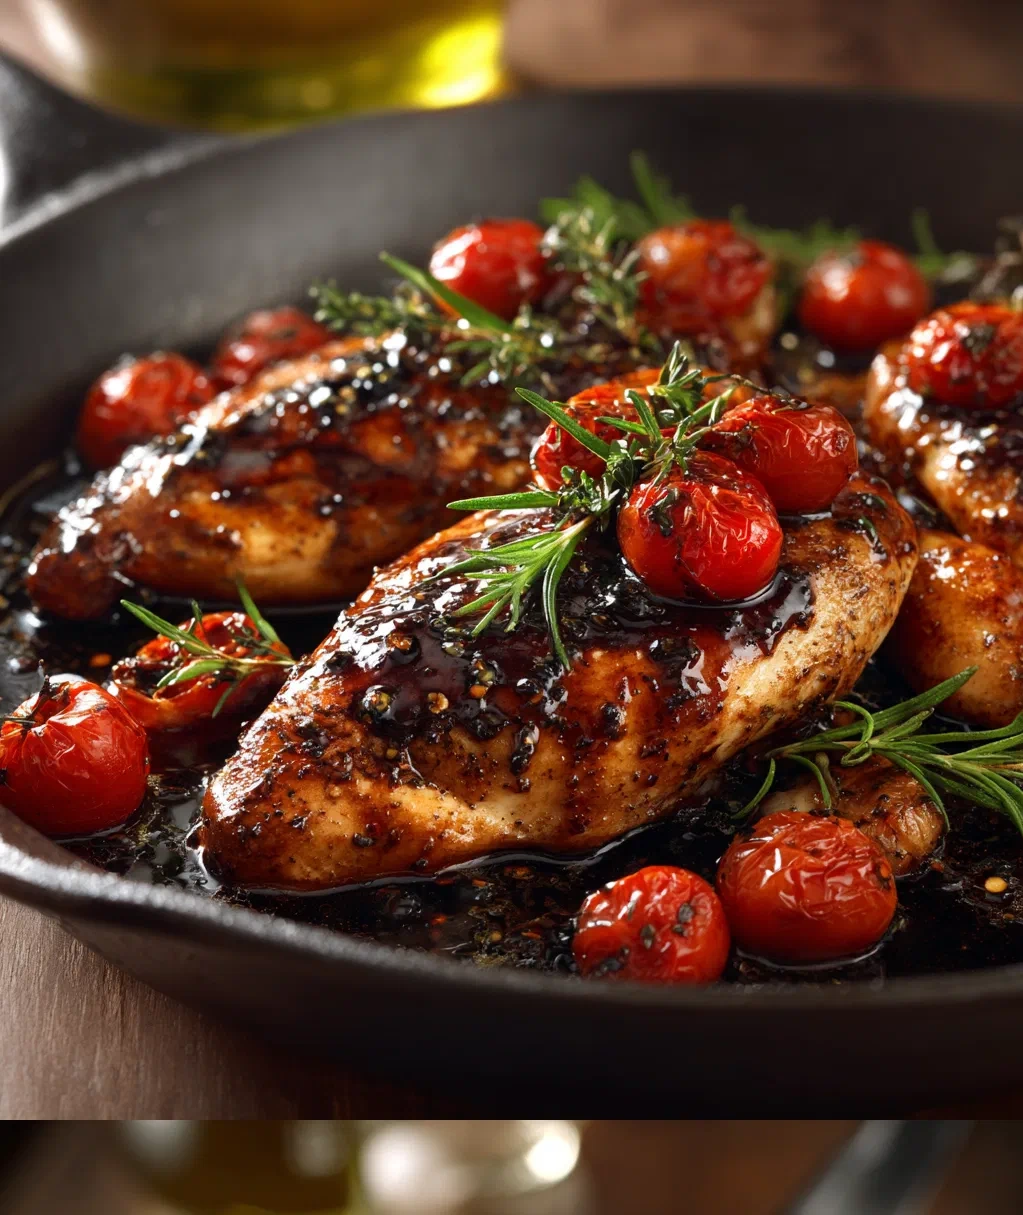
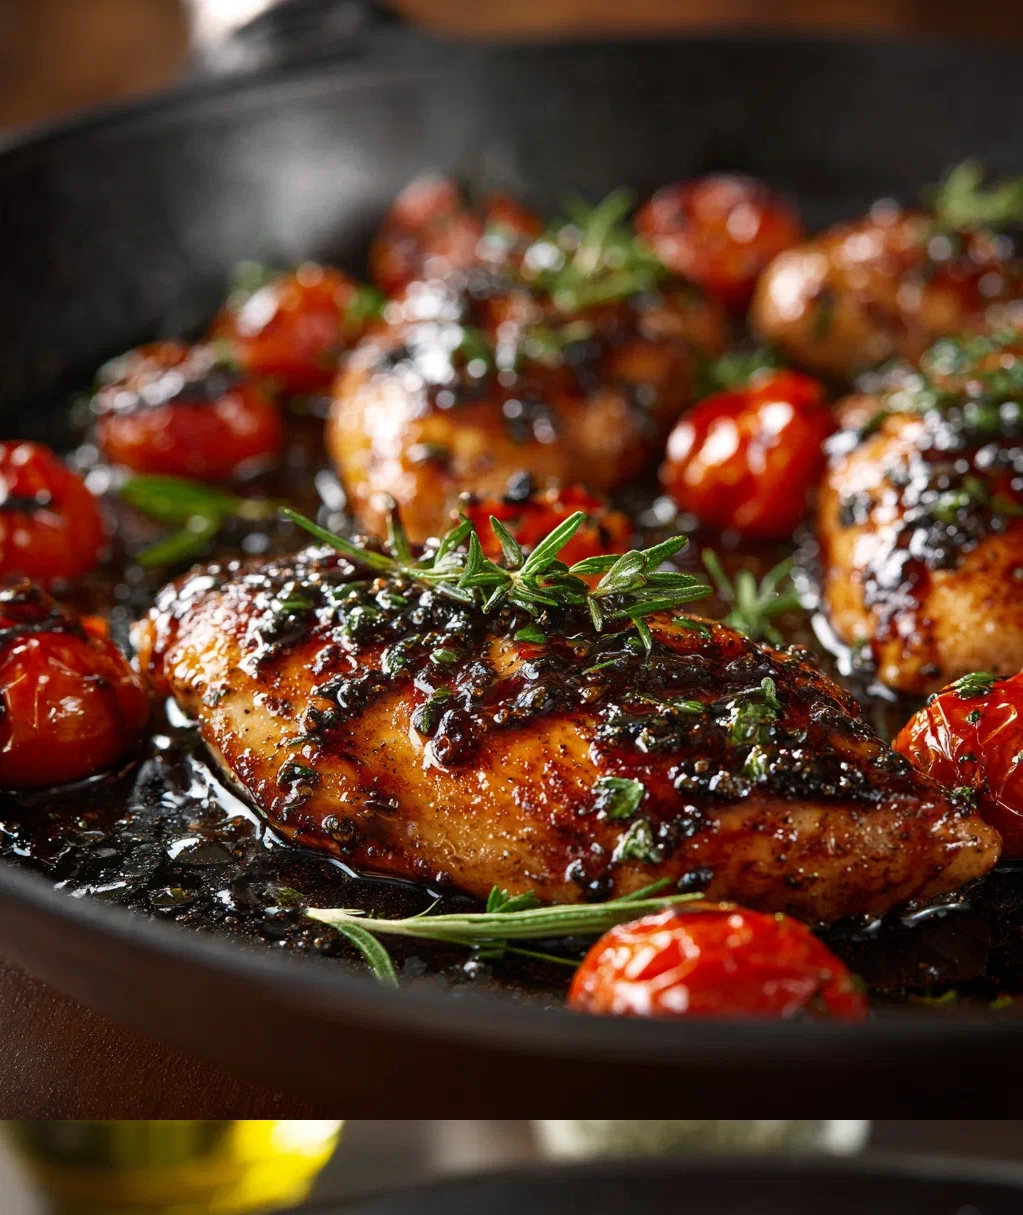
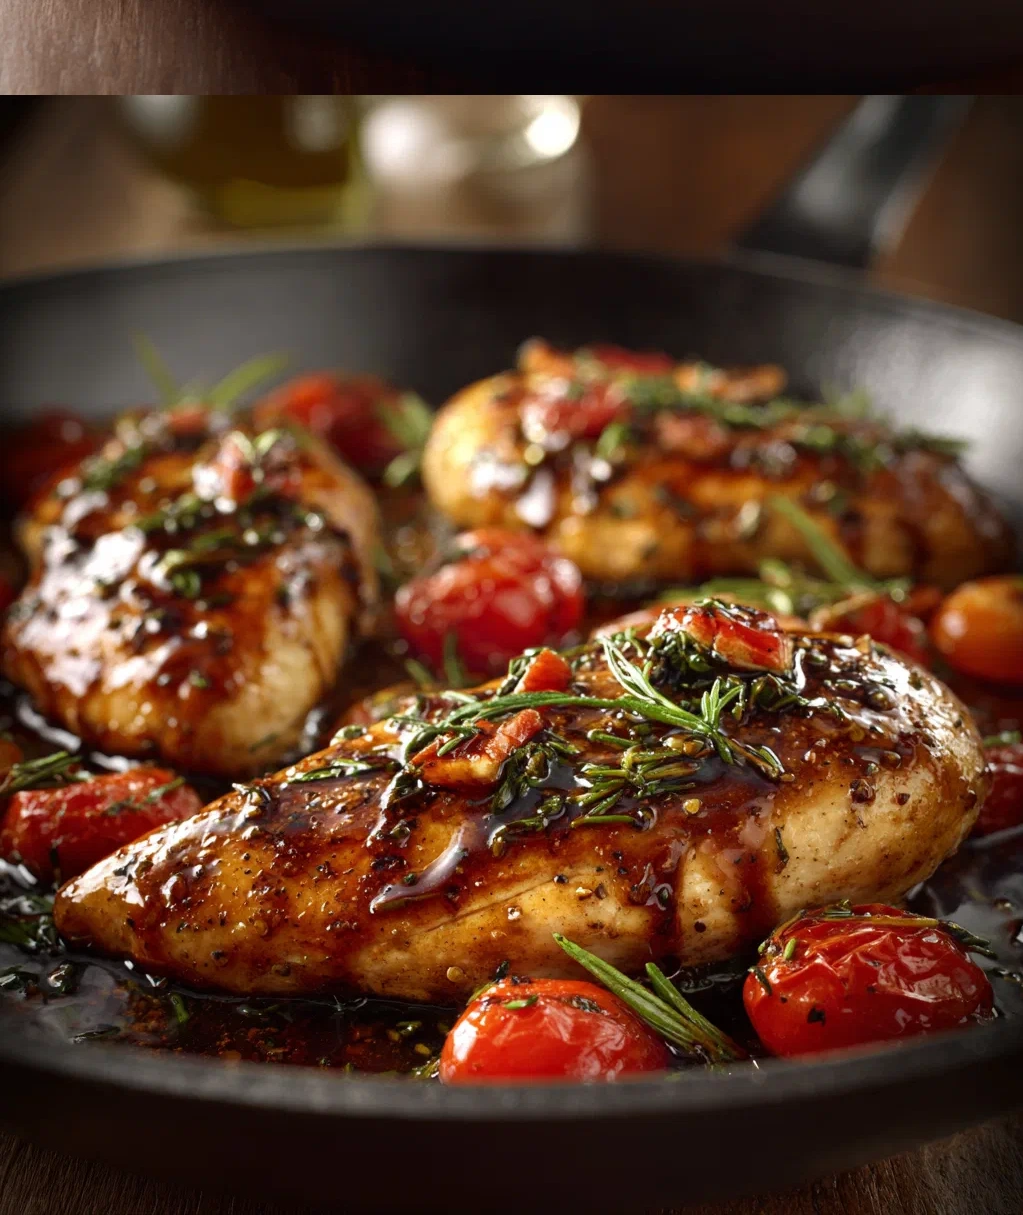
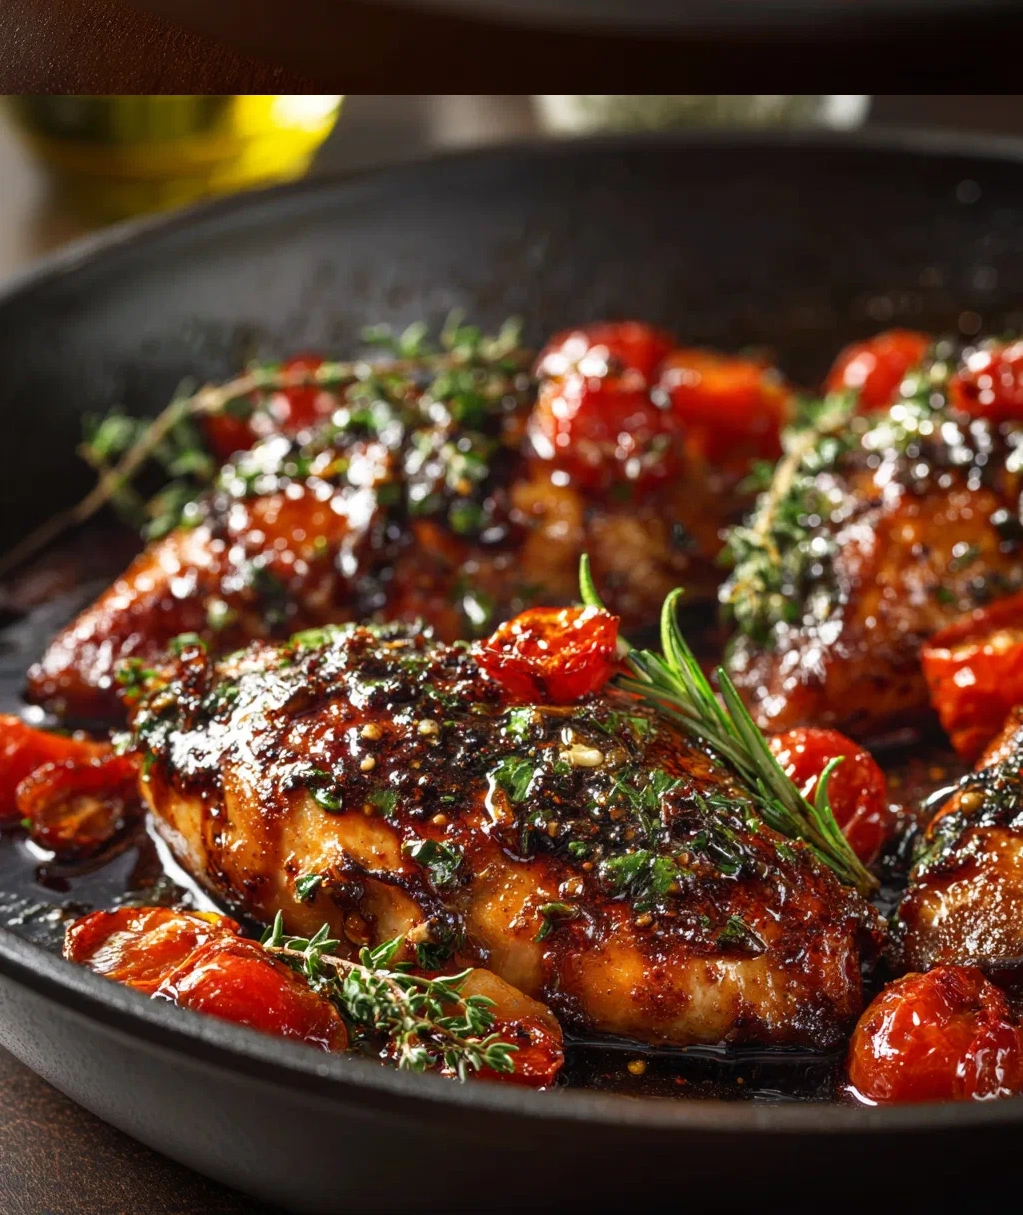
I first stumbled upon the idea for one pan balsamic chicken when I was staring blankly at my fridge after a long day, wondering what on earth I could throw together without making a huge mess. You know that feeling, right? I had some chicken breasts, a bottle of balsamic vinegar that was gathering dust, and a handful of veggies. I decided to toss it all together in one pan, and wow—the results were incredible. The chicken comes out so tender and juicy, with this gorgeous caramelized glaze that’s both tangy and sweet. And the best part? You only have one pan to clean up afterward. Talk about a win!
What I love most about this one pan balsamic chicken is how forgiving it is. Don’t have exactly the veggies I list? No problem—swap them out! Forgot to marinate the chicken? It’ll still taste amazing. This recipe is all about making your life easier while still treating your taste buds to something special. Trust me, once you try it, you’ll be making it on repeat. It’s become my go-to for busy nights when I want something that feels fancy but requires minimal effort. Let’s dive in and get cooking!
Why You'll Absolutely Love This One Pan Balsamic Chicken
Let me tell you why this recipe has earned a permanent spot in my rotation. First off, it’s incredibly simple. You literally need just one pan—no juggling multiple pots or baking sheets. That means less time cleaning up and more time relaxing. Plus, the flavors are out of this world. The balsamic vinegar reduces into this sticky, sweet glaze that coats the chicken and veggies perfectly. It smells amazing while it’s cooking, too—like a fancy restaurant right in your kitchen.
Another huge benefit? It’s super versatile. I’ve made this one pan balsamic chicken with all sorts of veggies depending on what’s in season or what I have on hand. It’s a great way to use up those odds and ends in the fridge. And if you’re watching your time, this comes together in about 30 minutes from start to finish. No long marinating required, though you can certainly do that if you have the time.
Here are my top reasons this recipe rocks:
- Minimal cleanup: One pan means one dish to wash. Enough said.
- Big flavor: The balsamic glaze is tangy, sweet, and savory all at once.
- Healthy and satisfying: Packed with protein and veggies, it’s a balanced meal.
- Perfect for leftovers: Tastes even better the next day—great for meal prep.
- Family-friendly: My kids actually eat their veggies when they’re cooked this way.
My favorite part is how the chicken gets those beautiful caramelized edges. It looks impressive, but it’s so easy to achieve. You don’t need any special skills—just follow the simple steps below.
Everything You Need for Your One Pan Balsamic Chicken
Gathering your ingredients is the first step to success. I like to get everything out on the counter before I start—it makes the cooking process so much smoother. Here’s what you’ll need for this one pan balsamic chicken. Don’t stress if you don’t have exactly these items; I’ll give you some swap ideas in the variations section.
For the chicken:
- 4 boneless, skinless chicken breasts (about 1.5 pounds total)
- 1 tablespoon olive oil
- Salt and freshly ground black pepper (to taste—I use about 1 teaspoon salt and ½ teaspoon pepper)
- 1 teaspoon garlic powder
- ½ teaspoon dried oregano
For the balsamic glaze and veggies:
- ½ cup balsamic vinegar (use a good quality one if you can—it makes a difference!)
- 2 tablespoons honey or maple syrup
- 2 cloves garlic, minced
- 1 tablespoon Dijon mustard
- 1 red bell pepper, sliced into strips
- 1 yellow onion, sliced
- 1 cup cherry tomatoes, halved
- Fresh basil or parsley for garnish (optional but lovely)
A quick note on the balsamic vinegar: you don’t need to break the bank, but avoid the super cheap stuff that’s mostly caramel coloring. A mid-range balsamic will give you that rich, complex flavor we’re after. And if you’re out of honey, maple syrup works beautifully too—it adds a lovely warmth to the glaze.
For equipment, you’ll need a large oven-safe skillet (I use a 12-inch cast iron or stainless steel pan) and a whisk or fork for mixing the glaze. That’s it! No fancy gadgets required.
How to Make Perfect One Pan Balsamic Chicken: Step-by-Step
Ready to cook? Let’s walk through this together. I promise it’s straightforward, and I’ve included all my little tips to make sure your one pan balsamic chicken turns out amazing every time.
- Prep your ingredients: Start by patting your chicken breasts dry with paper towels. This helps them get a nice sear. Season both sides generously with salt, pepper, garlic powder, and oregano. Slice your bell pepper and onion, halve the cherry tomatoes, and mince the garlic. In a small bowl, whisk together the balsamic vinegar, honey, minced garlic, and Dijon mustard until smooth. Set this aside—this is your magic glaze.
- Sear the chicken: Heat your olive oil in that large skillet over medium-high heat. Once the oil is shimmering (about 1-2 minutes), add the chicken breasts. Don’t crowd them—if your pan is small, cook in batches. Let them cook undisturbed for 5-6 minutes per side, until they develop a golden-brown crust. They don’t need to be cooked through yet—we’ll finish them in the oven. Transfer the chicken to a plate temporarily.
- Cook the veggies: In the same pan (see? one pan magic!), add the sliced bell pepper and onion. Cook for about 4-5 minutes, stirring occasionally, until they start to soften and get a bit of color. Add the cherry tomatoes and cook for another 2 minutes. The tomatoes will start to release their juices, which adds wonderful flavor to the pan.
- Add the glaze and bake: Preheat your oven to 375°F (190°C) if it’s not already on. Return the chicken breasts to the pan, nestling them among the veggies. Pour that balsamic glaze mixture over everything, making sure the chicken gets coated. Give the pan a gentle shake to distribute the sauce.
- Bake to perfection: Transfer the skillet to the preheated oven. Bake for 15-18 minutes, until the chicken is cooked through (internal temperature should reach 165°F or 74°C) and the glaze has thickened and caramelized slightly. Keep an eye on it—if the glaze starts to look too dark, you can cover it loosely with foil.
- Rest and serve: Carefully remove the pan from the oven—remember, the handle will be hot! Let the chicken rest for 5 minutes before serving. This allows the juices to redistribute, keeping the meat tender. Garnish with fresh basil or parsley if you like.
My pro tip: don’t skip the searing step. It builds so much flavor and gives the chicken that beautiful color. And if you don’t have an oven-safe skillet, you can transfer everything to a baking dish before popping it in the oven.
Easy Variations to Make This One Pan Balsamic Chicken Your Own
One of the best things about this recipe is how adaptable it is. I’ve made this one pan balsamic chicken probably two dozen different ways, depending on what I have on hand or what mood I’m in. Here are some of my favorite twists to inspire you.
Veggie swaps: Don’t feel limited to bell peppers and onions. Try sliced zucchini, mushrooms, asparagus, or even broccoli florets. Just keep in mind that harder veggies might need a few extra minutes of cooking before you add the glaze. If you’re using something like potatoes, I’d recommend parboiling them first or cutting them into small pieces so they cook through.
Protein options: Chicken thighs work wonderfully here—they stay extra juicy. Just increase the cooking time by 5-10 minutes since they’re thicker. You could also use pork chops or even salmon fillets. For salmon, reduce the baking time to 10-12 minutes since it cooks faster.
Flavor boosts: Want to jazz it up? Add a pinch of red pepper flakes to the glaze for some heat. A tablespoon of soy sauce adds depth (just reduce the salt a bit). Fresh herbs like rosemary or thyme tossed in with the veggies are lovely too. Sometimes I add a handful of pitted olives or capers for a briny kick.
Dietary tweaks: For a lower-sugar version, use less honey or swap it for a sugar-free alternative. To make it gluten-free, just ensure your balsamic vinegar and mustard are gluten-free (most are). For dairy-free, you’re already good—no dairy in this recipe unless you add it.
My personal favorite variation is adding sliced apples in the fall. They caramelize beautifully with the balsamic glaze and pair so well with the chicken. Don’t be afraid to experiment—that’s half the fun of cooking!
Serving Suggestions and Storage Tips
Now that your one pan balsamic chicken is ready, let’s talk about how to serve it and make the most of any leftovers. This dish is incredibly versatile when it comes to pairing.
Serving ideas: I love serving this over a bed of fluffy quinoa or brown rice—they soak up that delicious glaze beautifully. Mashed potatoes or polenta are also fantastic options for something extra comforting. For a lighter meal, it’s great with a simple green salad on the side. The tangy balsamic dressing from the pan makes a wonderful impromptu salad dressing too!
If you’re feeding a crowd, you can easily double the recipe. Just use two pans or a very large roasting pan. The cooking times might need a slight adjustment, so keep an eye on it. This one pan balsamic chicken is also perfect for meal prep. I often make a double batch on Sunday and have lunches ready for the week.
Storage and reheating: Leftovers will keep in an airtight container in the refrigerator for 3-4 days. To reheat, I recommend using the oven or toaster oven at 350°F (175°C) for about 10-15 minutes, until heated through. You can microwave it, but the chicken might get a bit rubbery. If you do microwave, add a splash of water or broth and cover it to keep it moist.
The glaze might thicken up in the fridge—that’s normal. Just add a tablespoon of water or broth when reheating to loosen it up. You can also freeze this dish for up to 2 months. Thaw in the refrigerator overnight before reheating.
A little safety tip: always use a meat thermometer to check that your chicken has reached 165°F (74°C) internally. And when storing leftovers, get them into the refrigerator within 2 hours of cooking. Better safe than sorry!
Conclusion
Well, there you have it—my absolute favorite weeknight dinner that never fails to impress. This one pan balsamic chicken has saved me on so many busy evenings when I wanted something delicious without the fuss. I hope it becomes a staple in your kitchen too.
What I love most about this recipe is how it proves that simple ingredients, when combined thoughtfully, can create something truly special. That tangy-sweet balsamic glaze, the tender chicken, the caramelized veggies—it all comes together in one pan with minimal effort. It’s the kind of meal that makes you feel like a kitchen rockstar without requiring professional chef skills.
Give it a try this week. Play with the variations, make it your own, and most importantly, enjoy the process. Cooking should be fun, not stressful. And when you’re sitting down to a plate of this gorgeous one pan balsamic chicken, with only one dish waiting in the sink, I think you’ll understand why I’m so passionate about it.
Let me know how it turns out! I’d love to hear about your own twists on the recipe. Happy cooking, my friend—may your weeknights be filled with delicious, easy meals that bring everyone to the table with smiles.
Frequently Asked Questions
Q: Can I use chicken thighs instead of breasts for this one pan balsamic chicken?
Absolutely! Chicken thighs work beautifully in this recipe. They tend to stay juicier and have more flavor. Just increase the baking time by 5-10 minutes since they're usually thicker than breasts. Use a meat thermometer to ensure they reach 165°F internally.
Q: My balsamic glaze burned in the oven. What did I do wrong?
Don't worry—this can happen if your oven runs hot or if you use a very sugary balsamic vinegar. Next time, try reducing the oven temperature to 350°F and checking it at the 12-minute mark. You can also cover the pan loosely with aluminum foil during baking to prevent over-browning. Using a quality balsamic vinegar (not the super cheap kind) helps too.
Q: Can I make this one pan balsamic chicken ahead of time?
Yes, you can prep components ahead! Season the chicken and chop the veggies up to a day in advance—store them separately in the fridge. The balsamic glaze mixture can be whisked together and kept in a jar for 2-3 days. When ready to cook, just follow the steps as written. The actual cooking is quick, making it perfect for busy nights.
Q: What can I serve with this besides rice or potatoes?
So many options! Try it with crusty bread to soak up the sauce, over pasta like fettuccine, or with cauliflower rice for a low-carb version. A simple arugula salad with shaved Parmesan makes a lovely fresh side. It's also great with roasted sweet potatoes or a grain salad with quinoa and herbs.
Q: How do I know when the chicken is cooked through without cutting into it?
The best way is to use a meat thermometer. Insert it into the thickest part of the chicken—it should read 165°F (74°C). If you don't have one, you can make a small cut in the thickest piece to check that the juices run clear and there's no pink meat. The chicken will also feel firm to the touch when properly cooked.
PrintOne Pan Balsamic Chicken with Roasted Vegetables
- Total Time: 45
- Yield: 4 servings 1x
Description
Tender chicken breasts glazed in a sweet-tangy balsamic reduction with roasted vegetables, all cooked together in one pan for easy cleanup.
Ingredients
4 boneless, skinless chicken breasts (about 1.5 lbs)
1 lb baby potatoes, halved
1 large red bell pepper, sliced
1 medium red onion, sliced
3 tbsp olive oil, divided
1/2 tsp salt
1/4 tsp black pepper
1/2 cup balsamic vinegar
2 tbsp honey
2 cloves garlic, minced
1 tsp dried thyme
1/4 cup chicken broth
Fresh parsley for garnish (optional)
Instructions
Step 1: Preheat oven to 400°F (200°C).
Step 2: In a large bowl, toss potatoes, bell pepper, and onion with 2 tbsp olive oil, salt, and pepper.
Step 3: Spread vegetables on a large rimmed baking sheet in a single layer.
Step 4: In the same bowl, combine balsamic vinegar, honey, garlic, thyme, and remaining 1 tbsp olive oil.
Step 5: Place chicken breasts on the baking sheet among the vegetables.
Step 6: Pour half of the balsamic mixture over the chicken, reserving the rest.
Step 7: Roast for 20 minutes.
Step 8: Remove pan from oven and pour reserved balsamic mixture and chicken broth over chicken and vegetables.
Step 9: Return to oven and roast for 10-15 more minutes until chicken reaches 165°F internal temperature.
Step 10: Garnish with fresh parsley if desired and serve immediately.
- Prep Time: 15
- Cook Time: 30
- Category: Main Course
Nutrition
- Calories: 380
- Fat: 14g
- Carbohydrates: 35g
- Protein: 32g