Spring Decorations DIY: Transform Your Home with These Amazing & Affordable Ideas

As winter fades and spring emerges, our homes often feel ready for a fresh start. The days grow longer, flowers begin to bloom, and there’s an undeniable urge to refresh our living spaces. Spring decorations DIY projects offer the perfect opportunity to embrace this seasonal shift without breaking the bank. Unlike store-bought decor that can feel generic, DIY creations allow you to infuse your personal style while celebrating nature’s renewal. The importance of seasonal decorating goes beyond mere aesthetics—it connects us to natural cycles, boosts our mood with vibrant colors, and creates welcoming environments that reflect the joy of spring. Whether you’re an experienced crafter or a complete beginner, spring DIY projects can transform your home with minimal cost and maximum creativity. Imagine opening your windows to let in that first warm breeze, surrounded by handmade decorations that celebrate growth and new beginnings. This isn’t just about making things pretty—it’s about creating a home that feels alive, renewed, and perfectly in sync with the season. With spring decorations DIY, you control every element, from materials to colors to placement, ensuring your space truly reflects your vision of springtime beauty.
Essential Spring Decorations DIY Materials to Gather First
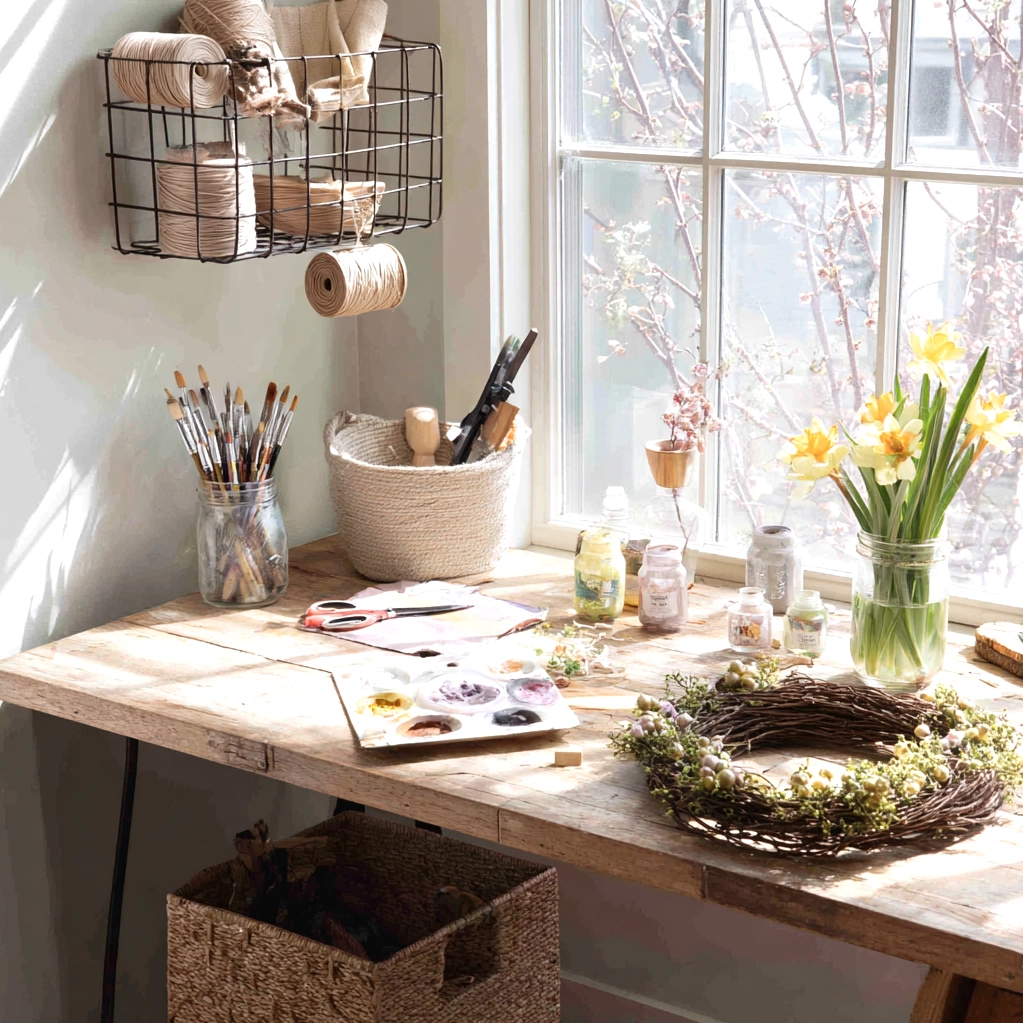
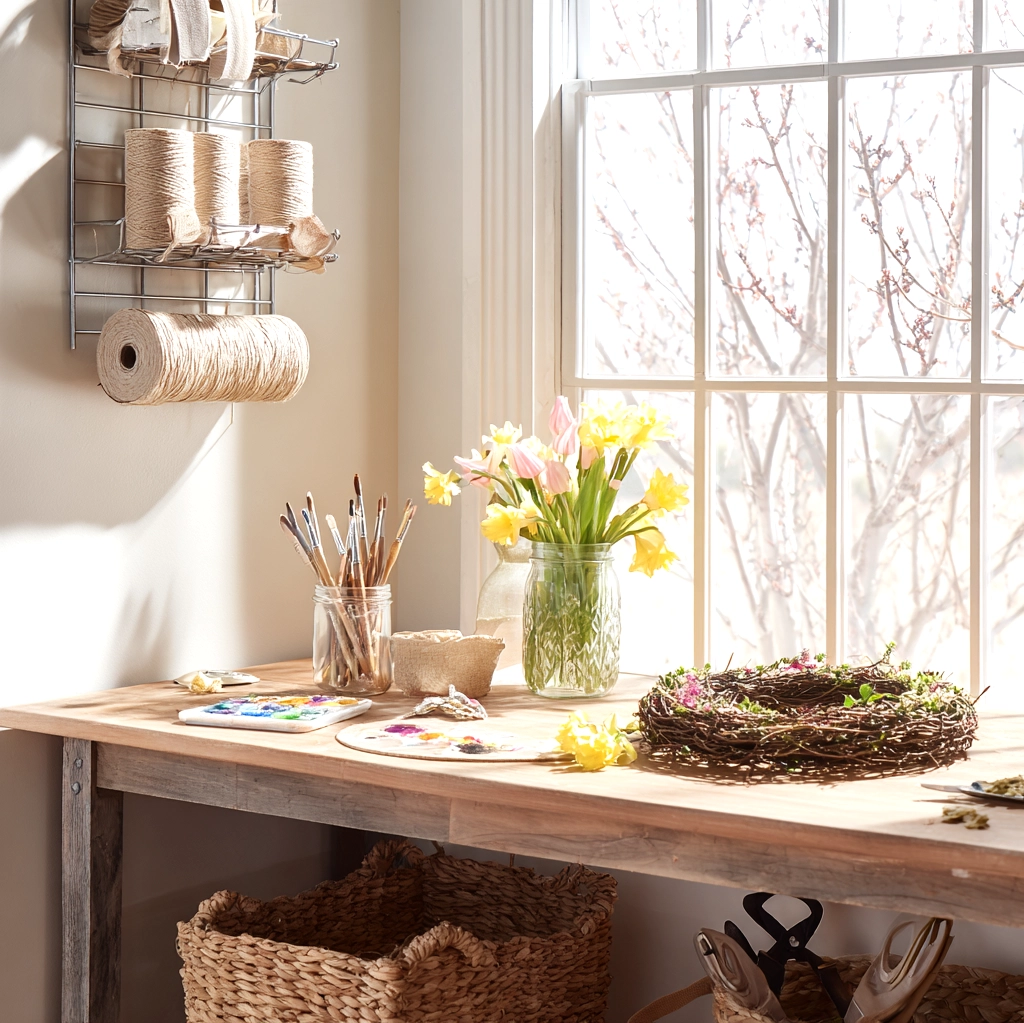
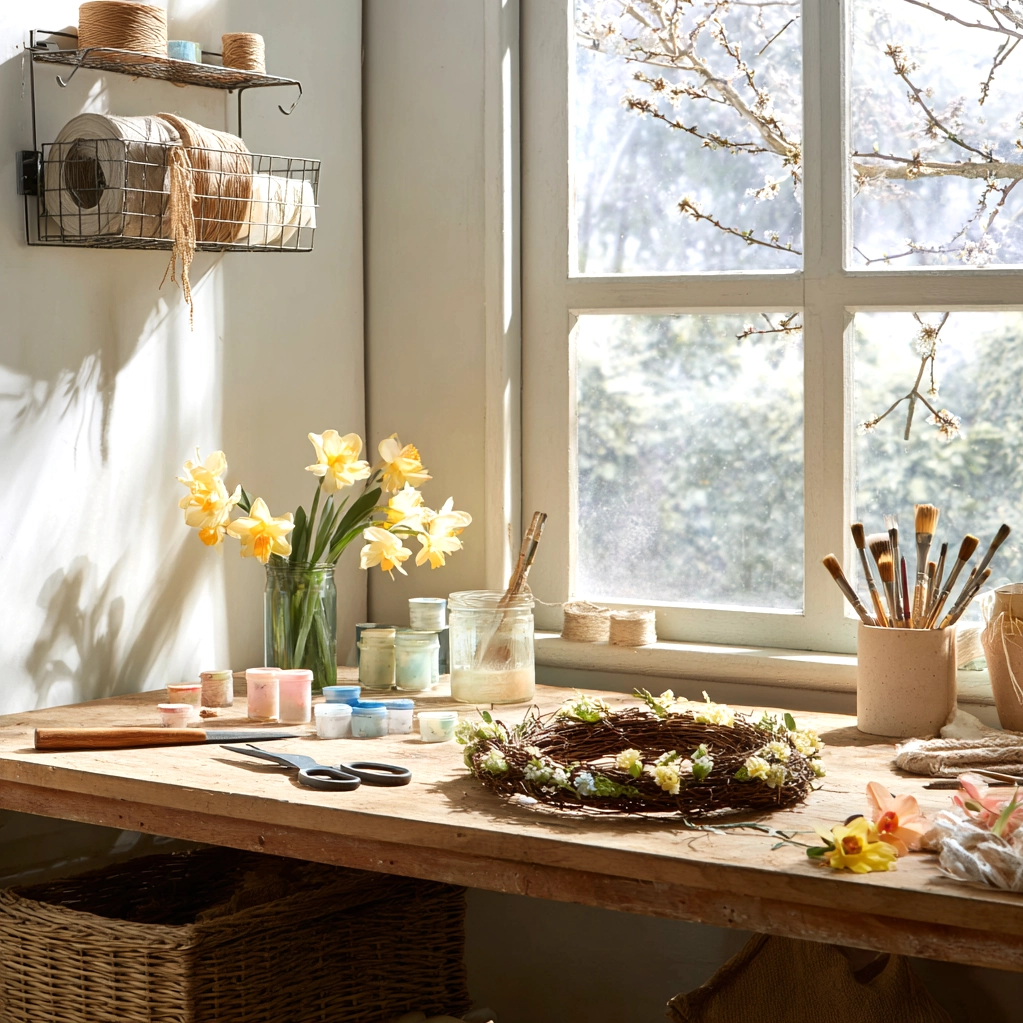
Before diving into specific projects, let's talk about materials. Successful spring decorations DIY starts with gathering the right supplies. Natural elements form the foundation of spring decor—think branches, flowers, stones, and seeds. Visit local parks or your own backyard to collect materials that won't cost you anything. For indoor projects, consider basics like glass jars, twine, paint, and fabric scraps. Many spring decorations DIY projects repurpose household items, so look around before buying new supplies. Mason jars can become vases or candle holders with simple modifications. Old picture frames transform into seasonal displays with fresh flowers or botanical prints. When shopping, focus on versatile materials that work for multiple projects. Acrylic paint in spring colors like pastel yellow, soft green, and sky blue will serve you well. Don't forget about texture—burlap, linen, and natural wood add warmth to any spring decorations DIY creation. Storage matters too. Keep materials organized in clear containers so you can see what you have. Label everything from ribbons to glue guns. This preparation saves time when inspiration strikes. Remember, spring decorations DIY should feel joyful, not stressful. Start simple with materials you already own, then expand your collection as you discover what projects you enjoy most. Quality matters more than quantity—a few well-chosen materials will create more impact than a closet full of unused supplies.
Easy Spring Decorations DIY Projects for Beginners
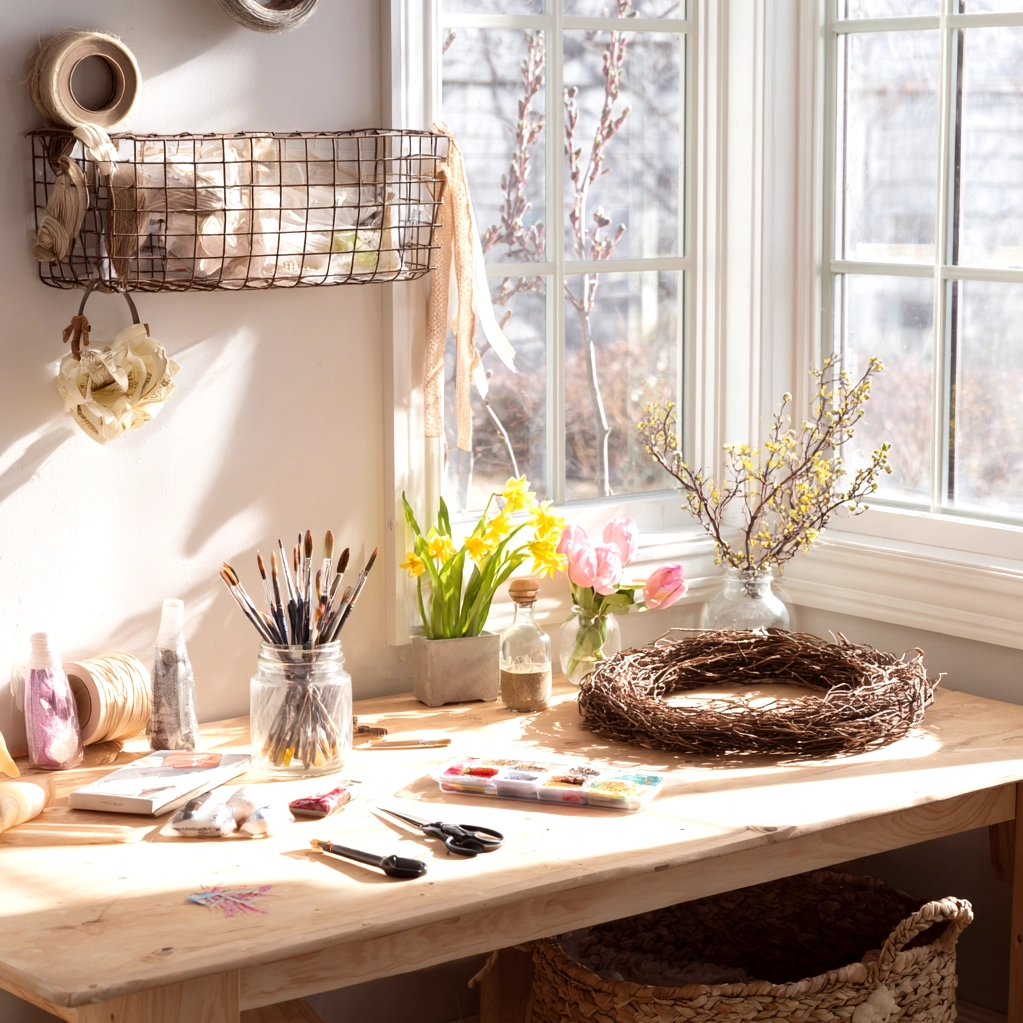
If you're new to crafting, these beginner-friendly spring decorations DIY projects will build your confidence. Start with a simple floral wreath. Gather grapevine wreath bases from craft stores and attach artificial or dried flowers using floral wire. This project requires minimal tools and creates instant spring charm for your front door. Another easy option involves painted mason jars. Clean glass jars thoroughly, then paint them with pastel colors using acrylic paint. Add twine around the neck for a rustic touch. These make perfect vases for fresh spring flowers or holders for tea lights. For table decor, try creating a spring centerpiece. Fill a shallow bowl with water and float candle votives alongside fresh flower petals. Add lemon slices or sprigs of mint for fragrance. This spring decorations DIY project takes minutes but creates an elegant focal point. Paper crafts offer another accessible entry point. Cut flower shapes from colored paper and string them together as garlands. Hang these across windows or mantels for cheerful color. Don't overlook nature's own decorations. Arrange branches with budding leaves in tall vases for instant spring atmosphere. Add ribbons or painted eggs during Easter season. The key to successful spring decorations DIY for beginners is starting small. Choose projects with clear steps and forgiving materials. Celebrate imperfections—they add character to handmade items. As you complete these simple projects, you'll gain skills for more complex creations. Most importantly, enjoy the process of making your home feel like spring.
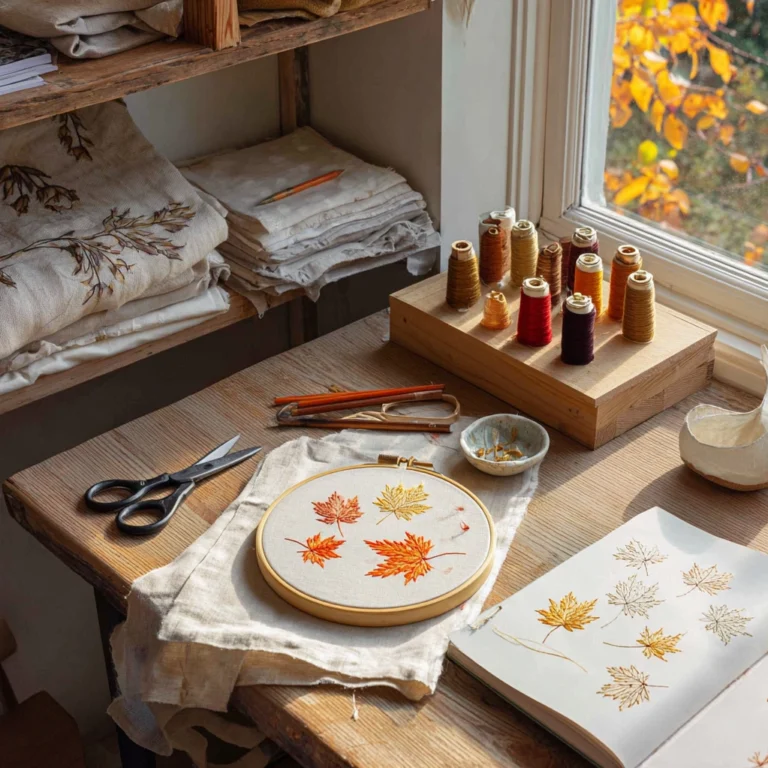
Advanced Spring Decorations DIY Ideas for Experienced Crafters
Ready to challenge your skills? These advanced spring decorations DIY projects create stunning statement pieces. Consider building a vertical garden wall. Start with a wooden pallet or frame, add landscape fabric to create pockets, then fill with soil and spring plants like pansies or herbs. This living wall brings nature indoors in a dramatic way. For textile enthusiasts, create embroidered spring-themed pillows. Choose linen fabric and transfer floral patterns using transfer paper. Use embroidery floss in spring colors to stitch delicate flowers and leaves. This spring decorations DIY project results in heirloom-quality decor. Another advanced idea involves creating a seasonal mosaic. Break colored ceramic tiles or glass into small pieces and arrange them on a wooden tray or stepping stone in floral patterns. Secure with tile adhesive and grout for a durable, beautiful piece. If you enjoy woodworking, build a custom planter box with carved designs. Use cedar or pine wood, then paint or stain in spring-appropriate finishes. Line with plastic and fill with seasonal flowers for a porch or patio centerpiece. Advanced spring decorations DIY often involves mixed media. Combine elements like wood, metal, and fabric in single creations. For example, create a wall hanging with wooden circles, metal accents, and fabric tassels in spring colors. These projects require more tools and time but deliver professional-looking results. Always sketch your design first and gather all materials before starting. Advanced crafting allows complete customization—your spring decor will be truly unique. Share your creations online or gift them to loved ones to spread spring cheer.
Outdoor Spring Decorations DIY to Welcome the Season
Don't limit your creativity to indoor spaces. Outdoor spring decorations DIY projects extend the seasonal celebration to your entire property. Start with your front entrance—it's the first impression of your home. Create a welcoming door basket filled with artificial spring flowers and greenery. Use a wire basket lined with moss, then secure blooms with floral pins. Hang with a sturdy ribbon that complements your door color. For pathways, make decorative stepping stones. Use concrete mix in molds, then press mosaic tiles, glass gems, or handprints into the surface before it dries. These personalized stones guide visitors through your garden. Another engaging outdoor spring decorations DIY project involves bird feeders and houses. Build simple wooden birdhouses from kits or scrap wood, then paint them in cheerful spring colors. Hang from tree branches with proper hardware to withstand weather. For patio spaces, create weather-resistant table decor. Use sealed wood slices as coasters, painted with floral designs using outdoor acrylic paint. Make matching placemats from outdoor fabric for cohesive dining areas. Garden markers offer both function and beauty. Paint smooth stones with plant names and illustrations, then place them near corresponding plants. This spring decorations DIY idea helps organize your garden while adding artistic touches. Consider lighting too. Fill glass jars with battery-operated fairy lights and hang them from tree branches for magical evening ambiance. Outdoor projects require durable materials. Choose weather-resistant paints, treated wood, and waterproof adhesives. Check local weather forecasts before starting outdoor work. These creations not only beautify your space but also encourage you to spend more time enjoying spring's fresh air. They transform ordinary yards into seasonal showcases that neighbors will admire.
Conclusion
Spring decorations DIY projects offer more than just home beautification—they provide a creative outlet that celebrates seasonal change while expressing personal style. Throughout this article, we've explored materials gathering, beginner projects, advanced creations, and outdoor applications. Each approach demonstrates how accessible and rewarding spring DIY can be, regardless of skill level. The true beauty of these projects lies in their flexibility. You can start with simple painted jars today and progress to elaborate mosaics as your confidence grows. Remember that spring decor isn't about perfection; it's about capturing the spirit of renewal through handmade touches. As you continue your spring decorations DIY journey, consider documenting your projects with photos. Create a seasonal decor journal noting what worked well and ideas for next year. Share your creations with friends or local community groups—inspiration grows when shared. Looking ahead, think about how these skills apply to other seasons. The techniques you master for spring can adapt to summer, fall, and winter decor. Most importantly, enjoy the process. Let spring's energy fuel your creativity. Whether you refresh one corner or transform your entire home, each handmade piece adds warmth and personality. As the season progresses, your DIY decorations will serve as joyful reminders of spring's fleeting beauty, making your home a true sanctuary of seasonal celebration.
Frequently Asked Questions
Q: What are the most budget-friendly materials for spring decorations DIY?
Nature provides the most affordable materials. Collect branches, pinecones, stones, and wildflowers from outdoor areas. Repurpose household items like glass jars, old fabric, and cardboard. Thrift stores offer inexpensive vases, frames, and containers perfect for upcycling. For purchased supplies, dollar stores often carry seasonal craft materials. Focus on versatile basics like acrylic paint, glue, and twine that work for multiple projects. Remember, creativity matters more than cost—simple materials transformed thoughtfully create beautiful spring decor.
Q: How can I make my spring DIY decorations last beyond the season?
Choose durable materials and proper storage. For floral elements, use high-quality artificial flowers or preserve real ones with silica gel. Seal painted surfaces with clear spray sealant to prevent fading. Store decorations in labeled plastic bins with tissue paper between layers. Avoid direct sunlight which causes colors to fade. Some projects transition well to other seasons—a neutral wreath base can be redecorated for summer. Consider creating modular decorations where you swap seasonal elements on a permanent base. Proper care ensures your creations bring joy for years.
Q: Are there spring decorations DIY projects suitable for children?
Absolutely! Child-friendly projects include painted rock garden markers, paper flower garlands, and decorated flower pots. Use washable paints, safety scissors, and non-toxic glues. Supervise closely with hot glue guns or other tools. Nature collages made with collected leaves and flowers develop appreciation for the season. Egg carton flowers transform trash into treasure. Keep projects simple with clear instructions. Celebrate their creations by displaying them prominently. DIY crafting teaches children creativity while creating seasonal memories. Always choose age-appropriate materials and emphasize fun over perfection.