
Cozy Hot Chocolate Cheesecake Bars – Unbelievably Delicious Comfort Treats You’ll Adore
I don’t know about you, but when the weather turns chilly and the days get shorter, I start craving all things warm, chocolatey, and comforting. There’s something about that perfect combination that just feels like a hug from the inside out. That’s exactly why I created these cozy hot chocolate cheesecake bars – they’re like wrapping yourself in your favorite blanket with a mug of the richest hot cocoa, only in dessert form.
I remember the first time I made these. It was a particularly dreary November afternoon, and I wanted something special for my book club gathering. I love classic cheesecake, but I also adore hot chocolate with those little marshmallows floating on top. So I thought, why not combine them? The result was magic – creamy cheesecake swirled with rich chocolate and that nostalgic hot chocolate flavor, all in a convenient bar form. Now, these have become my go-to treat for potlucks, holiday gatherings, or just a cozy night in. They’re surprisingly simple to make, and the payoff is huge – everyone who tries them asks for the recipe.
What I love most about these cozy hot chocolate cheesecake bars is how they bring people together. There’s something about that familiar hot chocolate taste that makes everyone smile. Plus, they’re perfect for sharing – you can cut them into big squares for dessert plates or smaller pieces for a party spread. And don’t worry if you’re not an experienced baker – I’ve made this recipe dozens of times, and I’ll walk you through every step with all my favorite tips.
Why These Cozy Hot Chocolate Cheesecake Bars Will Become Your New Favorite
Let me tell you why I’m absolutely obsessed with these bars – and why you will be too. First off, they taste incredible. Imagine the creamiest cheesecake you’ve ever had, but with that warm, chocolatey flavor of your favorite childhood hot cocoa. It’s nostalgic and sophisticated at the same time.
Here’s what makes them so special:
- Perfect texture: They’re firm enough to hold their shape when cut, but still beautifully creamy when you take a bite. No dry, crumbly cheesecake here!
- Make-ahead friendly: You can bake these a day or two before you need them. Actually, I think they taste even better after chilling overnight.
- Crowd-pleaser: I’ve served these to kids and adults alike, and everyone loves them. The hot chocolate flavor is universally appealing.
- Seasonal but not limited: While they’re perfect for fall and winter, I make them year-round. Sometimes you just need that cozy feeling, even in July!
- Easy to customize: You can add different toppings or mix-ins based on what you have on hand. I’ll share my favorite variations later.
Trust me, once you try these cozy hot chocolate cheesecake bars, you’ll understand why I keep coming back to this recipe. They have that perfect balance of sweet and rich without being overwhelming.
Everything You Need for Perfect Cozy Hot Chocolate Cheesecake Bars
Gathering your ingredients is the first step to success with these bars. I recommend getting everything out and measured before you start – it makes the process so much smoother. Here’s what you’ll need:
For the Crust:
- 2 cups graham cracker crumbs (about 15 full sheets)
- 1/3 cup granulated sugar
- 1/2 cup melted unsalted butter
- Pinch of salt
For the Cheesecake Filling:
- 24 ounces cream cheese, at room temperature (that’s three 8-oz packages)
- 1 cup granulated sugar
- 1/2 cup packed brown sugar
- 3 large eggs, at room temperature
- 1 cup sour cream, at room temperature
- 2 teaspoons pure vanilla extract
- 1/4 cup unsweetened cocoa powder
- 1/2 cup semi-sweet chocolate chips, melted and slightly cooled
- 1 teaspoon instant espresso powder (optional, but it enhances the chocolate flavor)
For the Topping:
- 1 cup mini marshmallows
- 1/4 cup chocolate chips
- Optional: crushed candy canes or peppermint pieces for holiday version
A quick note about temperature: Having your cream cheese, eggs, and sour cream at room temperature is crucial. Cold ingredients don’t blend as smoothly and can cause lumps in your batter. I usually take mine out about an hour before I start baking. If you forget, you can place sealed packages of cream cheese in warm water for 15-20 minutes to soften them up.
How to Make Your Cozy Hot Chocolate Cheesecake Bars Step-by-Step
Ready to bake? Let’s do this! I promise it’s easier than it looks. Follow these steps, and you’ll have perfect bars every time.
Step 1: Prepare Your Pan and Oven
First, preheat your oven to 325°F (160°C). Line a 9×13 inch baking pan with parchment paper, leaving some overhang on the sides – this makes it so much easier to lift the bars out later. Lightly grease the paper with butter or cooking spray. Trust me, don’t skip the parchment paper – it’s a game-changer for clean cuts.
Step 2: Make the Crust
In a medium bowl, mix together the graham cracker crumbs, sugar, and salt. Pour in the melted butter and stir until everything is evenly moistened. It should look like wet sand. Press this mixture firmly into the bottom of your prepared pan. I use the bottom of a measuring cup to press it down evenly. Bake for 10 minutes, then remove and let it cool while you make the filling. Don’t worry if it seems soft – it’ll firm up as it cools.
Step 3: Create the Cheesecake Filling
In a large bowl, beat the cream cheese with an electric mixer on medium speed until it’s completely smooth and creamy – about 2-3 minutes. Scrape down the sides of the bowl with a spatula. Add both sugars and beat until well combined. Now add the eggs one at a time, beating well after each addition. Mix in the sour cream and vanilla until just combined.
Here’s the fun part: Transfer about one-third of the batter to a separate bowl. To this portion, add the cocoa powder, melted chocolate, and espresso powder if using. Mix until smooth. Now pour the plain cheesecake batter over your cooled crust. Drop spoonfuls of the chocolate batter over the top, then use a knife to gently swirl them together. Don’t over-swirl – you want pretty marbling, not a muddy brown batter.
Step 4: Bake and Cool
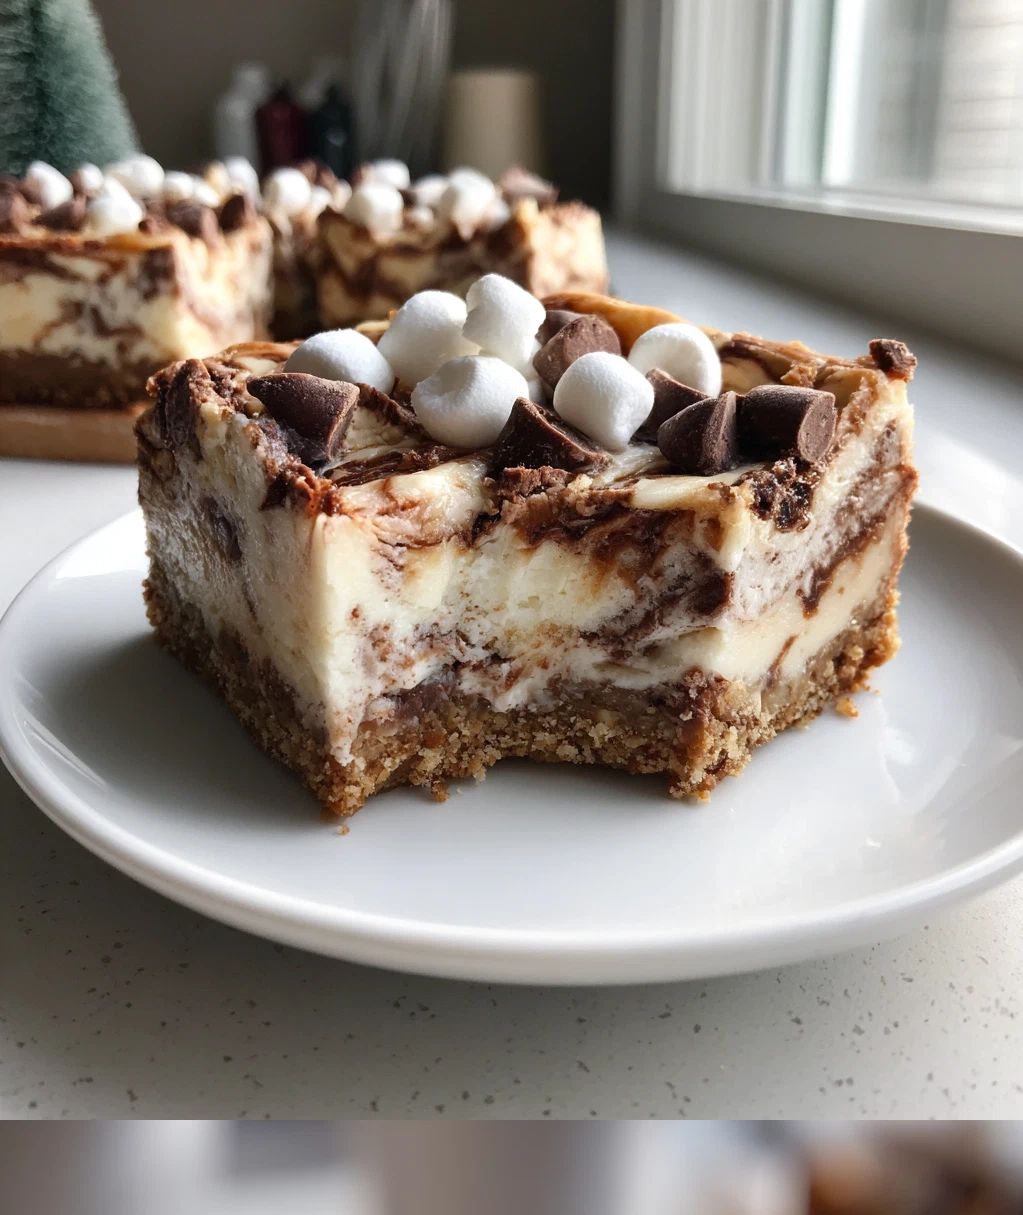
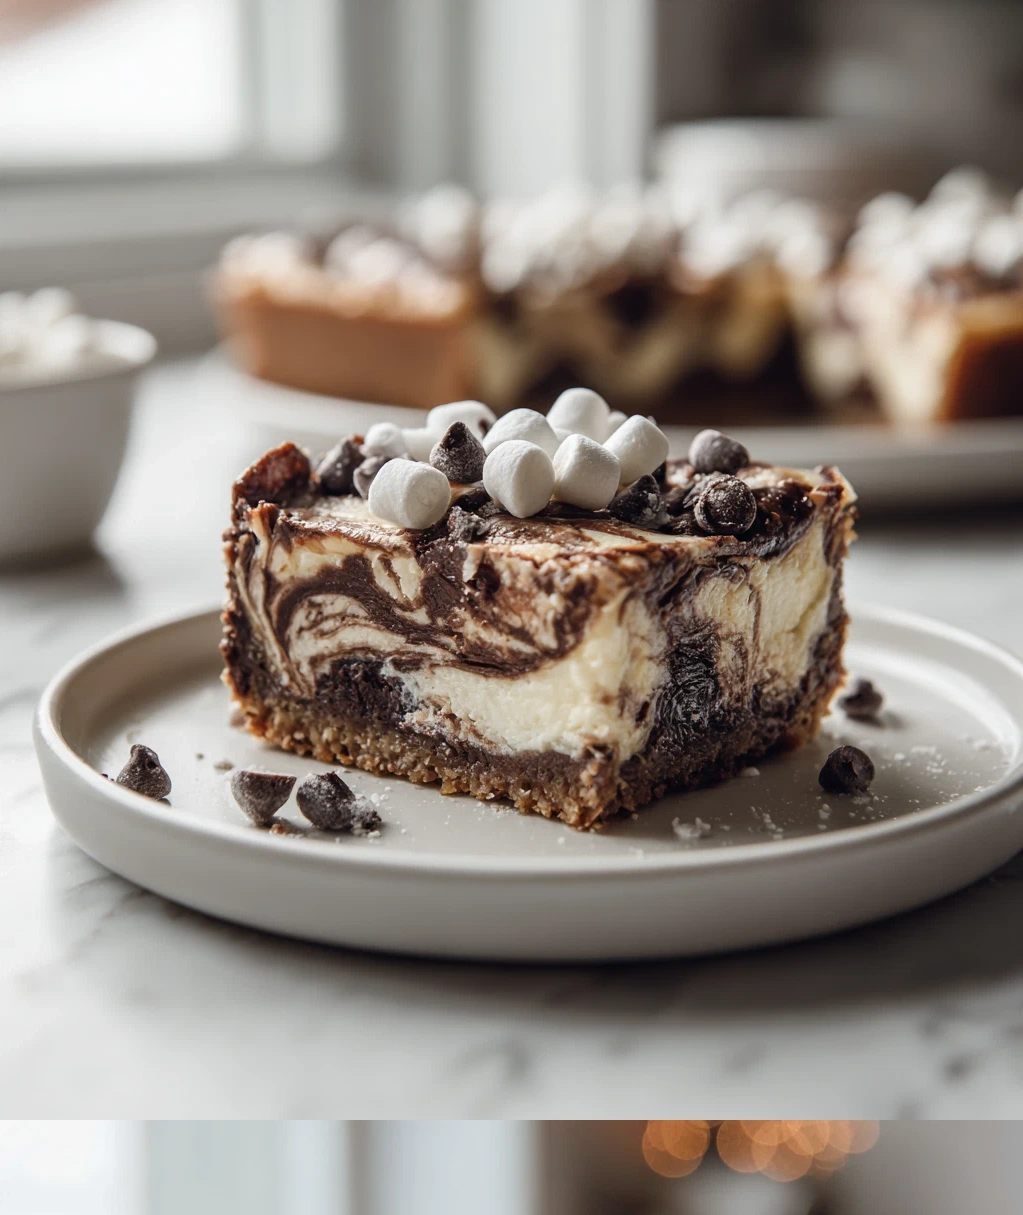
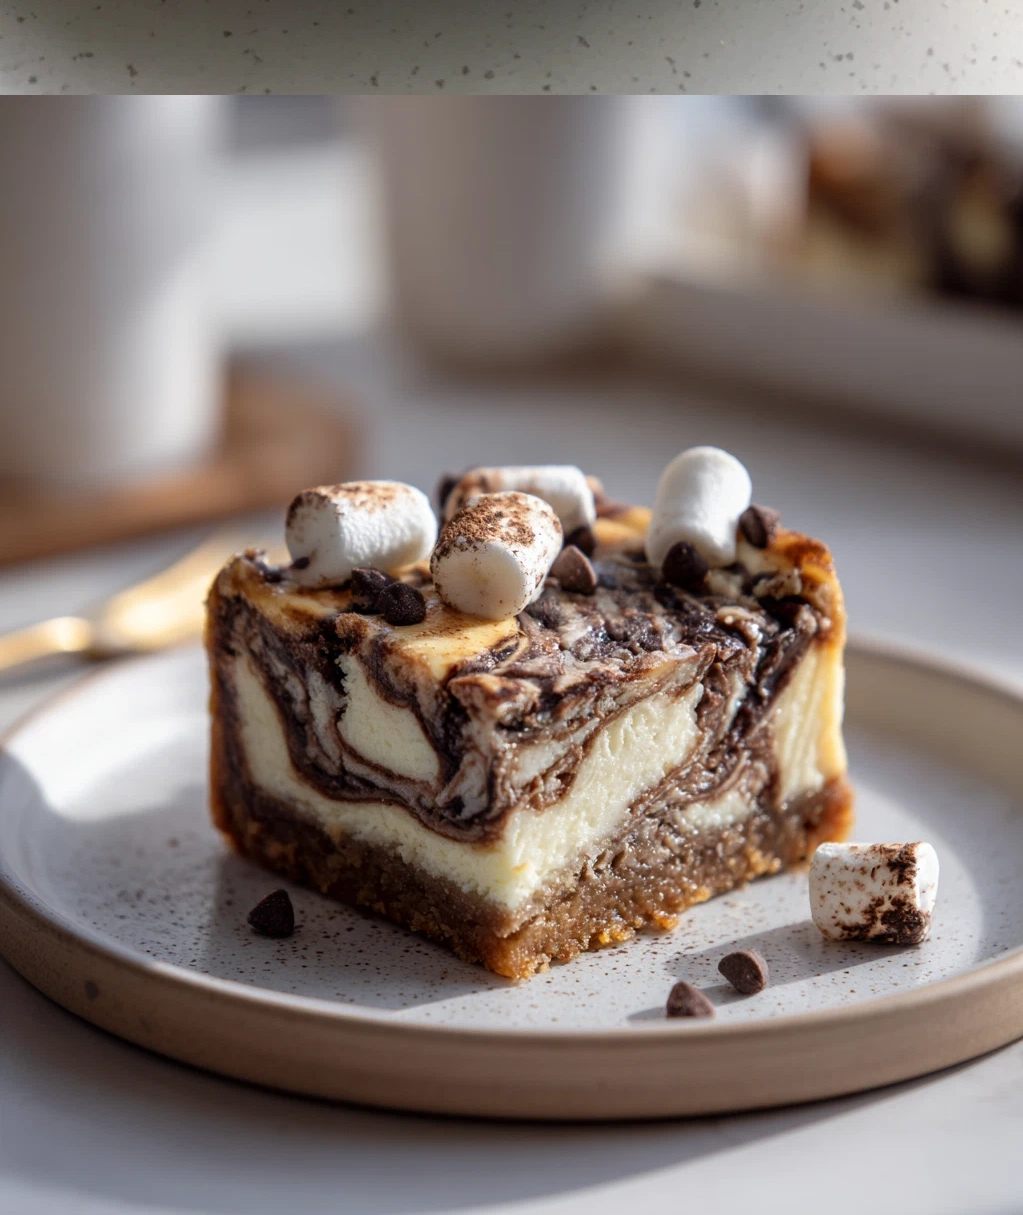
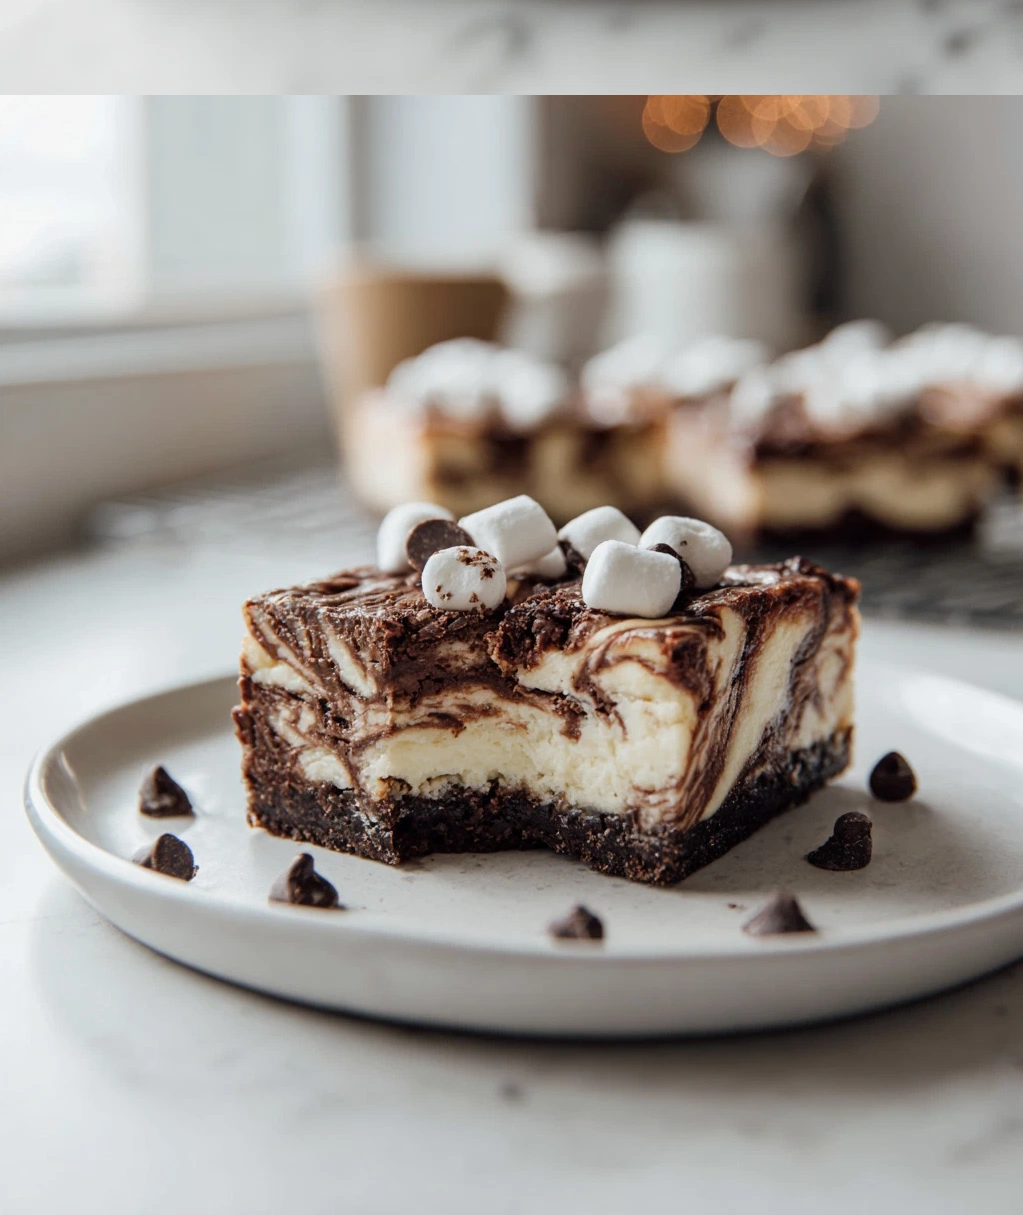
Bake for 45-50 minutes. The edges should be set, but the center will still have a slight jiggle when you gently shake the pan. That’s perfect! Turn off the oven, crack the door open, and let the bars cool in the oven for 1 hour. This prevents cracking. Then remove from the oven and let cool completely on a wire rack. Once cooled, sprinkle with mini marshmallows and chocolate chips. Refrigerate for at least 4 hours, but overnight is best.
Serving and Storing Your Cozy Hot Chocolate Cheesecake Bars
Now for the best part – enjoying your creation! Here’s how I like to serve and store these bars for maximum deliciousness.
Cutting and Serving Tips
When you’re ready to serve, use the parchment paper overhang to lift the entire slab out of the pan. Place it on a cutting board. For clean cuts, use a sharp knife dipped in hot water and wiped dry between each slice. I usually cut them into 12 large bars or 24 smaller squares, depending on the occasion.
My favorite way to serve these cozy hot chocolate cheesecake bars is slightly chilled. The texture is perfect – firm enough to hold but still creamy. You can add a dollop of whipped cream on top if you’re feeling fancy, or just enjoy them as-is. They’re rich, so smaller portions are often perfect.
Storage Instructions
These bars store beautifully. Keep them covered in the refrigerator for up to 5 days. If you need to stack them, place parchment paper between layers to prevent sticking. You can also freeze them for up to 3 months. To freeze, place cut bars on a baking sheet and freeze until solid, then transfer to a freezer-safe container with parchment between layers. Thaw in the refrigerator overnight before serving.
A quick safety note: Because these contain dairy, always store them in the refrigerator. Don’t leave them out at room temperature for more than 2 hours, especially if you’re serving them at a party. I usually keep them refrigerated until just before serving time.
Delicious Variations for Your Cozy Hot Chocolate Cheesecake Bars
One of the things I love most about this recipe is how adaptable it is. Here are some of my favorite ways to mix things up:
Seasonal Twists
For the holidays, try adding 1/2 cup of crushed peppermint candies to the chocolate portion of the batter. The mint-chocolate combination is divine. You can also sprinkle crushed candy canes on top with the marshmallows for a festive look.
In the fall, mix 1/2 teaspoon of cinnamon into the chocolate batter. It adds a warm, spicy note that pairs beautifully with the chocolate. You could even add a tablespoon of bourbon to the batter if you’re feeling adventurous – just reduce the vanilla by half.
Topping Ideas
While I love the classic mini marshmallow topping, here are some other options:
- Toasted marshmallows – arrange mini marshmallows on top and use a kitchen torch to lightly toast them
- Chocolate ganache drizzle – melt 1/2 cup chocolate chips with 1/4 cup heavy cream and drizzle over cooled bars
- Crushed toffee bits – sprinkle on top for added crunch
- Sea salt flakes – a tiny sprinkle enhances all the chocolate flavors
Dietary Adjustments
If you need to make these gluten-free, use gluten-free graham crackers for the crust. For a slightly lighter version, you can use reduced-fat cream cheese and sour cream, though the texture will be a bit less creamy. I’ve tried it both ways, and while the full-fat version is my favorite, the lighter one is still delicious.
Remember, baking is about making it work for you and your taste. Don’t be afraid to experiment once you’ve mastered the basic recipe!
Conclusion
Well, there you have it – my absolute favorite recipe for cozy hot chocolate cheesecake bars. From that first bite of creamy cheesecake with that familiar hot chocolate flavor to the satisfying texture that holds together perfectly, these bars have earned their spot in my regular baking rotation. They’re the kind of treat that makes ordinary days feel special and special occasions feel even more celebratory.
What I hope you take away from this is that baking doesn’t have to be complicated or intimidating. With a few simple ingredients and some patience (that chilling time is important!), you can create something truly wonderful. These bars have brought so much joy to my family and friends over the years, and I can’t wait for you to experience that same joy in your own kitchen.
So go ahead – preheat that oven, gather your ingredients, and get ready to fill your home with the most amazing aroma. Whether you’re baking for a party, a potluck, or just because it’s Tuesday and you deserve something sweet, these cozy hot chocolate cheesecake bars won’t disappoint. And when someone asks you for the recipe (because they will!), feel free to share it proudly. Happy baking, and enjoy every delicious bite!
Frequently Asked Questions
Q: Can I make these bars without a stand mixer?
Absolutely! While a stand mixer or hand mixer makes the process faster, you can definitely make these by hand. Just make sure your cream cheese is very soft at room temperature. Use a sturdy whisk and some elbow grease – it might take a bit longer to get that smooth, creamy texture, but it's completely doable. I've made them both ways, and they turn out great regardless.
Q: My cheesecake bars cracked in the middle. What did I do wrong?
Don't worry – cracked cheesecake still tastes amazing! Cracking usually happens from temperature changes or over-baking. To prevent it next time, make sure you cool the bars slowly in the turned-off oven with the door cracked open. Also, avoid over-beating the batter once you add the eggs – mix just until combined. And remember, the center should still have a slight jiggle when you take it out of the oven. Even if they crack, they'll still be delicious – you can always cover imperfections with extra marshmallows!
Q: Can I use a different type of chocolate for the swirl?
Yes, you can experiment with different chocolates! I prefer semi-sweet for that classic hot chocolate flavor, but milk chocolate works well too if you like things sweeter. Dark chocolate gives a more intense chocolate taste. Just make sure whatever chocolate you use is good quality – it really makes a difference in the final flavor. And always melt it gently, either in a double boiler or in short bursts in the microwave, stirring frequently.
Q: How long do I need to chill the bars before cutting?
I recommend at least 4 hours in the refrigerator, but overnight is truly best. The chilling time allows the bars to set properly so they cut cleanly and hold their shape. If you try to cut them too soon, they'll be too soft and messy. I know it's hard to wait when they smell so good, but trust me – patience pays off with perfect, neat slices.
Q: Can I make these bars ahead of time for a party?
These are actually perfect make-ahead treats! You can bake them up to 2 days in advance. Store them covered in the refrigerator, and they'll be ready to go when you need them. In fact, I think they taste even better after a day or two as the flavors have more time to develop. Just wait to add any crunchy toppings until right before serving so they don't get soggy.
PrintCozy Hot Chocolate Cheesecake Bars
- Total Time: 60
- Yield: 16 bars 1x
Description
Rich chocolate cheesecake bars with a graham cracker crust, topped with marshmallows for a comforting hot chocolate-inspired dessert.
Ingredients
1 1/2 cups graham cracker crumbs
1/3 cup unsalted butter, melted
16 oz cream cheese, softened
3/4 cup granulated sugar
2 large eggs
1/2 cup sour cream
1 tsp vanilla extract
1/2 cup unsweetened cocoa powder
1 cup mini marshmallows
1/4 cup chocolate chips for drizzle
Instructions
Step 1: Preheat oven to 325°F and line an 8×8 inch baking pan with parchment paper.
Step 2: Mix graham cracker crumbs with melted butter until combined, then press firmly into the bottom of the pan.
Step 3: In a large bowl, beat cream cheese and sugar until smooth.
Step 4: Add eggs one at a time, beating after each addition.
Step 5: Mix in sour cream, vanilla extract, and cocoa powder until fully incorporated.
Step 6: Pour cheesecake mixture over the crust and spread evenly.
Step 7: Bake for 30-35 minutes until edges are set but center is slightly jiggly.
Step 8: Remove from oven and sprinkle mini marshmallows over the top.
Step 9: Return to oven for 3-5 minutes until marshmallows are lightly toasted.
Step 10: Cool completely at room temperature, then refrigerate for at least 4 hours.
Step 11: Melt chocolate chips and drizzle over bars before cutting into squares.
- Prep Time: 20
- Cook Time: 40
- Category: Dessert
Nutrition
- Calories: 280
- Fat: 18g
- Carbohydrates: 25g
- Protein: 5g