
Cakes Dessert Ideas: Amazingly Simple Homemade Treats You’ll Absolutely Adore
Hey there, friend! I’ve been thinking about you lately, especially with all those sweet cravings hitting right about now. You know me—I’m always in the kitchen, flour on my apron and a big smile on my face, whipping up something delicious. And when it comes to cakes dessert ideas, I just can’t help myself. There’s something so special about creating a beautiful cake from scratch that fills your home with the most incredible smells and brings everyone together around the table.
I remember when I first started baking cakes, I was so nervous. I worried about everything—would it rise? Would it taste good? Would it look anything like the pictures? But here’s the thing: baking cakes for dessert doesn’t have to be complicated or stressful. Some of my favorite cakes dessert ideas are actually the simplest ones. The ones that use basic ingredients you probably already have, and come together in a way that feels almost magical.
Today, I want to share some of my absolute favorite cakes dessert ideas with you. These are the recipes I turn to when I need something special but don’t want to spend hours in the kitchen. They’re the cakes I make for birthdays, for Sunday dinners, for those “just because” moments when we all need a little sweetness. And trust me, once you try these cakes dessert ideas, you’ll understand why I get so excited about them!
My Go-To Chocolate Cake: The Ultimate Cakes Dessert Idea
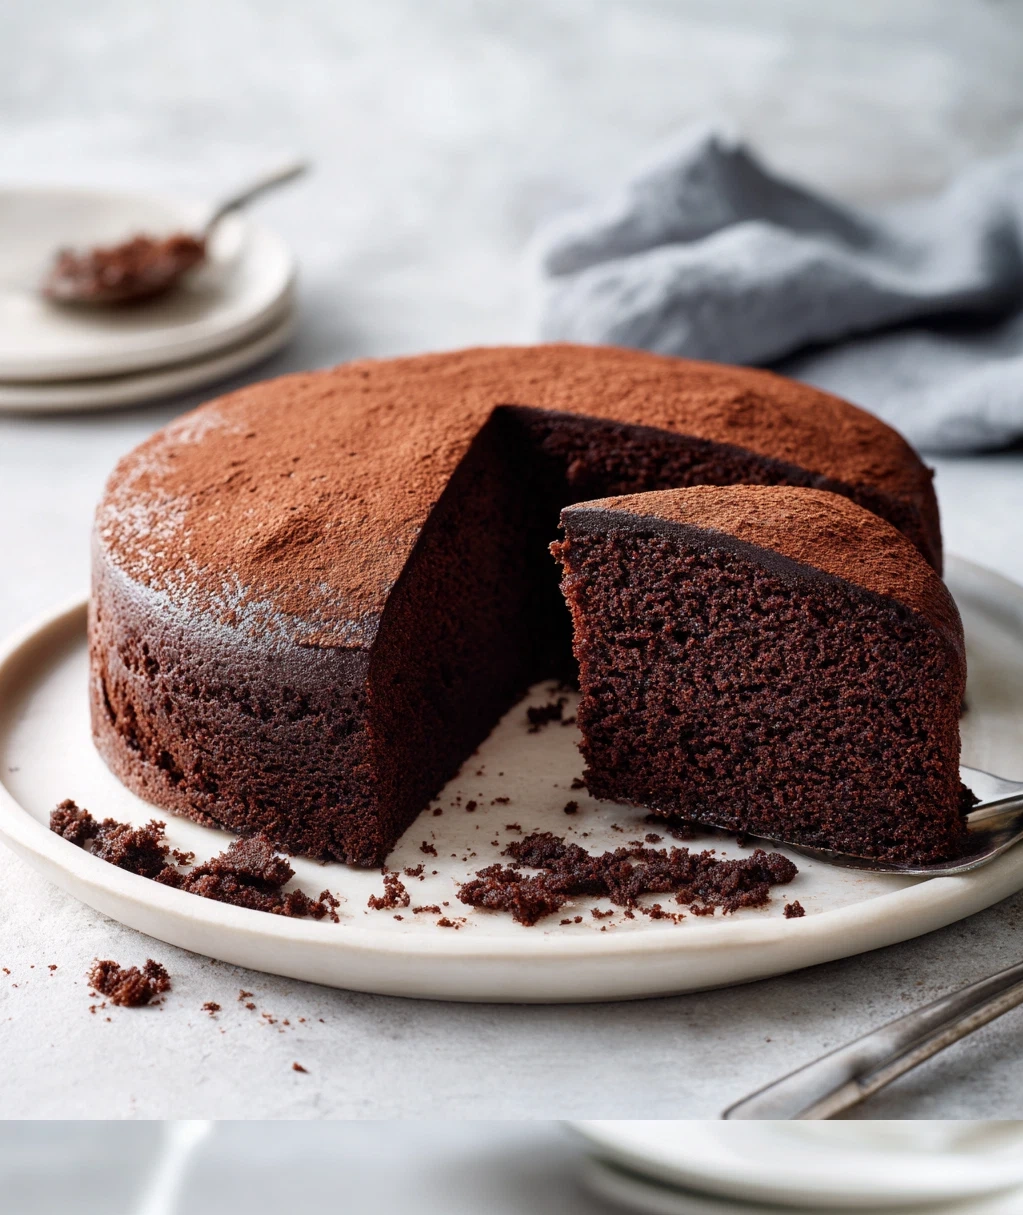
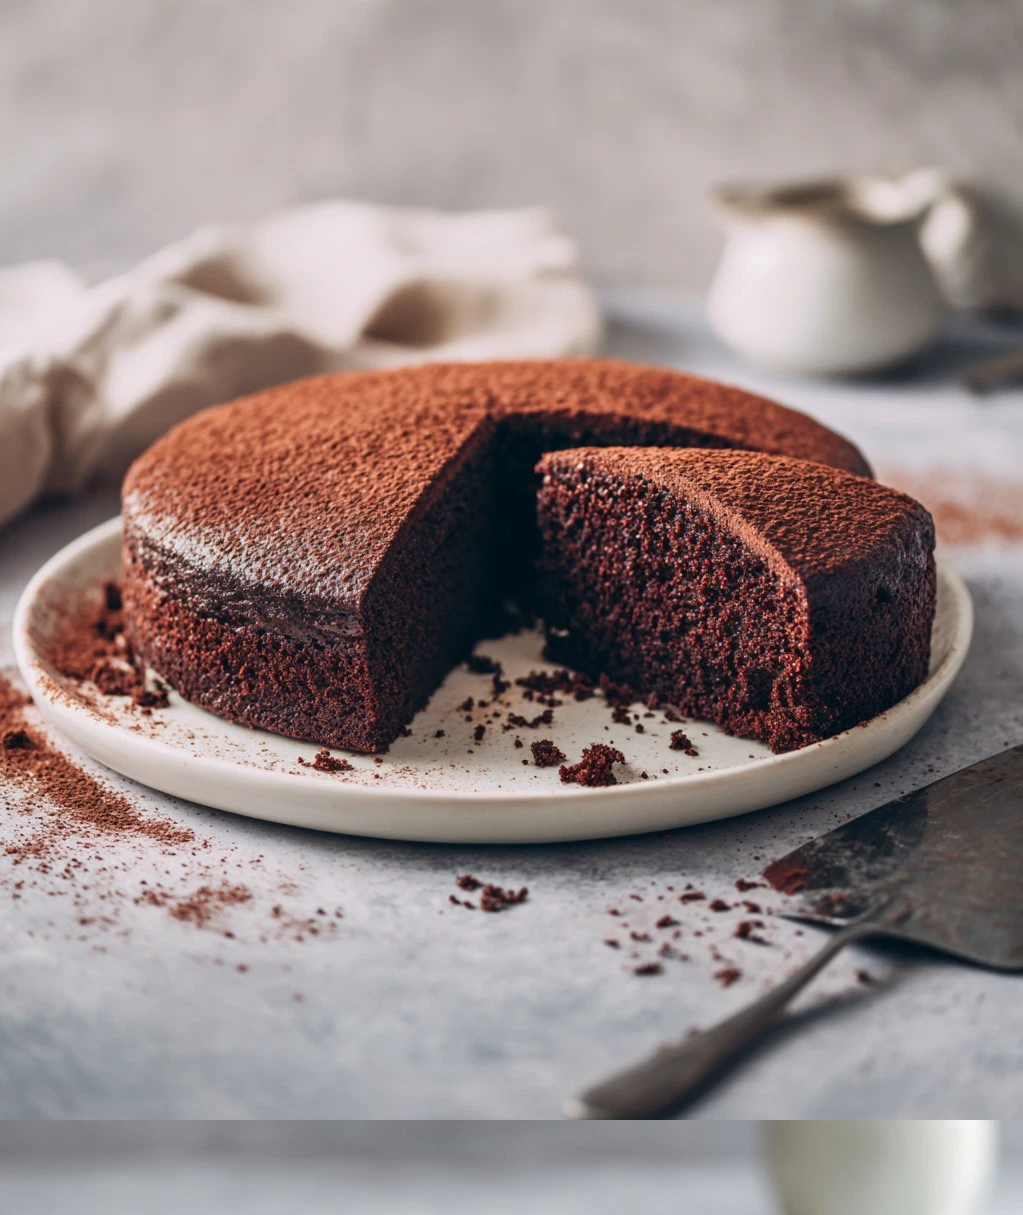
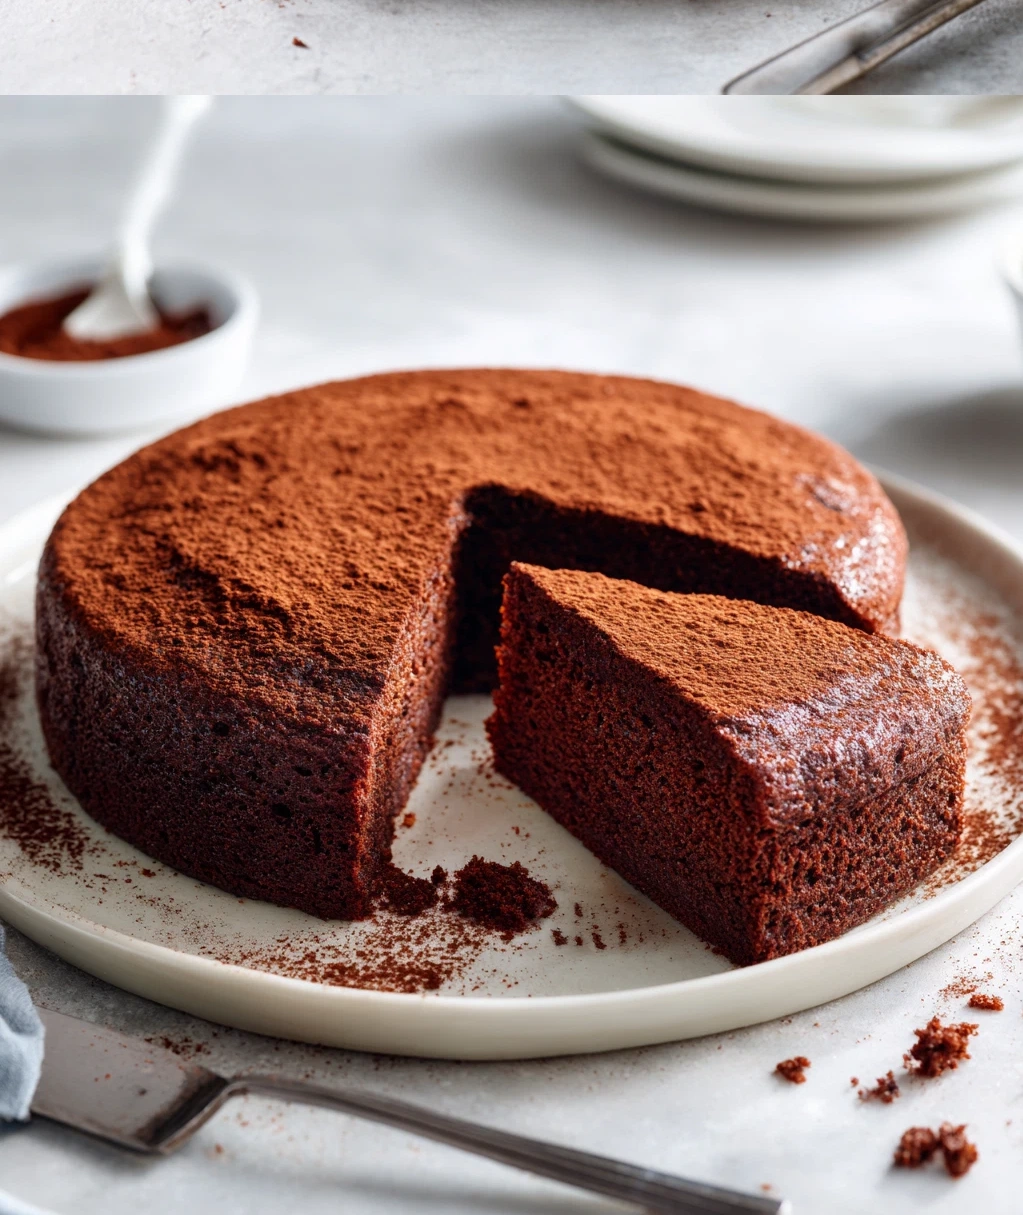
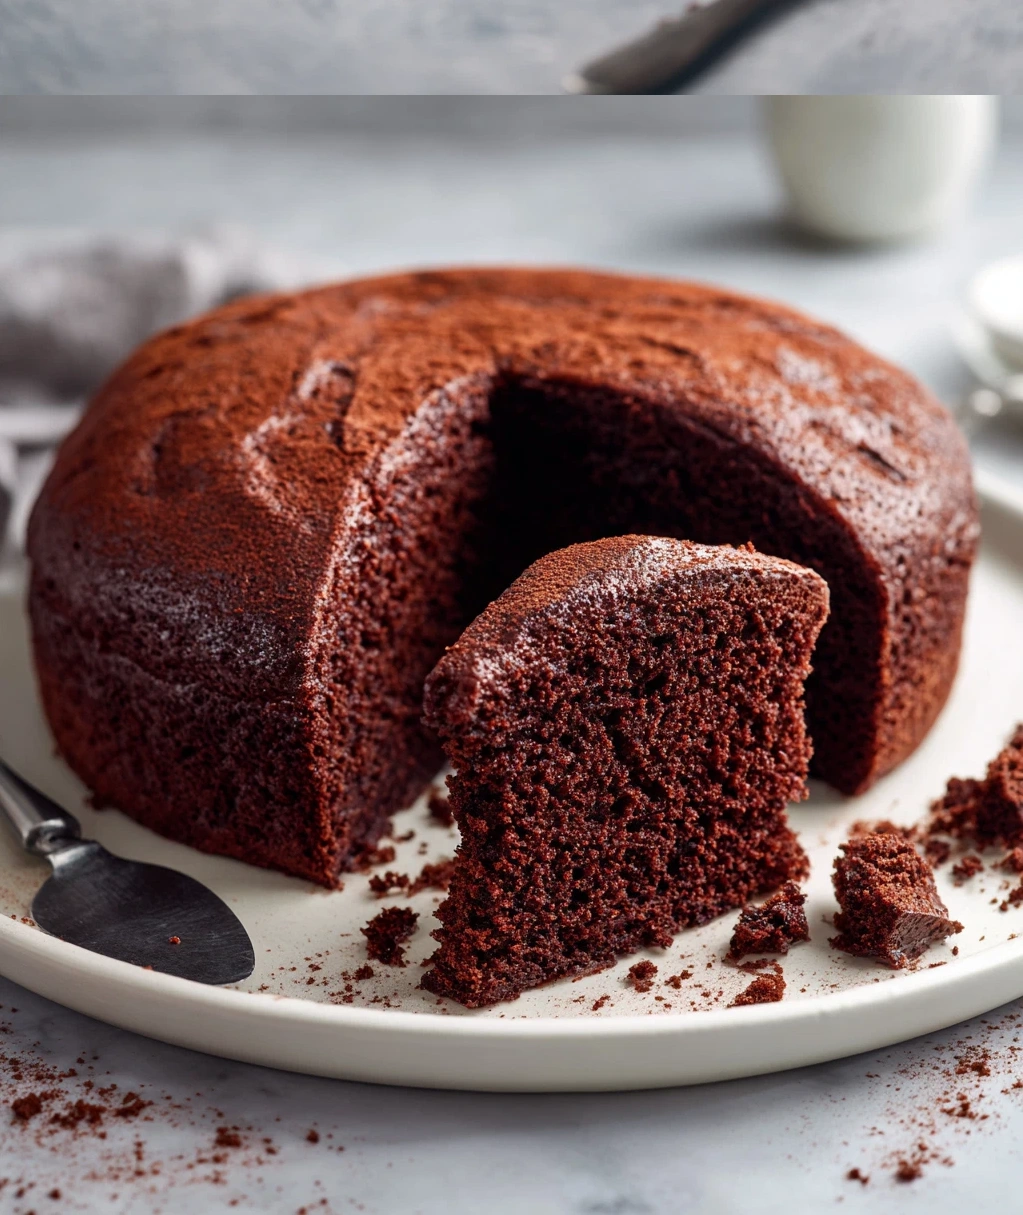
Let’s start with a classic, shall we? When I’m thinking about cakes dessert ideas, chocolate cake is always at the top of my list. There’s just something about that rich, moist chocolate flavor that makes everyone happy. This recipe is my absolute favorite—it’s the one I’ve been making for years, and it never fails to impress.
Why You’ll Love This Chocolate Cake
- It’s incredibly moist and stays that way for days
- The chocolate flavor is deep and rich without being too sweet
- It’s versatile—you can dress it up with frosting or keep it simple
- Perfect for birthdays, parties, or just because you want cake
- Uses ingredients you probably already have in your pantry
Ingredients You’ll Need
- 1 3/4 cups all-purpose flour
- 1 3/4 cups granulated sugar
- 3/4 cup unsweetened cocoa powder (I prefer Dutch-processed)
- 1 1/2 teaspoons baking powder
- 1 1/2 teaspoons baking soda
- 1 teaspoon salt
- 2 large eggs at room temperature
- 1 cup whole milk
- 1/2 cup vegetable oil
- 2 teaspoons pure vanilla extract
- 1 cup boiling water (this is the secret to that amazing texture!)
How to Make Your Perfect Chocolate Cake
- First, preheat your oven to 350°F. Grease two 9-inch round cake pans and line the bottoms with parchment paper. Trust me, the parchment paper makes all the difference when it comes time to remove the cakes!
- In a large bowl, whisk together the flour, sugar, cocoa powder, baking powder, baking soda, and salt. Make sure everything is well combined—I usually give it a good 30-second whisk.
- In another bowl, beat the eggs lightly, then add the milk, oil, and vanilla. Mix until everything is just combined. Don’t overmix at this stage!
- Now, slowly add the wet ingredients to the dry ingredients. Mix on medium speed until smooth. This should take about 2 minutes. The batter will be thick, but don’t worry—we’re about to change that!
- Here’s the magic step: carefully stir in the boiling water. The batter will become very thin, and that’s exactly what we want. It might look strange, but this is what gives the cake its incredible moistness.
- Pour the batter evenly into your prepared pans. Bake for 30-35 minutes, or until a toothpick inserted in the center comes out clean.
- Let the cakes cool in the pans for 10 minutes, then turn them out onto wire racks to cool completely. My favorite part is watching them come out perfectly—that beautiful dark color and that heavenly chocolate smell filling the kitchen!
For frosting, I love a simple chocolate buttercream, but this cake is delicious even without frosting. Sometimes I just dust it with powdered sugar and serve it with a scoop of vanilla ice cream. So good!
Lemon Blueberry Cake: A Fresh Take on Cakes Dessert Ideas
When you want something a little lighter and brighter, this lemon blueberry cake is one of my favorite cakes dessert ideas. It’s perfect for spring and summer, but honestly, I make it year-round because it’s just that good. The combination of tart lemon and sweet blueberries is absolutely divine.
What Makes This Cake Special
This isn’t your average cake. The lemon zest and juice give it such a fresh, vibrant flavor, while the blueberries add little bursts of sweetness in every bite. The texture is light and tender, almost like a pound cake but not as dense. It’s the kind of cake that feels fancy but is actually quite simple to make.
Key Ingredients
- 2 cups all-purpose flour
- 2 teaspoons baking powder
- 1/2 teaspoon salt
- 1/2 cup unsalted butter, softened
- 1 cup granulated sugar
- 2 large eggs
- Zest of 2 lemons (about 2 tablespoons)
- 1/4 cup fresh lemon juice
- 1/2 cup buttermilk (if you don’t have buttermilk, you can make your own by adding 1 1/2 teaspoons lemon juice to regular milk and letting it sit for 5 minutes)
- 1 1/2 cups fresh blueberries (frozen work too, but don’t thaw them first)
- 1 tablespoon flour for tossing the blueberries
Simple Steps to Lemon Blueberry Bliss
- Start by preheating your oven to 350°F. Grease a 9-inch springform pan or a regular cake pan. I like using a springform because it makes removing the cake so much easier.
- In a medium bowl, whisk together the flour, baking powder, and salt. Set this aside for now.
- In a large bowl, cream the butter and sugar together until light and fluffy. This should take about 3-4 minutes with an electric mixer. Don’t rush this step—it’s important for creating that lovely texture!
- Add the eggs one at a time, beating well after each addition. Then mix in the lemon zest.
- Now, add about one-third of the flour mixture to the butter mixture, mixing just until combined. Follow with half of the buttermilk, then another third of flour, the rest of the buttermilk mixed with lemon juice, and finally the last of the flour. Mix just until everything comes together—overmixing will make the cake tough.
- Toss the blueberries with that tablespoon of flour. This helps prevent them from sinking to the bottom of the cake. Gently fold them into the batter.
- Pour the batter into your prepared pan and smooth the top. Bake for 45-55 minutes, or until golden brown and a toothpick comes out clean (except for maybe a little blueberry juice!).
- Let the cake cool in the pan for 15 minutes before removing it to a wire rack. The smell of lemon and blueberries baking together is absolutely heavenly!
I like to make a simple lemon glaze with powdered sugar and lemon juice to drizzle over the top. It adds just the right amount of sweetness and makes the cake look so pretty. Serve it with a cup of tea or coffee, and you’ve got the perfect afternoon treat.
No-Bake Cheesecake: Easy Cakes Dessert Ideas for Busy Days
Okay, I know what you’re thinking—cheesecake isn’t technically a cake. But when we’re talking about cakes dessert ideas that are easy and impressive, this no-bake cheesecake absolutely deserves a spot on the list. It’s perfect for those days when you want something delicious but don’t want to turn on the oven. Plus, it’s so creamy and satisfying!
Why This Cheesecake Works So Well
This recipe gives you all the rich, creamy texture of traditional cheesecake without any of the baking stress. No worrying about cracks or water baths! It sets up beautifully in the refrigerator, and you can customize it in so many ways. Add different toppings, mix in fruit purees, or keep it classic with just a graham cracker crust and some berries on top.
What You’ll Need
- For the crust:
- 2 cups graham cracker crumbs (about 15 full sheets)
- 1/4 cup granulated sugar
- 1/2 cup unsalted butter, melted
- For the filling:
- 16 ounces cream cheese, softened to room temperature
- 1 cup powdered sugar
- 1 teaspoon pure vanilla extract
- 1 cup heavy whipping cream, cold
- For topping (optional):
- Fresh berries
- Chocolate sauce
- Caramel drizzle
Making Your No-Bake Masterpiece
- First, make the crust. In a medium bowl, mix the graham cracker crumbs and sugar. Pour in the melted butter and stir until all the crumbs are moistened. The mixture should hold together when you pinch it.
- Press the crust mixture firmly into the bottom of a 9-inch springform pan. I like to use the bottom of a measuring cup to press it down evenly. Make sure you get it nice and compact!
- Place the crust in the refrigerator while you make the filling. This helps it set up a bit.
- Now for the filling. In a large bowl, beat the cream cheese until it’s smooth and creamy. This might take a couple of minutes—you want to make sure there are no lumps.
- Add the powdered sugar and vanilla extract to the cream cheese. Beat until everything is well combined and smooth.
- In a separate bowl, whip the heavy cream until stiff peaks form. Be careful not to over-whip it or you’ll end up with butter!
- Gently fold the whipped cream into the cream cheese mixture. Use a rubber spatula and fold gently until no white streaks remain. You want to keep as much air in the mixture as possible for that light, creamy texture.
- Pour the filling over your chilled crust. Smooth the top with your spatula.
- Cover the cheesecake with plastic wrap and refrigerate for at least 6 hours, but overnight is even better. The waiting is the hardest part, I know!
When you’re ready to serve, run a knife around the edge of the pan before releasing the springform. Top with fresh berries or your favorite sauce. The texture is so smooth and creamy—it just melts in your mouth. This is one of those cakes dessert ideas that always gets compliments, and no one will believe how easy it was to make!
Tips for Perfect Cakes Every Time
Now that I’ve shared some of my favorite cakes dessert ideas, I want to give you a few tips that have helped me become a better baker over the years. These are the little things that make a big difference in how your cakes turn out.
Measure Your Ingredients Correctly
This might seem obvious, but it’s so important! For dry ingredients like flour, I always use the spoon-and-level method. Don’t scoop directly from the bag with your measuring cup—that packs in too much flour. Instead, spoon the flour into your measuring cup, then level it off with a straight edge. For liquids, use clear liquid measuring cups and check at eye level.
Room Temperature Ingredients Matter
When a recipe calls for room temperature eggs, butter, or dairy, don’t skip this step! Room temperature ingredients blend together much more easily and create a smoother batter. This leads to better texture in your finished cake. If you forget to take things out ahead of time, you can quickly bring eggs to room temperature by placing them in a bowl of warm water for 5-10 minutes. For butter, cut it into small pieces—it will soften faster.
Don’t Overmix Your Batter
This is probably the most common mistake I see people make. Once you add the flour to your wet ingredients, mix just until everything is combined. Overmixing develops the gluten in the flour, which can make your cake tough or dense. A few small lumps are okay—they’ll work themselves out during baking.
Test for Doneness Properly
Always use a toothpick or cake tester to check if your cake is done. Insert it into the center of the cake—if it comes out clean or with just a few moist crumbs (not wet batter), your cake is ready. Don’t rely solely on the timer or how the top looks. And remember, the cake will continue to cook a little as it cools in the pan.
Cool Your Cakes Correctly
Let your cakes cool in the pan for about 10-15 minutes before turning them out onto a wire rack. This gives them time to set up so they don’t fall apart. But don’t leave them in the pan too long, or they might get soggy from the steam. Once they’re on the wire rack, let them cool completely before frosting. If you try to frost a warm cake, the frosting will just melt right off!
These tips might seem small, but they really do make a difference. Once you get the hang of them, you’ll find that all your cakes dessert ideas turn out better than ever. And remember—practice makes perfect. Don’t get discouraged if a cake doesn’t turn out exactly how you wanted. Every baker has had cakes that didn’t rise properly or got a little overbaked. It happens to all of us!
Conclusion
Well, there you have it—some of my absolute favorite cakes dessert ideas to try in your own kitchen. From that rich chocolate cake to the bright lemon blueberry version and the easy no-bake cheesecake, I hope these recipes inspire you to get baking and create some sweet memories with the people you love.
What I love most about these cakes dessert ideas is how adaptable they are. Once you master the basic techniques, you can start experimenting with different flavors and combinations. Try adding orange zest instead of lemon, or mix some chopped nuts into the chocolate cake batter. Use different berries in the lemon cake, or add a swirl of fruit puree to the cheesecake filling. The possibilities are endless!
Remember, baking should be fun, not stressful. Don’t worry if your first attempt isn’t perfect. My very first chocolate cake was so dense you could have used it as a doorstop! But I kept trying, and now baking cakes is one of my favorite things to do. The kitchen smells amazing, everyone gathers around waiting for a taste, and there’s just something so satisfying about creating something delicious with your own hands.
So pick one of these cakes dessert ideas and give it a try this weekend. Invite some friends over, put on some music, and enjoy the process. And when you pull that beautiful cake out of the oven (or refrigerator!), take a moment to appreciate what you’ve created. Then dig in and enjoy every delicious bite. Happy baking, my friend!
Frequently Asked Questions
Q: Can I make these cakes dessert ideas ahead of time?
Absolutely! All of these cakes keep well. The chocolate and lemon cakes can be baked a day ahead—just store them tightly wrapped at room temperature. The cheesecake needs to be made at least 6 hours ahead, but overnight is even better. You can frost or glaze the cakes the day you plan to serve them for the freshest look and texture.
Q: What if I don't have buttermilk for the lemon blueberry cake?
No problem! You can make a quick buttermilk substitute by adding 1 1/2 teaspoons of lemon juice or white vinegar to 1/2 cup of regular milk. Let it sit for 5-10 minutes until it thickens slightly, then use it in the recipe. This works perfectly for cakes and gives you that same tender texture.
Q: How do I prevent my cakes from sticking to the pan?
I always use parchment paper circles cut to fit the bottom of my pans. After greasing the pan, place the parchment circle in the bottom—it makes removing the cakes so much easier. Also, make sure to let your cakes cool in the pan for about 10-15 minutes before trying to remove them. They need that time to set up properly.
Q: Can I freeze these cakes for later?
Yes! All three cakes freeze beautifully. Wrap unfrosted cakes tightly in plastic wrap, then in aluminum foil. They'll keep for up to 3 months in the freezer. Thaw them overnight in the refrigerator, then bring to room temperature before serving or frosting. The cheesecake can be frozen whole or in slices—just wrap it well to prevent freezer burn.
Q: What's the best way to store leftover cake?
For frosted cakes, store them in an airtight container in the refrigerator for up to 5 days. Unfrosted cakes can be kept at room temperature for 2-3 days if tightly wrapped. The cheesecake must always be refrigerated. If your cake starts to dry out, you can refresh it by microwaving individual slices for 10-15 seconds—it brings back that just-baked texture!
PrintOne-Bowl Vanilla Sheet Cake with Whipped Cream Frosting
- Total Time: 45
- Yield: 12 servings 1x
Description
A simple, moist vanilla sheet cake with light whipped cream frosting – perfect for easy homemade dessert gatherings.
Ingredients
2 cups all-purpose flour
1 1/2 cups granulated sugar
3 teaspoons baking powder
1/2 teaspoon salt
1/2 cup unsalted butter, softened
1 cup whole milk
2 large eggs
2 teaspoons vanilla extract
2 cups heavy whipping cream
1/4 cup powdered sugar
1 teaspoon vanilla extract (for frosting)
Instructions
Step 1: Preheat oven to 350°F (175°C) and grease a 9×13-inch baking pan.
Step 2: In a large bowl, whisk together flour, sugar, baking powder, and salt.
Step 3: Add softened butter, milk, eggs, and 2 teaspoons vanilla extract to the dry ingredients.
Step 4: Beat with an electric mixer on medium speed for 2 minutes until smooth and well combined.
Step 5: Pour batter into prepared pan and spread evenly.
Step 6: Bake for 25-30 minutes until a toothpick inserted in center comes out clean.
Step 7: Let cake cool completely in pan on a wire rack.
Step 8: For frosting, beat heavy cream, powdered sugar, and 1 teaspoon vanilla extract until stiff peaks form.
Step 9: Spread whipped cream frosting evenly over cooled cake.
Step 10: Slice and serve immediately, or refrigerate until ready to serve.
- Prep Time: 15
- Cook Time: 30
- Category: Dessert
Nutrition
- Calories: 320
- Fat: 18g
- Carbohydrates: 36g
- Protein: 4g