
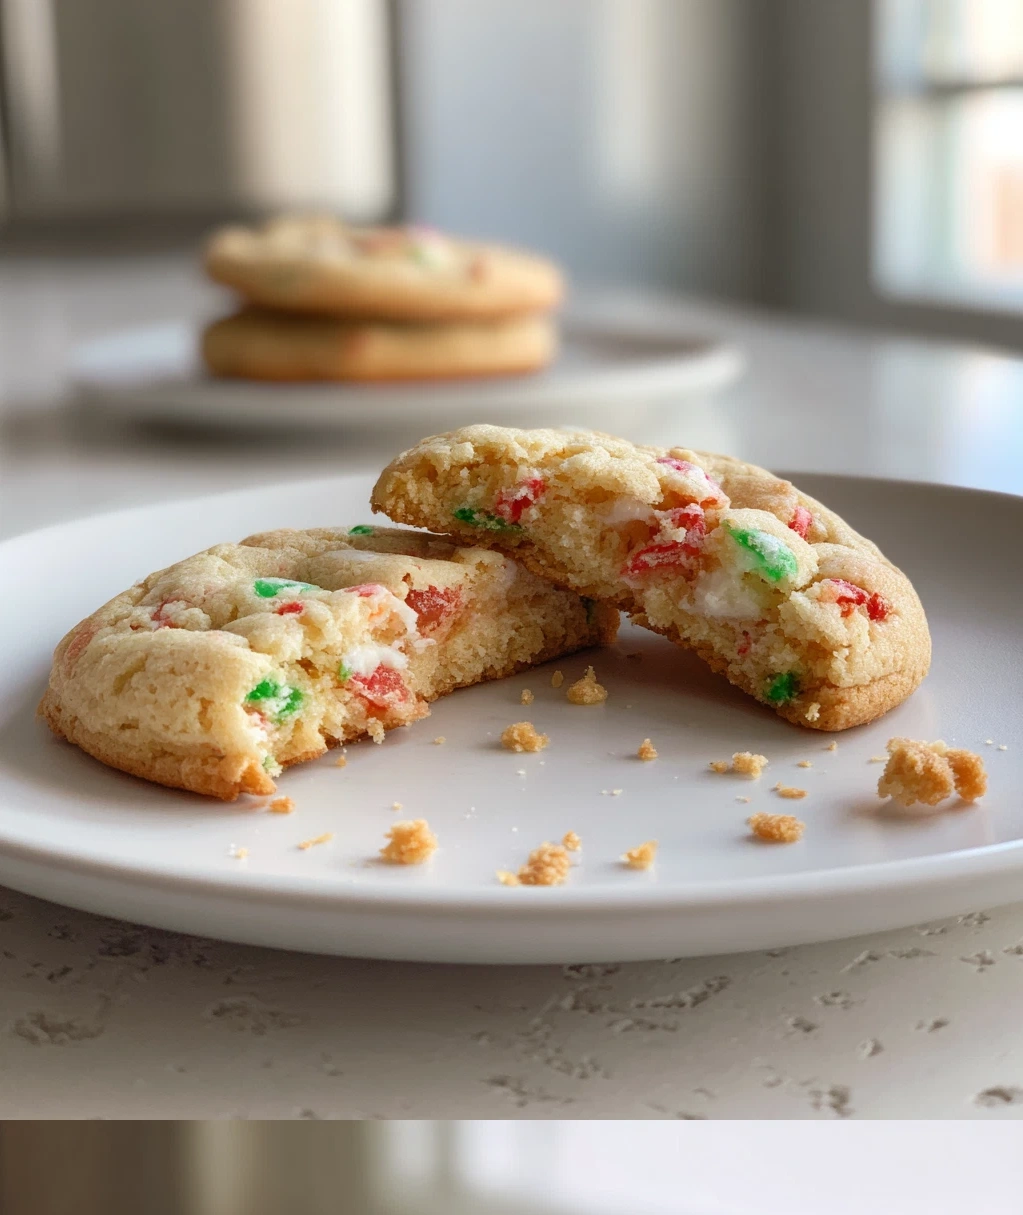
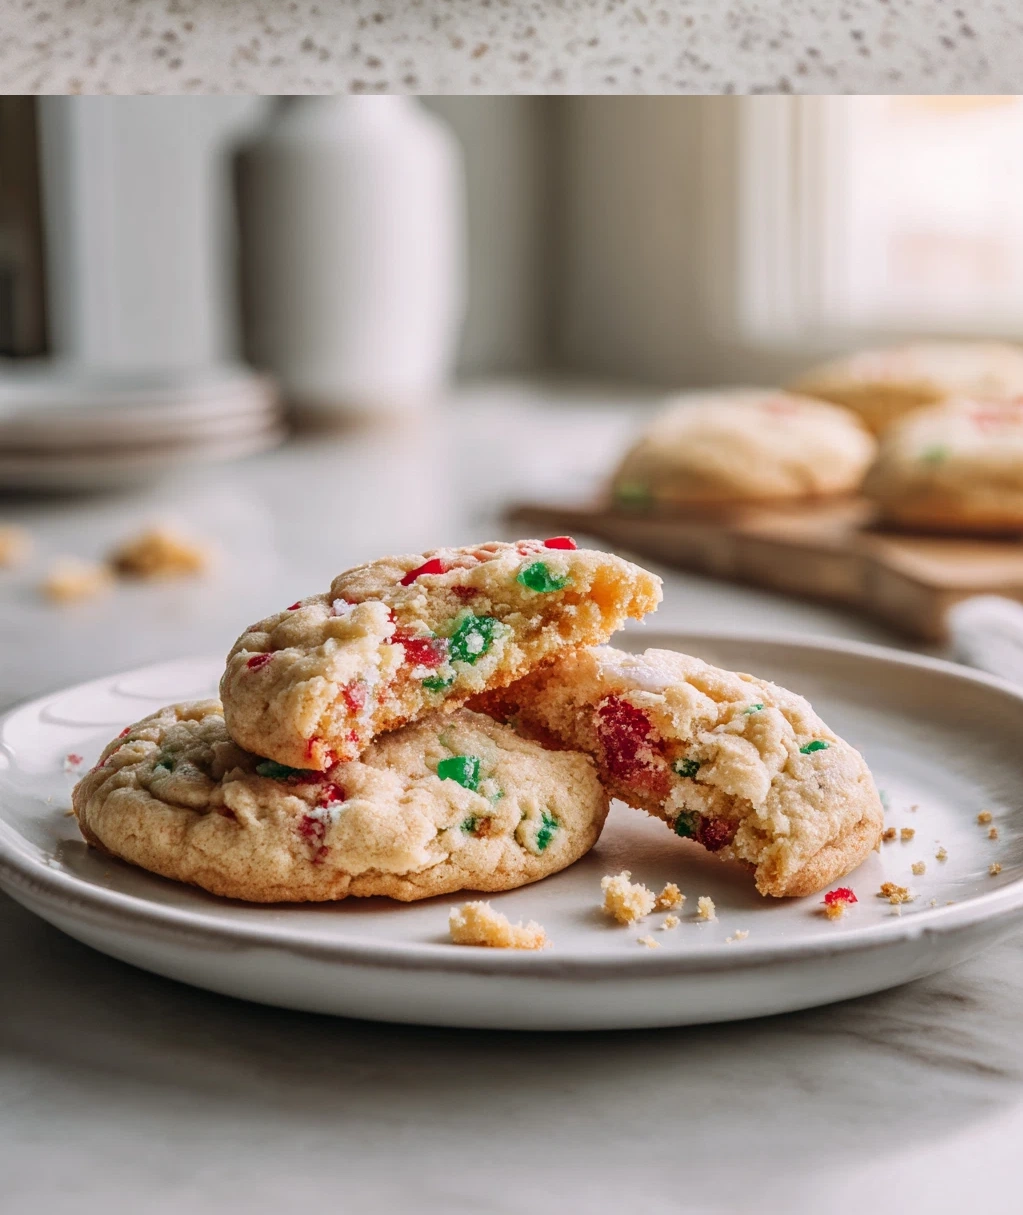
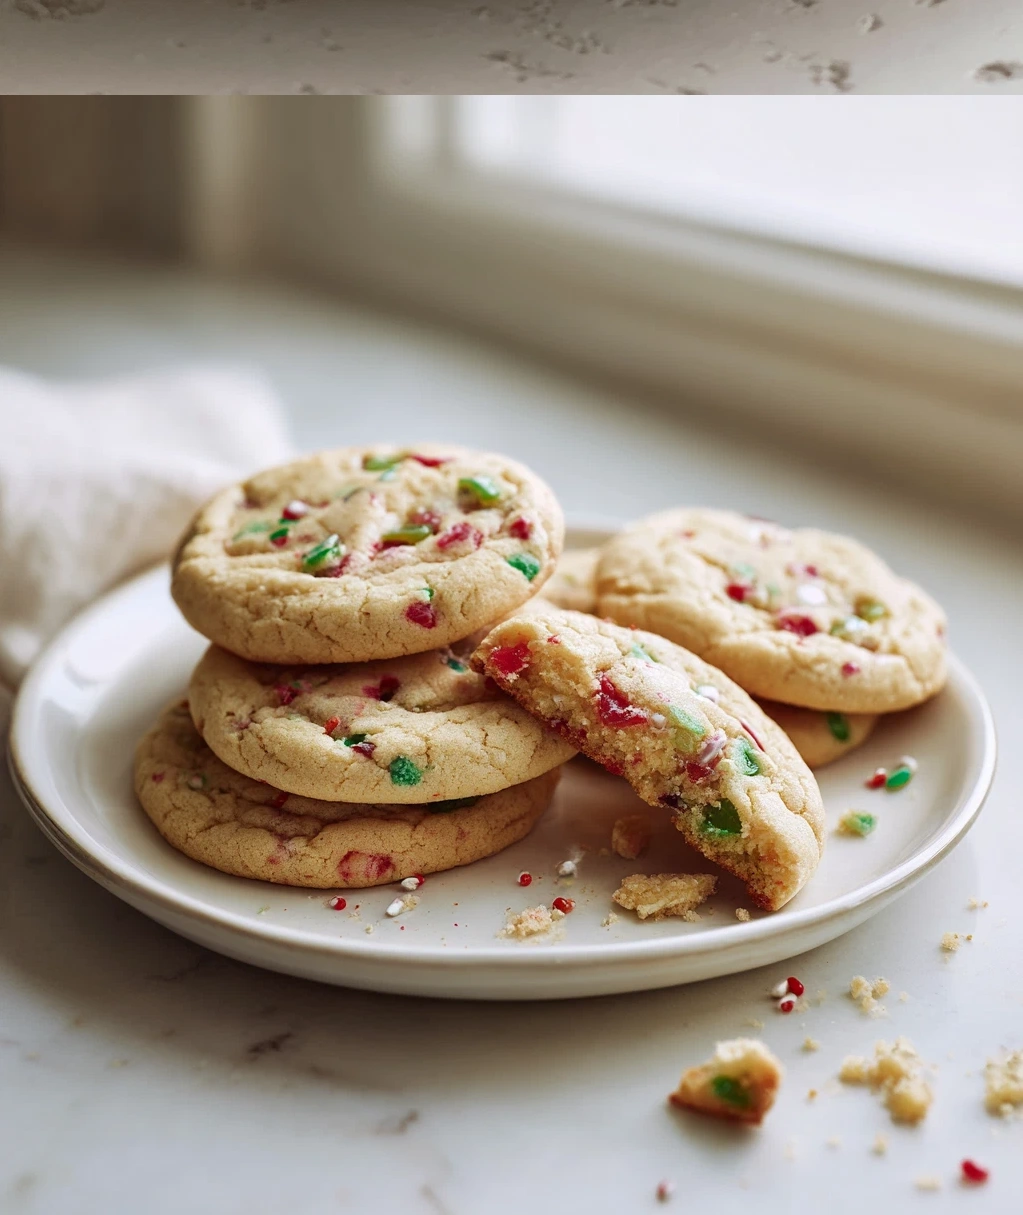
Retro Christmas Gumdrop Cookies: Delightfully Festive Holiday Treats
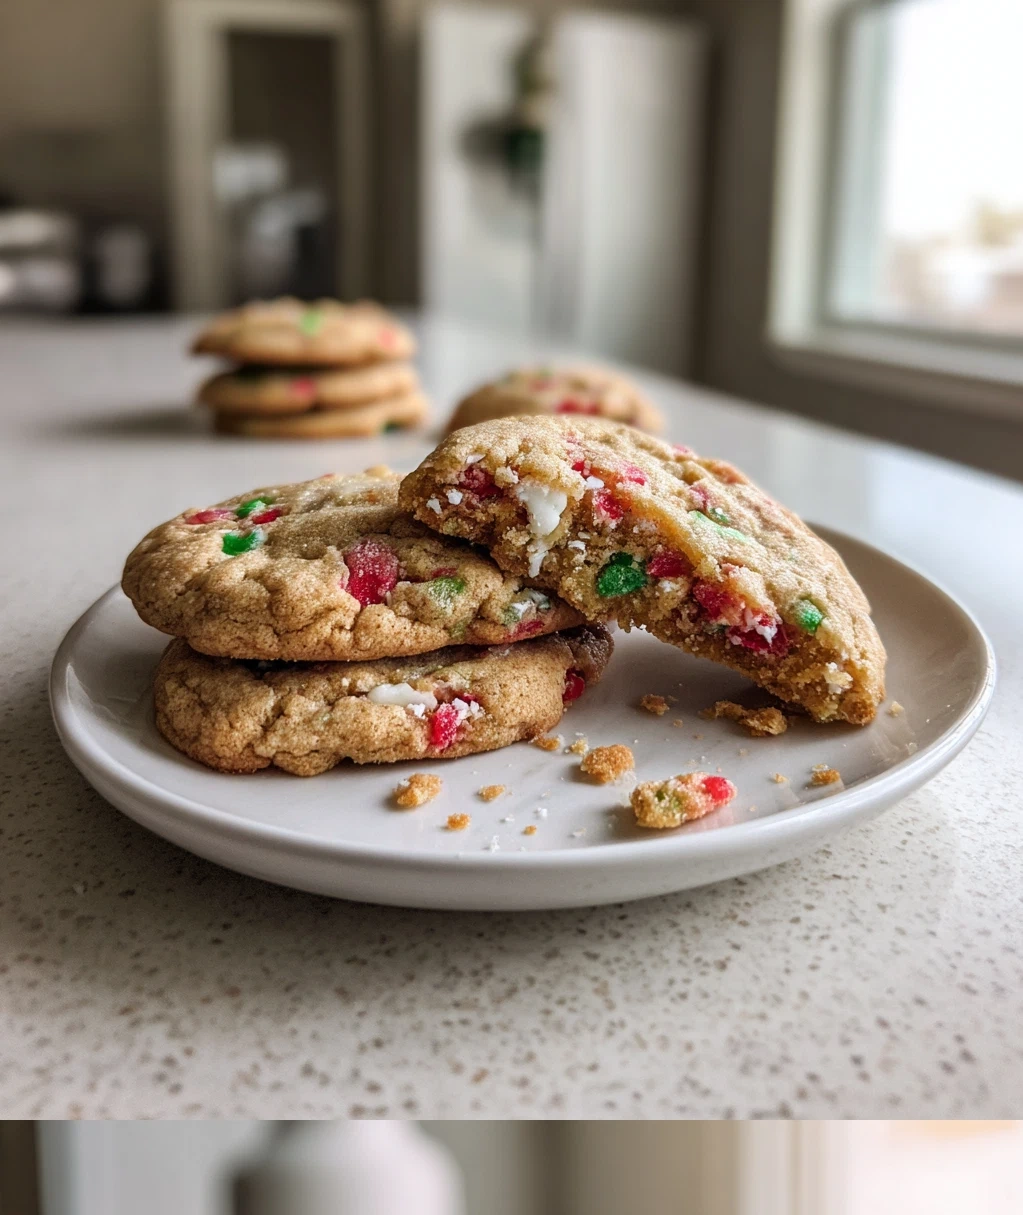
I’ve always believed that some of the best Christmas memories are baked right into our kitchens. You know what I mean—that warm, sugary scent that fills the house, the colorful sprinkles on the counter, and those little hands sneaking bits of dough when they think you’re not looking. For me, nothing captures that cozy holiday spirit quite like retro Christmas gumdrop cookies. These cheerful treats were a staple at my grandma’s house every December, and now they’ve become my family’s favorite tradition too.
What makes retro Christmas gumdrop cookies so special? It’s not just their sweet, buttery flavor or their festive appearance. It’s the way they transport you back to simpler times—to Christmases past where everything felt magical and the biggest worry was whether the cookies would cool before you could decorate them. These cookies are more than just dessert; they’re little edible pieces of nostalgia that bring people together.
I’m going to walk you through my family’s treasured recipe, the one my grandma wrote on an index card that’s now splattered with butter and sugar stains. Don’t worry if you’re not an experienced baker—these cookies are surprisingly simple to make, and I’ll share all my tips for getting them perfect every time. Whether you’re baking for a cookie exchange, leaving them out for Santa, or just wanting to fill your home with that wonderful Christmas smell, these retro Christmas gumdrop cookies are exactly what you need.
Why You'll Love These Retro Christmas Gumdrop Cookies
Let me tell you why these cookies have earned a permanent spot on my holiday baking list. First, they’re incredibly nostalgic. There’s something about those colorful gumdrops that just screams “Christmas!” in the best possible way. Every bite takes me back to childhood—to sitting at my grandma’s kitchen table with a glass of milk and watching the twinkle lights on the tree.
But beyond the nostalgia, here are the practical reasons you’ll love them:
- They’re surprisingly easy to make—you don’t need any fancy equipment or hard-to-find ingredients
- The dough comes together quickly and handles beautifully, making it perfect for baking with kids
- They stay soft and chewy for days (if they last that long!)
- The colorful gumdrops make them look festive without any complicated decorating
- They freeze beautifully, so you can bake ahead for the busy holiday season
My favorite part is how adaptable they are. You can use whatever gumdrops you find at the store, mix up the colors to match your decor, or even add a little extra spice if you’re feeling adventurous. And trust me, the smell while they’re baking? Pure Christmas magic.
Ingredients for Perfect Retro Christmas Gumdrop Cookies
One of the things I love most about these cookies is how simple the ingredient list is. You probably have most of these in your pantry right now! Here’s what you’ll need:
- 2 ¼ cups all-purpose flour
- 1 teaspoon baking soda
- 1 teaspoon salt
- 1 cup (2 sticks) unsalted butter, softened to room temperature
- ¾ cup granulated sugar
- ¾ cup packed brown sugar
- 2 large eggs
- 2 teaspoons vanilla extract
- 2 cups chopped gumdrops (about 12 ounces)
- Optional: ½ cup chopped nuts (I love pecans or walnuts)
A few important notes about the ingredients: Make sure your butter is truly softened, not melted. I usually take mine out of the fridge about an hour before I start baking. Room temperature butter creams beautifully with the sugars, giving you that perfect cookie texture.
For the gumdrops, you can use any kind you like. I’m partial to the traditional fruit-flavored ones, but spiced gumdrops work wonderfully too. Chop them into small pieces—about the size of chocolate chips—so they distribute evenly throughout the cookies. A quick tip: if your gumdrops are sticky, dust your knife or kitchen shears with a little flour before chopping. It makes the process so much easier!
If you’re adding nuts, toast them first. Just spread them on a baking sheet and pop them in a 350°F oven for 5-7 minutes until fragrant. It brings out their flavor and adds a lovely crunch to contrast with the chewy gumdrops.
How to Make Retro Christmas Gumdrop Cookies Step by Step
Ready to bake? Let’s get started! I’ll walk you through each step, just like I would if we were baking together in my kitchen.
First, preheat your oven to 375°F. Line your baking sheets with parchment paper or silicone baking mats. This prevents sticking and makes cleanup a breeze.
Now for the dough:
- In a medium bowl, whisk together the flour, baking soda, and salt. Set this aside.
- In a large bowl, beat the softened butter, granulated sugar, and brown sugar together until light and fluffy. This should take about 2-3 minutes with a hand mixer or stand mixer.
- Add the eggs one at a time, beating well after each addition. Then mix in the vanilla extract.
- Gradually add the flour mixture to the butter mixture, mixing on low speed just until combined. Don’t overmix here!
- Gently fold in the chopped gumdrops and nuts (if using) with a spatula.
Time to shape the cookies! Drop rounded tablespoons of dough onto your prepared baking sheets, spacing them about 2 inches apart. They’ll spread as they bake. If you want perfectly round cookies, you can roll the dough into balls between your palms, but I usually just use a cookie scoop—it’s faster and gives consistent results.
Bake for 9-11 minutes, until the edges are golden brown but the centers still look slightly soft. Every oven is different, so start checking at 9 minutes. The cookies will continue to set as they cool on the baking sheet.
Here’s my favorite trick: Let the cookies cool on the baking sheet for 5 minutes before transferring them to a wire rack. This helps them firm up enough to move without breaking, but they’re still warm enough to enjoy with a glass of milk.
Safety tip: Always use oven mitts when handling hot baking sheets, and keep kids and pets away from the oven area while baking.
Creative Variations for Your Retro Christmas Gumdrop Cookies
Once you’ve mastered the basic recipe, have fun playing with variations! These retro Christmas gumdrop cookies are wonderfully adaptable.
For a citrus twist, add the zest of one orange or lemon to the dough. It brightens up the flavor beautifully. You could also swap the vanilla extract for almond extract—just use half the amount since almond extract is more potent.
Feeling extra festive? Try these ideas:
- Use only red and green gumdrops for a classic Christmas color scheme
- Mix in some chopped dried cranberries or cherries along with the gumdrops
- Add a teaspoon of cinnamon or pumpkin pie spice to the flour mixture
- Drizzle cooled cookies with a simple glaze made from powdered sugar and milk
- Press a whole gumdrop into the top of each cookie before baking for extra decoration
If you’re baking for someone with dietary restrictions, you can make some substitutions. Use gluten-free flour blend for a gluten-free version, or swap the butter for plant-based butter for dairy-free cookies. The texture might vary slightly, but they’ll still be delicious.
My kids love making “cookie pizzas”—we press the dough into a greased pizza pan and bake it as one giant cookie, then decorate with gumdrops after it cools. It’s messy, fun, and makes for a great photo op!
Remember, baking should be joyful, especially during the holidays. Don’t stress about making everything perfect. Some of my favorite cookies have been the ones that came out a little lopsided or had gumdrops that melted into colorful swirls. That’s part of their homemade charm.
Storing and Serving Your Retro Christmas Gumdrop Cookies
Now that you’ve baked these beautiful retro Christmas gumdrop cookies, let’s talk about how to keep them fresh and serve them in style.
First, make sure your cookies are completely cool before storing them. Any warmth will create condensation in your container, making them soggy. I usually let mine cool on the rack for at least an hour.
For short-term storage (up to a week), place the cookies in an airtight container at room temperature. You can layer them with parchment paper between layers to prevent sticking. They’ll stay soft and chewy for about 5-7 days this way.
Want to bake ahead? These cookies freeze beautifully! Here’s how:
- Freeze unbaked dough: Scoop the dough into balls and place them on a baking sheet. Freeze until solid (about 2 hours), then transfer to a freezer bag. They’ll keep for up to 3 months. When you’re ready to bake, just place frozen dough balls on a baking sheet and add 1-2 minutes to the baking time.
- Freeze baked cookies: Place completely cooled cookies in a single layer in a freezer-safe container with parchment between layers. They’ll keep for 2-3 months. Thaw at room temperature before serving.
For serving, I love putting these cookies on a vintage Christmas platter or in a festive tin. They make wonderful gifts—just layer them in a clear cellophane bag tied with a ribbon, or pack them in a decorative box. I always include a little note with the recipe name so people know what they’re getting.
Pair them with hot cocoa, coffee, or a glass of cold milk. They’re also fantastic with a scoop of vanilla ice cream for an extra-special dessert. And if you’re hosting a holiday party, arrange them on a tiered stand with other cookies for a beautiful display.
Conclusion
As I wrap up this recipe, I’m looking at the plate of retro Christmas gumdrop cookies cooling on my counter. They’re not perfect—some are slightly uneven, a few gumdops melted more than others, and one has a thumbprint from my youngest “helper.” But that’s exactly what makes them special. These cookies aren’t about perfection; they’re about joy, tradition, and sharing something sweet with the people you love.
I hope this recipe brings as much happiness to your kitchen as it has to mine. Whether you’re baking them for the first time or continuing a family tradition, these retro Christmas gumdrop cookies have a way of making everything feel a little more festive. The simple act of mixing the dough, chopping those colorful gumdrops, and filling your home with that wonderful baking smell—it’s pure Christmas magic.
So go ahead, preheat that oven, and get baking. Don’t worry about making them look store-bought perfect. Embrace the little imperfections that make them uniquely yours. And when you take that first bite of a warm cookie, with its buttery sweetness and bursts of gumdrop flavor, I think you’ll understand why these have been a holiday favorite for generations. Here’s to creating sweet memories, one batch of retro Christmas gumdrop cookies at a time.
Frequently Asked Questions
Q: Can I use different types of gumdrops in these cookies?
Absolutely! You can use any gumdrops you like. Traditional fruit-flavored ones work great, but spiced gumdrops add a wonderful holiday warmth. If you can't find gumdrops, you can substitute with chopped jelly beans or other soft candies. Just avoid using licorice gumdrops if you're not a fan of that flavor—they can overpower the other ingredients.
Q: How do I prevent the gumdrops from sticking to my knife when chopping them?
This is a common problem! Lightly dust your knife or kitchen shears with flour before chopping the gumdrops. The flour creates a barrier that prevents sticking. You can also chill the gumdrops in the freezer for 10-15 minutes before chopping—they'll be firmer and less sticky. Another trick is to use kitchen shears instead of a knife; they're often easier to work with for sticky ingredients.
Q: Can I make these cookies ahead of time and freeze them?
Yes, these cookies freeze beautifully! You have two options: freeze the unbaked dough or freeze baked cookies. For dough, scoop it into balls, freeze on a baking sheet until solid, then transfer to a freezer bag. Bake from frozen, adding 1-2 minutes to the baking time. For baked cookies, let them cool completely, then store in a freezer-safe container with parchment between layers. They'll keep for 2-3 months in the freezer.
Q: Why did my gumdrops melt and spread so much during baking?
Some gumdrop brands melt more than others. If you find your gumdrops are spreading too much, try these tips: Chop them into slightly larger pieces, chill the shaped cookie dough in the refrigerator for 30 minutes before baking, or reduce your oven temperature by 25 degrees. The chilling step is especially helpful—it gives the dough a chance to firm up so the gumdrops have less time to melt before the cookie structure sets.
Q: Are these cookies good for cookie exchanges or gifting?
They're perfect for both! Retro Christmas gumdrop cookies hold up well in packaging and travel nicely. For gifting, layer them in a tin or clear cellophane bag with parchment between layers. They stay soft and chewy for about a week at room temperature. At cookie exchanges, they always stand out because of their colorful appearance and nostalgic appeal. Just be prepared to share the recipe—people always ask for it!
PrintRetro Christmas Gumdrop Cookies
- Total Time: 32
- Yield: 36 cookies 1x
Description
Classic holiday cookies studded with colorful gumdrops, offering a chewy texture and festive appearance perfect for Christmas celebrations.
Ingredients
2 1/4 cups all-purpose flour
1 tsp baking soda
1/2 tsp salt
1 cup unsalted butter, softened
3/4 cup granulated sugar
3/4 cup packed brown sugar
2 large eggs
1 tsp vanilla extract
1 1/2 cups chopped gumdrops (assorted colors)
1/2 cup chopped walnuts (optional)
Instructions
Step 1: Preheat oven to 375°F (190°C) and line baking sheets with parchment paper.
Step 2: In a medium bowl, whisk together flour, baking soda, and salt.
Step 3: In a large bowl, cream butter, granulated sugar, and brown sugar until light and fluffy.
Step 4: Beat in eggs one at a time, then stir in vanilla extract.
Step 5: Gradually mix in the dry ingredients until just combined.
Step 6: Fold in chopped gumdrops and walnuts (if using).
Step 7: Drop rounded tablespoons of dough onto prepared baking sheets, spacing about 2 inches apart.
Step 8: Bake for 10-12 minutes or until edges are lightly golden.
Step 9: Let cookies cool on baking sheets for 5 minutes, then transfer to wire racks to cool completely.
- Prep Time: 20
- Cook Time: 12
- Category: Dessert
Nutrition
- Calories: 120
- Fat: 5g
- Carbohydrates: 18g
- Protein: 1g