
Traditional Pumpkin Cheesecake: The Ultimate Comforting Fall Dessert You’ll Adore
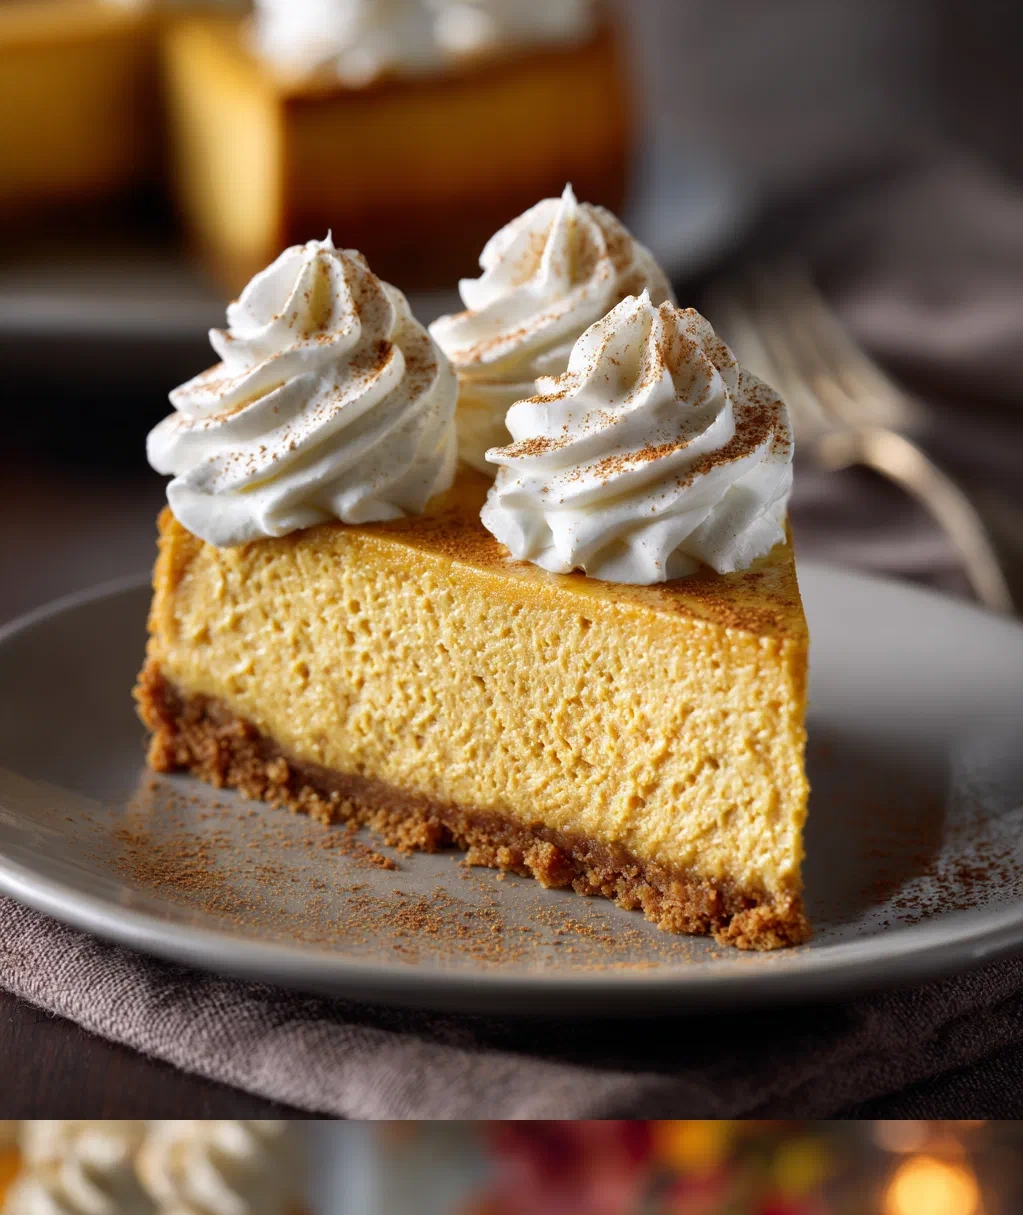
I’ll tell you a secret – there’s nothing that says ‘cozy fall’ to me quite like the rich, creamy magic of a traditional pumpkin cheesecake. I know, I know, you might be thinking ‘but pumpkin pie!’ – trust me, once you try this beauty, you’ll understand why I’m so passionate about it. Picture this: the smooth, spiced pumpkin filling perfectly balanced with that tangy cream cheese base, all nestled in a buttery graham cracker crust. It’s like autumn in dessert form.
I’ve been making this traditional pumpkin cheesecake for family gatherings for years now. It started as a way to use up leftover pumpkin puree from Thanksgiving prep, but it quickly became the star of the show. My kids actually look forward to it more than the turkey! What I love most is how it brings everyone together – there’s something about that first slice that gets everyone talking and smiling.
Now, I know cheesecake can seem intimidating if you’ve never made one before. Don’t worry – I’m going to walk you through every step. This isn’t some complicated restaurant dessert; it’s a home cook’s dream. With a few simple ingredients and some patience (the hardest part is waiting for it to chill!), you’ll have a showstopper that’ll impress everyone. Let’s get baking!
Why This Traditional Pumpkin Cheesecake Recipe Is My Go-To
I’ve tried dozens of pumpkin cheesecake recipes over the years, and this traditional version is the one I keep coming back to. Here’s why it works so well:
- The perfect texture balance: Some pumpkin cheesecakes can be too dense or too soft. This one hits that sweet spot – creamy but firm enough to slice cleanly.
- Seasonings that sing: I use a blend of cinnamon, ginger, and nutmeg that gives it that classic fall flavor without being overwhelming.
- Make-ahead friendly: This traditional pumpkin cheesecake actually tastes better the next day, which makes it perfect for holiday planning.
- Adaptable to your taste: Love more spice? Add extra cinnamon. Want it sweeter? Adjust the sugar. It’s forgiving!
My favorite part is how the pumpkin puree keeps the cheesecake moist without making it soggy. And that cream cheese tang? It cuts through the sweetness just right. This isn’t one of those desserts that leaves you feeling heavy – it’s light enough for seconds (and trust me, people always want seconds).
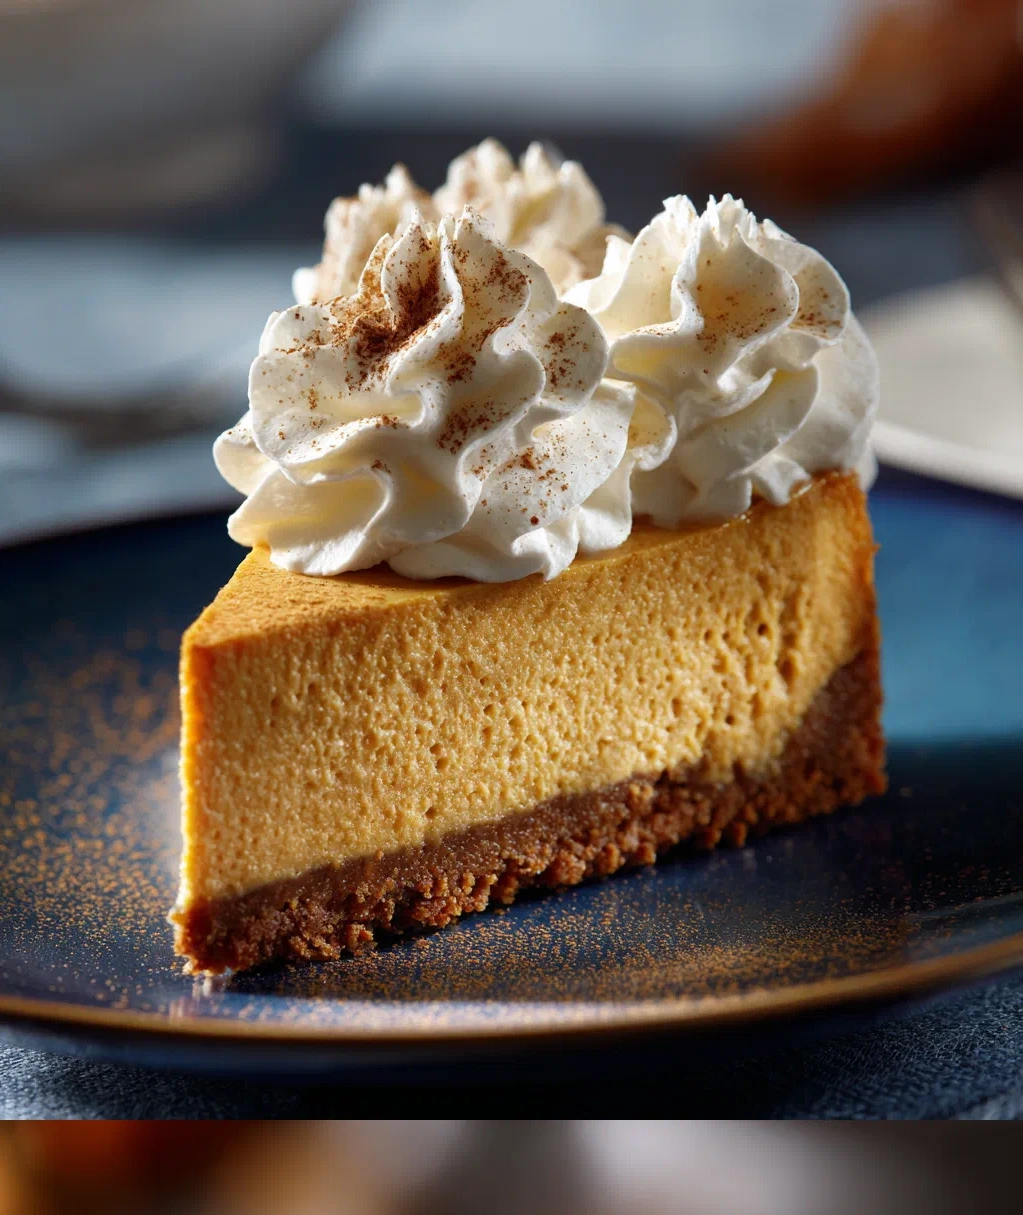
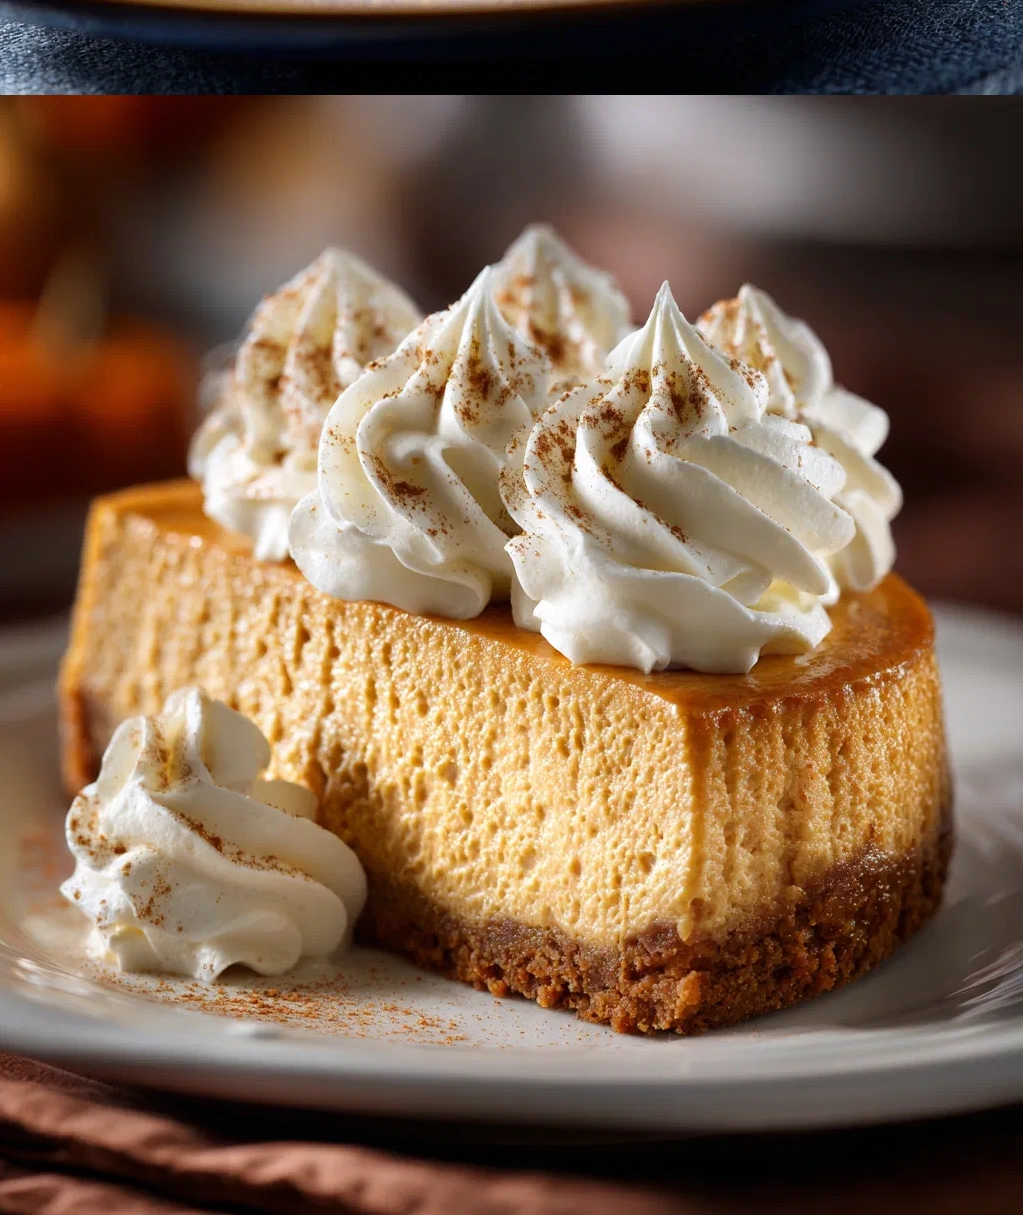
One more thing I love: it looks impressive but isn’t fussy. You don’t need special piping skills or fancy decorations. A simple dollop of whipped cream and maybe a sprinkle of cinnamon, and you’ve got a dessert that looks like it came from a bakery. But it tastes better because it’s made with love in your own kitchen.

Everything You Need for Your Perfect Traditional Pumpkin Cheesecake
Before we start, let’s gather our ingredients. I always recommend having everything at room temperature before you begin – it makes such a difference in how smoothly everything blends together. Here’s what you’ll need:
For the Crust:
- 1 ½ cups graham cracker crumbs (about 12 full crackers)
- ¼ cup granulated sugar
- 6 tablespoons unsalted butter, melted (plus extra for greasing the pan)
For the Filling:
- 3 (8-ounce) packages cream cheese, softened at room temperature
- 1 (15-ounce) can pure pumpkin puree (not pumpkin pie filling)
- 1 cup packed brown sugar
- ½ cup granulated sugar
- 3 large eggs plus 1 egg yolk, at room temperature
- ¼ cup sour cream
- 1 teaspoon vanilla extract
- 2 tablespoons all-purpose flour
- 1 ½ teaspoons ground cinnamon
- ½ teaspoon ground ginger
- ¼ teaspoon ground nutmeg
- ¼ teaspoon ground cloves
- Pinch of salt
A quick note about the pumpkin: make sure you’re getting pure pumpkin puree, not the pie filling that already has spices and sugar added. We want to control those flavors ourselves! And about the cream cheese – full-fat works best here. The reduced-fat versions can sometimes give you a different texture, and we want that classic creamy mouthfeel.
You’ll also need a 9-inch springform pan (that’s the one with the removable sides), aluminum foil, and a roasting pan or baking dish large enough to hold your springform pan for the water bath. Don’t skip the water bath – it’s what gives our traditional pumpkin cheesecake that velvety texture without cracks!
Step-by-Step Instructions for the Best Traditional Pumpkin Cheesecake
Ready to make some magic? Let’s take this one step at a time. I’ll walk you through the whole process with all my tips and tricks.
Step 1: Prepare Your Pan and Oven
First, preheat your oven to 350°F (175°C). While it’s heating, wrap the bottom and sides of your springform pan in two layers of heavy-duty aluminum foil. This is crucial – it keeps water from seeping into our traditional pumpkin cheesecake during the water bath. Grease the inside of the pan with butter or cooking spray.
Step 2: Make the Crust
In a medium bowl, mix the graham cracker crumbs and sugar. Pour in the melted butter and stir until all the crumbs are moistened. Press this mixture firmly into the bottom of your prepared pan, going about halfway up the sides if you like a thicker crust. I use the bottom of a measuring cup to press it down evenly. Bake this for 8-10 minutes until it’s lightly golden, then let it cool while you make the filling.
Step 3: Create the Filling
- In a large bowl, beat the cream cheese with an electric mixer until it’s completely smooth and creamy. This might take 2-3 minutes – don’t rush it! Scrape down the sides of the bowl as needed.
- Add both sugars and beat until well combined and fluffy.
- Beat in the pumpkin puree until smooth.
- Add the eggs and yolk one at a time, beating just until each is incorporated. Overbeating can incorporate too much air, which might cause cracks.
- Mix in the sour cream and vanilla.
- Finally, add the flour, spices, and salt. Mix just until everything is combined – no more.
Pour this beautiful orange mixture over your cooled crust and smooth the top with a spatula.
Step 4: The Water Bath Bake
Place your springform pan in a larger roasting pan. Pour hot water into the roasting pan until it comes about halfway up the sides of the springform pan. Carefully transfer this to the oven and bake for 55-65 minutes. The edges should be set but the center will still jiggle slightly when you gently shake the pan.
Turn off the oven, crack the door open about an inch, and let the traditional pumpkin cheesecake cool in the oven for 1 hour. This gradual cooling helps prevent cracks too! Then remove it from the water bath, take off the foil, and let it cool completely on a wire rack before refrigerating for at least 4 hours, preferably overnight.
Serving and Storing Your Traditional Pumpkin Cheesecake Masterpiece
Okay, you’ve waited patiently (I know it’s hard!), and now your traditional pumpkin cheesecake is perfectly chilled and ready. Here’s how to make it shine:
Serving Suggestions
Run a thin knife around the edge of the pan before releasing the springform sides. For clean slices, dip your knife in hot water and wipe it dry between cuts. I love serving this with:
- A dollop of freshly whipped cream (just heavy cream beaten with a little sugar and vanilla)
- A drizzle of caramel sauce – the salted kind is amazing with pumpkin
- A sprinkle of cinnamon or pumpkin pie spice on top
- Toasted pecans or walnuts for some crunch
It’s rich, so I usually cut it into 12 slices. But hey, if someone wants a bigger piece, who am I to judge? This traditional pumpkin cheesecake pairs beautifully with coffee after dinner or makes a decadent afternoon treat with tea.
Storage Tips
Cover any leftovers tightly with plastic wrap or transfer to an airtight container. It’ll keep in the refrigerator for up to 5 days. The flavor actually deepens after a day or two, so don’t worry if you make it ahead!
You can also freeze this traditional pumpkin cheesecake. Wrap individual slices or the whole thing (without toppings) tightly in plastic wrap, then in aluminum foil. It’ll keep for up to 2 months in the freezer. Thaw overnight in the refrigerator before serving.
One safety note: because of the dairy and eggs, please don’t leave this out at room temperature for more than 2 hours. I usually put it back in the fridge right after serving.
Easy Variations to Make This Traditional Pumpkin Cheesecake Your Own
Once you’ve mastered this basic traditional pumpkin cheesecake, feel free to get creative! Here are some of my favorite twists:
Crust Alternatives
- Gingersnap crust: Swap the graham crackers for crushed gingersnap cookies. It adds extra spice that complements the pumpkin beautifully.
- Pecan crust: Replace half the graham crackers with finely chopped toasted pecans for a nutty crunch.
- Chocolate crust: Use chocolate graham crackers or add 2 tablespoons of cocoa powder to your crumb mixture.
Filling Twists
- Maple version: Replace half the brown sugar with pure maple syrup. It gives it that classic New England flavor.
- Chocolate swirl: Melt ½ cup of chocolate chips and drizzle it over the filling before baking, then swirl it gently with a knife.
- Extra spicy: Add an extra teaspoon of cinnamon or a pinch of cayenne pepper for a warm kick.
Topping Ideas
Instead of whipped cream, try:
- Sweetened mascarpone cheese thinned with a little cream
- A bourbon caramel sauce (just add a tablespoon of bourbon to your caramel)
- Candied ginger pieces sprinkled on top
- A dusting of cocoa powder for contrast
Don’t be afraid to experiment! That’s the beauty of this traditional pumpkin cheesecake – it’s a wonderful canvas for your personal touch. Just remember: if you’re changing liquid ingredients significantly, you might need to adjust baking time slightly. Keep an eye on it and trust the jiggle test.
Conclusion
There you have it – my absolute favorite way to make a traditional pumpkin cheesecake that never fails to delight. From that first whiff of spices mixing with cream cheese to the final smooth, creamy bite, every step of this process feels like a little celebration of fall. I hope this recipe brings as much joy to your kitchen as it has to mine over the years.
Remember, the key to a great traditional pumpkin cheesecake isn’t perfection – it’s love and patience. Don’t stress if you get a tiny crack (just cover it with whipped cream!). Don’t worry if your crust isn’t perfectly even (it’ll taste amazing anyway). What matters is that you’re creating something special to share with people you care about.
I’d love to hear how yours turns out. Did you try any of the variations? Did your family go back for seconds? This traditional pumpkin cheesecake has started so many sweet conversations around my table, and I hope it does the same for yours. Now go preheat that oven – your new favorite fall tradition awaits!
Frequently Asked Questions
Q: Can I make this traditional pumpkin cheesecake without a water bath?
I really don't recommend skipping the water bath. It's what gives the cheesecake that smooth, creamy texture without cracks. The steam from the water creates a gentle, even heat that prevents the edges from overcooking before the center sets. If you're worried about water leaking, just make sure you wrap your springform pan really well with heavy-duty aluminum foil – two layers should do it!
Q: How do I know when my traditional pumpkin cheesecake is done baking?
The best test is the jiggle test. About 55 minutes into baking, gently shake the pan. The edges should look set, but the center (about a 3-inch circle in the middle) should still jiggle slightly when shaken. It will continue to cook as it cools in the turned-off oven. If the whole thing jiggles like jelly, it needs more time. If it doesn't jiggle at all, it might be overbaked.
Q: Can I use fresh pumpkin instead of canned puree?
You absolutely can! Roast or steam a sugar pumpkin (not a carving pumpkin), then puree the flesh until smooth. Just make sure to drain it really well – fresh pumpkin puree tends to be wetter than canned. Spread it on a towel or cheesecloth and let some moisture drain out first. You'll need about 1¾ cups of puree to replace the 15-ounce can.
Q: Why did my traditional pumpkin cheesecake crack on top?
Don't worry – cracks happen to all of us! They're usually caused by sudden temperature changes, overmixing (which incorporates too much air), or overbaking. The water bath and gradual cooling in the oven help prevent this. But if you do get cracks, just cover them with whipped cream or toppings. The taste will still be fantastic!
Q: How far in advance can I make this traditional pumpkin cheesecake?
This actually tastes better made a day or two ahead! The flavors have time to meld and develop. You can make it up to 3 days before serving. Just keep it covered in the refrigerator. You can also freeze it for up to 2 months – thaw it overnight in the fridge before serving.
PrintTraditional Pumpkin Cheesecake
- Total Time: 90
- Yield: 12 servings 1x
Description
A creamy, spiced pumpkin cheesecake with a graham cracker crust, perfect for fall gatherings.
Ingredients
1 1/2 cups graham cracker crumbs
1/4 cup granulated sugar
1/2 cup unsalted butter, melted
3 (8 oz) packages cream cheese, softened
1 cup granulated sugar
1 (15 oz) can pumpkin puree
3 large eggs
1 tsp vanilla extract
1 tsp ground cinnamon
1/2 tsp ground nutmeg
1/4 tsp ground ginger
1/4 tsp ground cloves
1/4 tsp salt
Instructions
Step 1: Preheat oven to 325°F (165°C).
Step 2: Mix graham cracker crumbs, 1/4 cup sugar, and melted butter in a bowl.
Step 3: Press mixture into bottom of a 9-inch springform pan.
Step 4: Bake crust for 10 minutes, then cool.
Step 5: Beat cream cheese and 1 cup sugar until smooth.
Step 6: Add pumpkin puree, eggs, vanilla, spices, and salt; mix well.
Step 7: Pour filling over crust and smooth top.
Step 8: Bake for 60-70 minutes until center is set.
Step 9: Cool in oven with door ajar for 1 hour, then refrigerate for 4 hours.
- Prep Time: 20
- Cook Time: 70
- Category: Dessert
Nutrition
- Calories: 420
- Fat: 28g
- Carbohydrates: 36g
- Protein: 7g