
Most Amazing Apple Crisp: The Incredibly Simple Dessert That Will Blow Your Mind
Okay, let me be real with you for a second. I’ve made a lot of desserts in my time, but there’s something about a good apple crisp that just hits different. Maybe it’s the way the whole house smells like cinnamon and warm apples when it’s baking. Maybe it’s that perfect contrast between the sweet, tender apples and that crunchy, buttery topping. Or maybe it’s just because it’s so darn easy to throw together—seriously, you don’t need to be a pastry chef to make this work.
But here’s the thing: not all apple crisps are created equal. I’ve had my fair share of disappointments—soggy toppings, bland apples, you name it. That’s why I spent years tweaking and testing until I landed on what I now confidently call the most amazing apple crisp recipe ever. I’m not exaggerating when I say this version has become my go-to for everything from casual weeknight treats to impressing dinner guests. It’s the dessert I make when I want something comforting and delicious without spending hours in the kitchen.
What makes it so special? Well, it’s all about balance. The apples get just soft enough without turning to mush, and the topping stays crisp and golden without burning. Plus, it’s incredibly forgiving—if you’re missing an ingredient or two, chances are you can make it work. So grab your favorite baking dish and let’s make some magic happen.
Why This Is The Most Amazing Apple Crisp You'll Ever Make
Let me tell you exactly what sets this recipe apart from all the others out there. First, it’s all about that topping. We’re using a combination of oats, flour, brown sugar, and just the right amount of butter to create that perfect crunchy texture. Not too sweet, not too plain—just right. And don’t even get me started on the spices. A little cinnamon goes a long way, but I like to add a pinch of nutmeg too. It gives that warm, cozy flavor that makes this feel like a hug in dessert form.
The apples are another game-changer. I’ve tried every variety under the sun, and here’s what I’ve learned: you want something that holds its shape but still gets nice and tender. My top picks are Granny Smith for that tart kick, or Honeycrisp if you prefer something sweeter. Actually, mixing two different types gives you the best of both worlds—I do that all the time.
But the real secret? It’s in the assembly. Don’t just dump everything in the pan. Take an extra minute to really work that butter into the dry ingredients with your fingers until you get those perfect little crumbles. That’s what creates those irresistible crispy bits that everyone fights over. And here’s a pro tip: let the crisp cool for at least 15 minutes before serving. I know it’s tempting to dive right in, but that resting time lets the juices thicken up just enough so you don’t end up with a soupy mess.
Oh, and one more thing—this recipe scales beautifully. Making it for a crowd? Just double everything and use a larger baking dish. It bakes up just as perfectly. Trust me, once you try this version, you’ll understand why I call it the most amazing apple crisp. It’s the dessert that never lets me down.
Everything You Need For The Most Amazing Apple Crisp
Alright, let’s get down to business. Here’s what you’ll need to make this happen. Don’t worry if you don’t have every single thing—I’ll give you some swaps too.
For the Apple Filling:
- 6-7 medium apples (about 2 pounds total)
- 1/4 cup granulated sugar
- 2 tablespoons all-purpose flour
- 1 teaspoon ground cinnamon
- 1/4 teaspoon ground nutmeg (optional but amazing)
- 1 tablespoon lemon juice
- 1 teaspoon vanilla extract
For the Crisp Topping:
- 1 cup old-fashioned rolled oats
- 3/4 cup all-purpose flour
- 3/4 cup packed brown sugar
- 1/2 teaspoon ground cinnamon
- 1/4 teaspoon salt
- 1/2 cup (1 stick) cold unsalted butter, cubed
A few quick notes about ingredients. First, the apples: like I mentioned, Granny Smith or Honeycrisp work best, but really any baking apple will do. Just avoid super soft varieties like Red Delicious—they turn to mush. Second, that brown sugar. Make sure it’s packed into the measuring cup. Loose sugar means a less crispy topping, and we don’t want that. And the butter needs to be cold. Like, straight-from-the-fridge cold. Room temperature butter will give you a greasy topping instead of those perfect crumbles.
Missing something? No problem. Out of brown sugar? You can use white sugar with a tablespoon of molasses mixed in. No oats? Add an extra 1/4 cup of flour and maybe some chopped nuts for texture. See? This recipe is as flexible as it is delicious.
Step-By-Step Instructions For Perfect Results Every Time
Ready to make the most amazing apple crisp of your life? Follow these simple steps and you can’t go wrong.
- Prep your apples: Start by peeling, coring, and slicing your apples. I like mine about 1/4-inch thick—thin enough to cook evenly but thick enough to keep some bite. Toss them in a large bowl with the granulated sugar, 2 tablespoons flour, cinnamon, nutmeg (if using), lemon juice, and vanilla. Mix until every slice is coated. The lemon juice isn’t just for flavor—it keeps the apples from turning brown while you work on the topping.
- Make the topping: In a separate bowl, combine the oats, 3/4 cup flour, brown sugar, cinnamon, and salt. Give it a good stir with a fork to break up any brown sugar lumps. Now add those cold butter cubes. Here’s where the magic happens: use your fingers to work the butter into the dry ingredients. Pinch and rub everything together until you have a crumbly mixture with pea-sized butter pieces throughout. This should take about 2-3 minutes. Don’t overdo it—you want texture, not a uniform paste.
- Assemble and bake: Preheat your oven to 375°F (190°C). Spread the apple mixture evenly in a 9×9-inch baking dish or similar size. Sprinkle the topping over the apples, covering them completely but don’t press it down. Bake for 40-45 minutes, until the topping is golden brown and the apples are bubbling around the edges. If the top starts getting too dark before the apples are done, just loosely tent some foil over it.
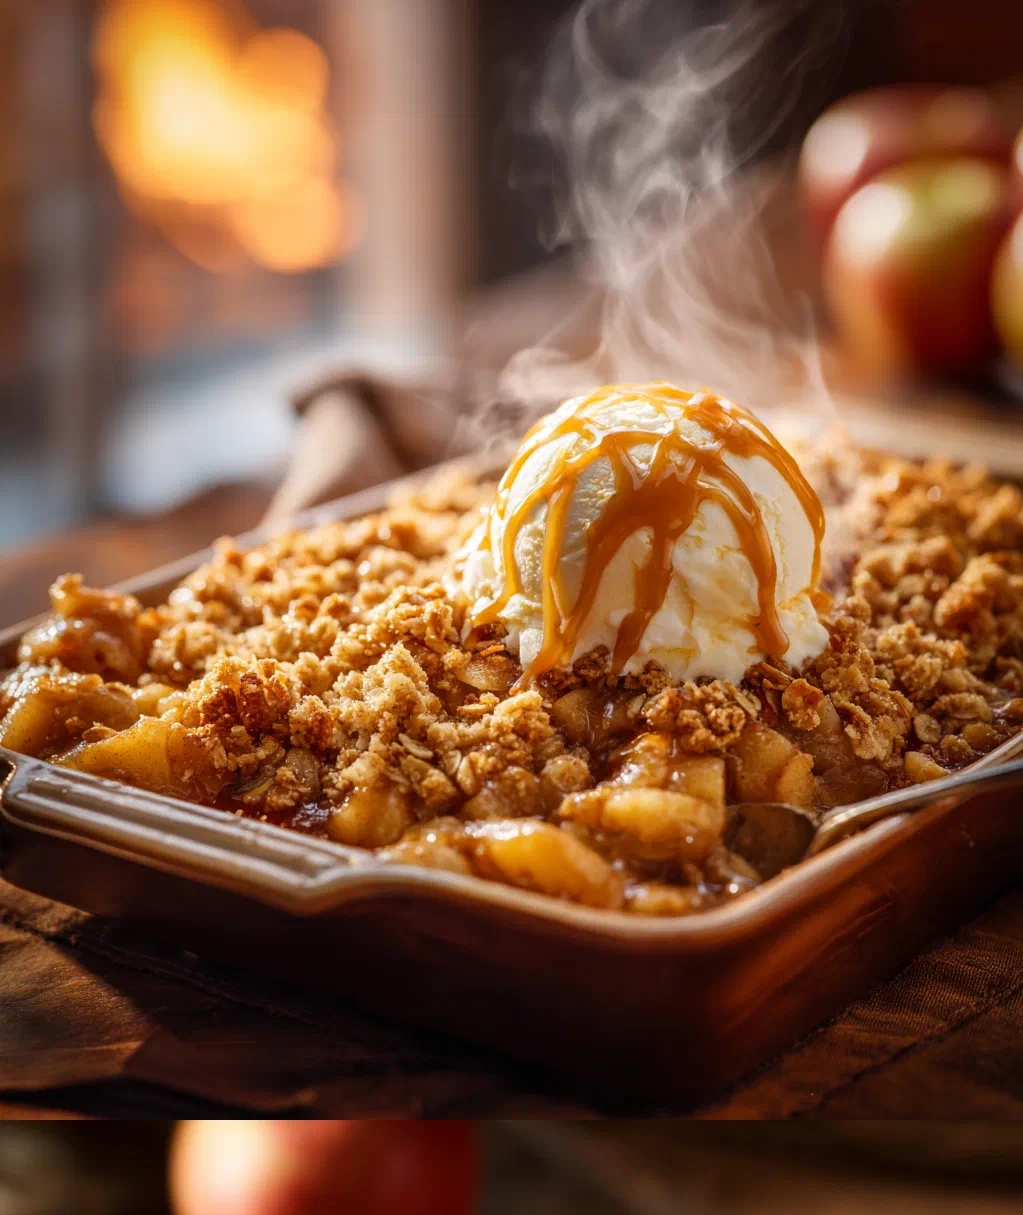
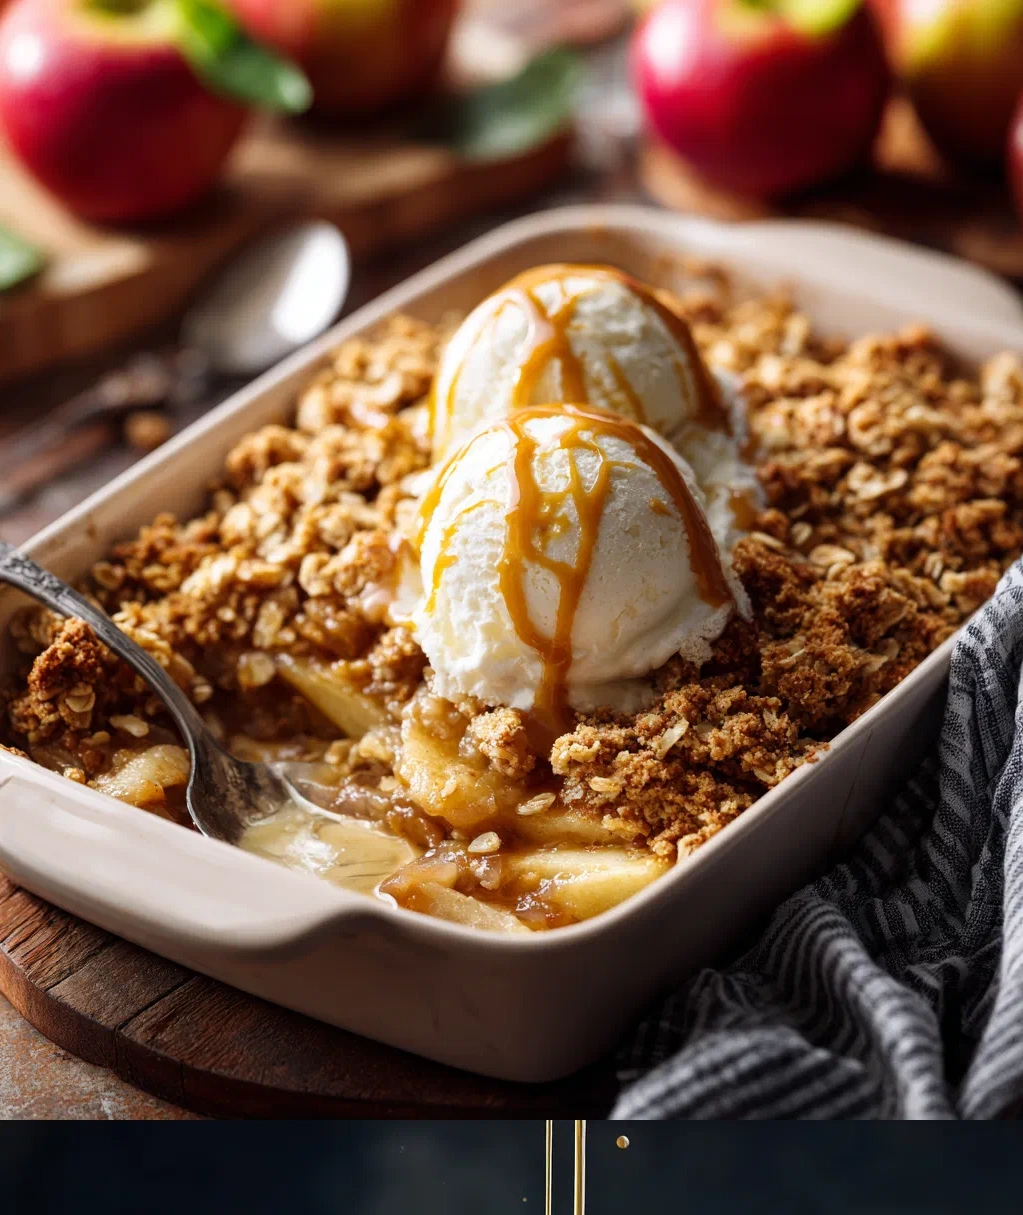
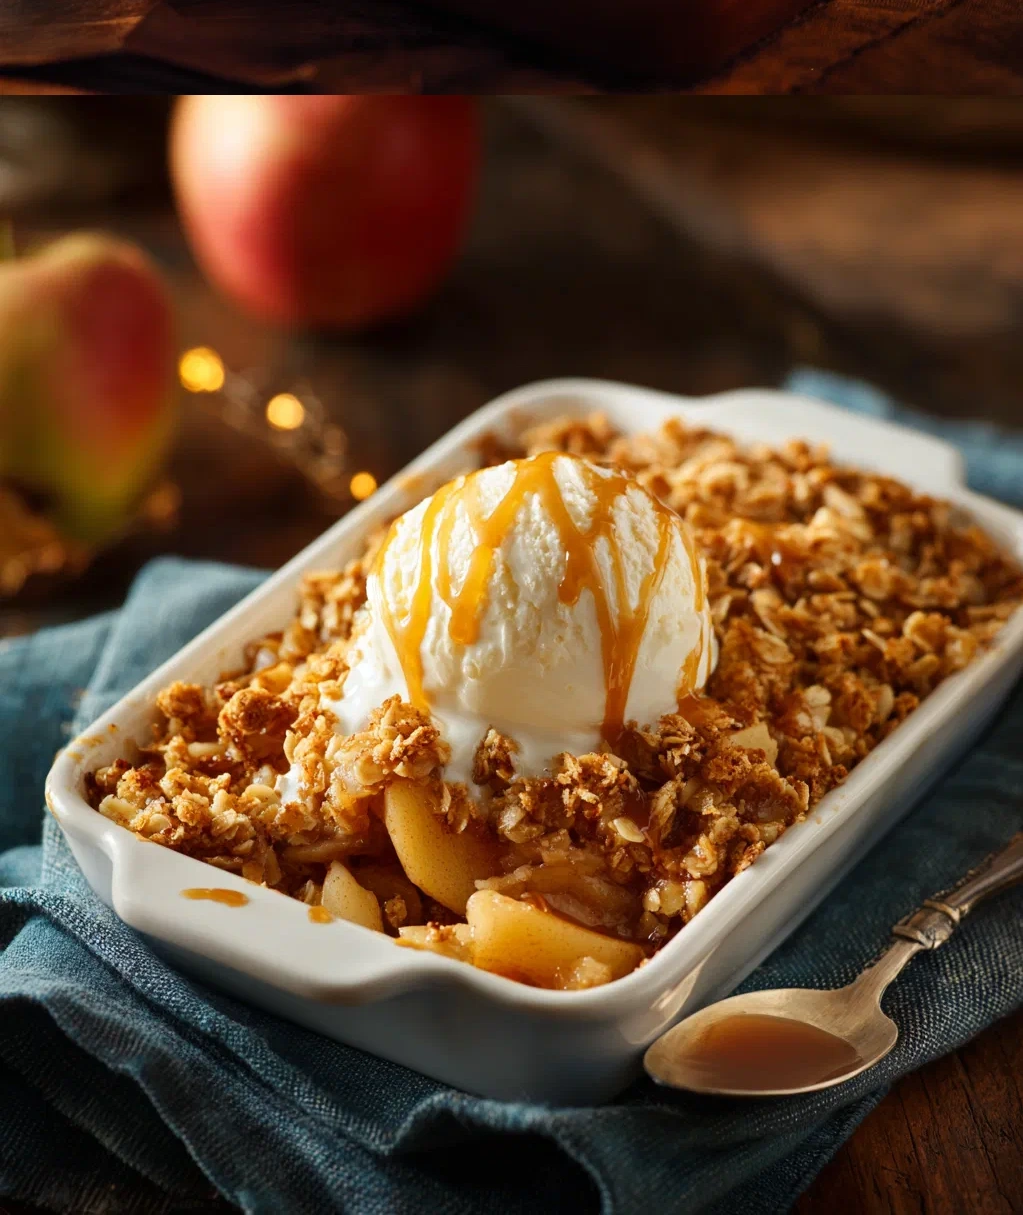
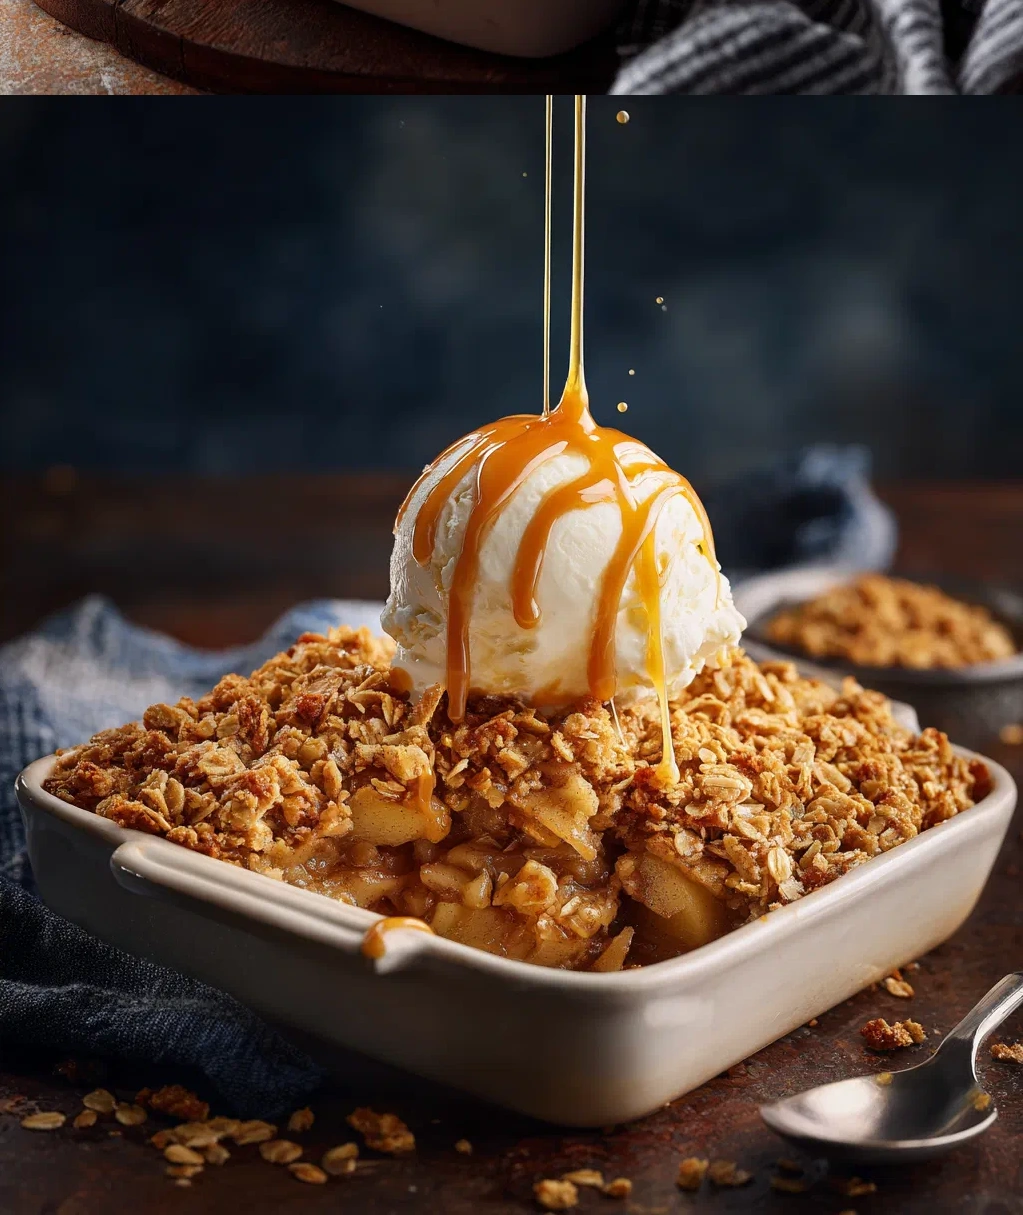
- Cool and serve: This is the hardest part—waiting! Let the crisp cool for at least 15 minutes before serving. This gives the juices time to thicken up so you get perfect slices, not apple soup. Serve it warm with a scoop of vanilla ice cream or a dollop of whipped cream. The contrast between warm crisp and cold cream is absolutely divine.
A few extra tips: If you’re making this ahead, you can prepare everything and refrigerate it separately, then assemble and bake when ready. And always place your baking dish on a sheet pan in case of overflow—trust me, cleaning burnt sugar off the oven floor is no fun.
Delicious Variations On The Most Amazing Apple Crisp
Once you’ve mastered the basic version, try playing around with these fun twists. They’re all based on the same amazing foundation, just with little tweaks that make each one feel special.
Berry-Apple Crisp: Replace one or two of the apples with fresh or frozen berries. Blueberries and raspberries work especially well. Just toss them in with the apples—no need to thaw if using frozen. The berries add a lovely tartness and gorgeous color to the filling.
Peach-Apple Crisp: During summer when peaches are at their peak, mix in a couple of sliced peaches with your apples. Reduce the sugar slightly since peaches are sweeter. The combination is absolutely heavenly.
Nutty Topping: Add 1/2 cup of chopped pecans or walnuts to your crisp topping mixture. Toast them first for extra flavor. The nuts add another layer of crunch that’s just irresistible.
Maple Version: Replace the brown sugar in the topping with maple sugar, or use half brown sugar and add 2 tablespoons of pure maple syrup to the apple mixture. This gives it that classic fall flavor without being overpowering.
Individual Servings: Make mini crisps in ramekins for a cute presentation. Just divide the filling and topping among 6-8 small dishes and reduce baking time to 25-30 minutes. Perfect for dinner parties when you want everyone to have their own little treat.
Don’t be afraid to get creative. The beauty of this most amazing apple crisp recipe is that it’s a fantastic starting point for all sorts of delicious experiments. Just keep the basic ratios the same and you’ll be golden.
Serving, Storing, And Reheating Your Masterpiece
You’ve made this incredible dessert—now let’s talk about how to enjoy it to the fullest.
Serving Suggestions: Obviously, a scoop of vanilla ice cream is the classic pairing and for good reason. The cold cream against the warm crisp is pure perfection. But don’t stop there! Try it with a drizzle of caramel sauce for extra decadence. Or keep it simple with a dollop of lightly sweetened whipped cream. For breakfast (yes, I said breakfast), serve it with Greek yogurt instead of ice cream. It’s basically fruit and oats, right?
Storage: If you have leftovers (big if!), cover the baking dish tightly with plastic wrap or transfer to an airtight container. It’ll keep at room temperature for up to 2 days, or in the refrigerator for up to 5 days. The topping will soften a bit in the fridge, but it’s still delicious.
Reheating: To get that crispy topping back, reheat individual portions in the toaster oven or regular oven at 350°F for 10-15 minutes. The microwave works in a pinch, but it’ll make the topping soggy. If you’re reheating the whole thing, cover it with foil and warm at 350°F for 20-25 minutes, then remove the foil for the last 5 minutes to crisp up the top.
Freezing: This freezes beautifully! Bake it completely, let it cool, then wrap the whole dish tightly in plastic wrap and foil. Or portion it out and freeze in individual containers. It’ll keep for up to 3 months. To reheat from frozen, bake at 350°F for 30-40 minutes until heated through. No need to thaw first.
One last tip: if you’re taking this to a potluck or gathering, transport it in the baking dish with a clean kitchen towel over the top to keep it warm. It travels like a dream and always gets rave reviews.
Conclusion
And there you have it—my go-to recipe for what I truly believe is the most amazing apple crisp out there. It’s the dessert I turn to when I need something comforting, when I want to impress without stress, or when I just need a little sweetness in my day. What I love most about it is how it bridges that gap between fancy and approachable. It feels special enough for holidays but simple enough for a Tuesday night.
The best part? Once you make it a few times, it becomes second nature. You’ll find yourself eyeballing measurements, adjusting spices to your taste, and making it your own. That’s when you know a recipe has earned its place in your regular rotation. And honestly, that’s what home cooking is all about—finding those reliable, delicious dishes that bring people together and make your house smell incredible.
So next time you see apples at the market, grab a few extra and give this a try. I promise it’s worth every minute. Whether you’re serving it to guests or keeping it all to yourself (no judgment here!), this apple crisp delivers every single time. Happy baking, and enjoy every sweet, crunchy, cinnamon-scented bite!
Frequently Asked Questions
Q: Can I make this apple crisp gluten-free?
Absolutely! Just swap the all-purpose flour in both the filling and topping with your favorite gluten-free flour blend. I've had great results with a 1:1 gluten-free baking flour. The oats should be certified gluten-free too, since regular oats can sometimes be contaminated during processing.
Q: What's the best type of apple to use for apple crisp?
For the most amazing apple crisp texture, you want apples that hold their shape when baked but still get tender. My top choices are Granny Smith (tart and firm), Honeycrisp (sweet and crisp), or Braeburn. Actually, mixing two different varieties gives you the best flavor complexity. Avoid super soft apples like Red Delicious—they tend to turn mushy.
Q: Can I prepare this ahead of time?
Yes, and it's actually a great make-ahead dessert! You can prepare the apple filling and topping separately up to 24 hours in advance. Just store the apples in the refrigerator (the lemon juice will prevent browning) and keep the topping in an airtight container at room temperature. When ready to bake, assemble and pop it in the oven. You might need to add 5-10 minutes to the baking time if everything starts cold.
Q: Why did my crisp topping turn out soggy?
A few common culprits: using room temperature butter instead of cold butter, not working the butter into the dry ingredients enough (you want pea-sized pieces, not a paste), or cutting the apples too thin so they release too much liquid. Also, make sure you're using old-fashioned rolled oats, not quick oats—they hold up better. And always let the crisp cool for at least 15 minutes before serving so the juices can thicken.
Q: Can I use frozen apples instead of fresh?
You can, but there are a couple things to keep in mind. Thaw the apples completely and drain off any excess liquid before using, or they'll make your crisp too watery. You might also need to increase the flour in the filling by a tablespoon to absorb the extra moisture. Fresh apples are ideal, but frozen work in a pinch—just pat them dry really well first.
PrintMost Amazing Apple Crisp
- Total Time: 50
- Yield: 6 servings 1x
Description
A simple yet mind-blowing dessert with tender cinnamon-spiced apples and a buttery oat crumble topping.
Ingredients
6 cups peeled and sliced apples (about 4–5 medium apples)
1/2 cup granulated sugar
1 tsp ground cinnamon
1/4 tsp ground nutmeg
1 tbsp lemon juice
1 cup old-fashioned rolled oats
1/2 cup all-purpose flour
1/2 cup packed brown sugar
1/2 cup unsalted butter, melted
1/2 tsp salt
Instructions
Step 1: Preheat oven to 375°F (190°C) and grease an 8×8-inch baking dish.
Step 2: In a large bowl, toss sliced apples with granulated sugar, cinnamon, nutmeg, and lemon juice until evenly coated.
Step 3: Spread the apple mixture evenly in the prepared baking dish.
Step 4: In a medium bowl, combine oats, flour, brown sugar, melted butter, and salt to form a crumbly topping.
Step 5: Sprinkle the oat mixture evenly over the apples in the baking dish.
Step 6: Bake for 30-35 minutes until the topping is golden brown and apples are tender.
Step 7: Let cool for 10 minutes before serving warm with vanilla ice cream if desired.
- Prep Time: 15
- Cook Time: 35
- Category: Dessert
Nutrition
- Calories: 320
- Fat: 14g
- Carbohydrates: 52g
- Protein: 3g