
Brioche Buns: The Unbeatable, Heavenly Secret to Home Baking Bliss
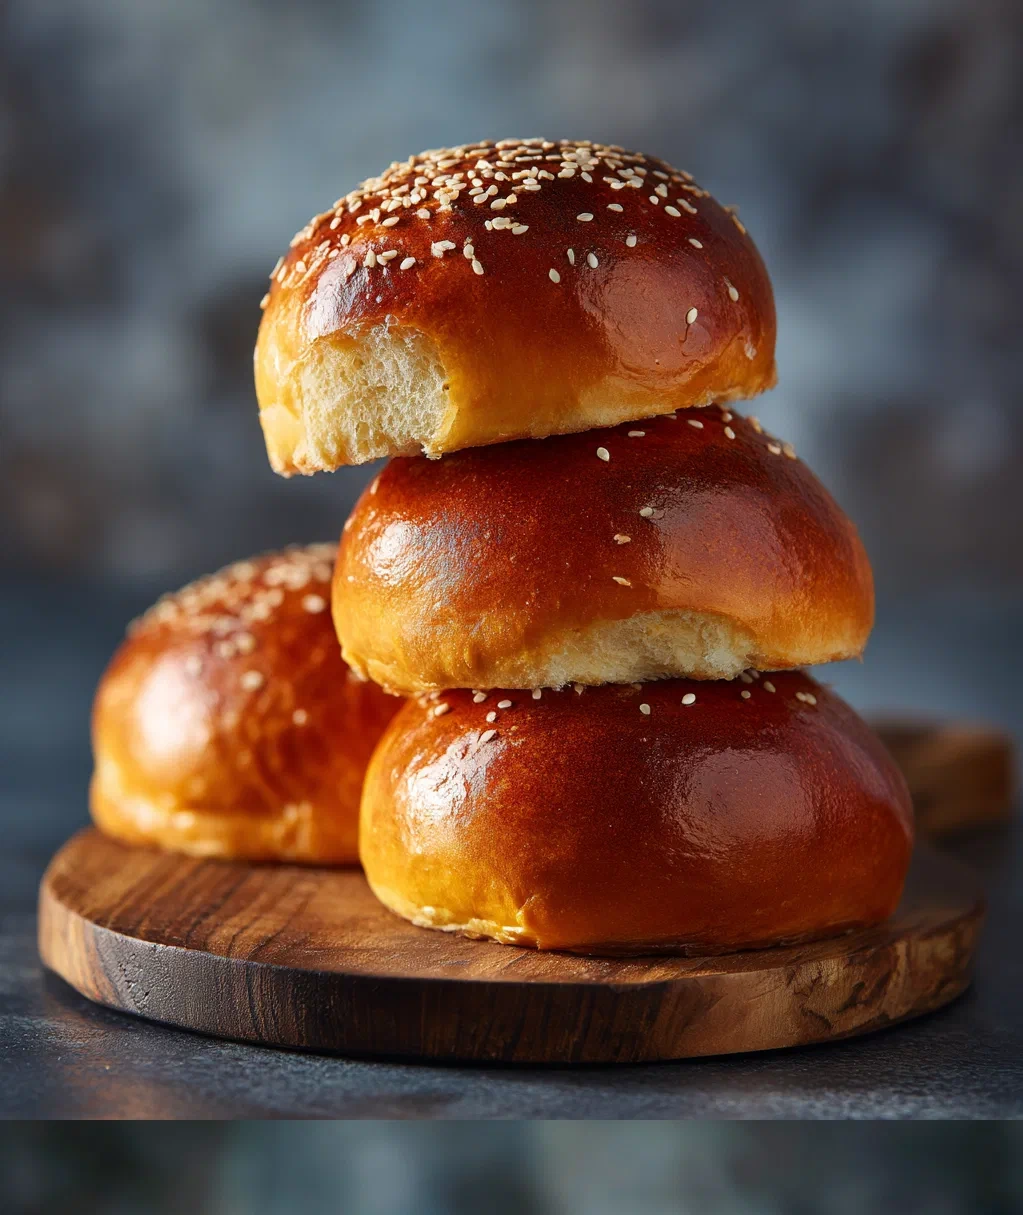
I have to tell you something. I’ve been baking bread for years now, and I’ve tried just about every recipe under the sun—from rustic sourdough to soft sandwich loaves. But nothing, and I mean nothing, has ever made me as excited as perfecting my own brioche buns at home. The first time I pulled a batch of these golden, buttery beauties out of the oven, I knew I’d stumbled onto something special. The smell alone—warm, sweet, and rich—filled my kitchen and made me feel like I’d just unlocked a secret level of home cooking.
You might think brioche buns sound fancy or difficult, but trust me, they’re not. They’re just wonderfully soft, slightly sweet rolls that have this incredible tender crumb and a shiny golden crust. I started making them because store-bought buns often felt dry or bland, and I wanted something that could stand up to juicy burgers or make a simple breakfast sandwich feel luxurious. Now, I bake a batch almost every weekend. They’ve become my go-to for everything from weekend brunches to impressing friends at backyard barbecues. Once you taste a fresh brioche bun, warm from the oven and slathered with butter, you’ll understand why I’m so obsessed. It’s like hugging your taste buds.
So, let’s dive in together. I’ll walk you through my favorite recipe step-by-step, with all the tips I’ve picked up along the way. Don’t worry if you’re new to baking—this is totally doable, and the results are so worth it. Get ready to fall in love with homemade brioche buns.
Why Brioche Buns Are Absolutely Worth the Effort
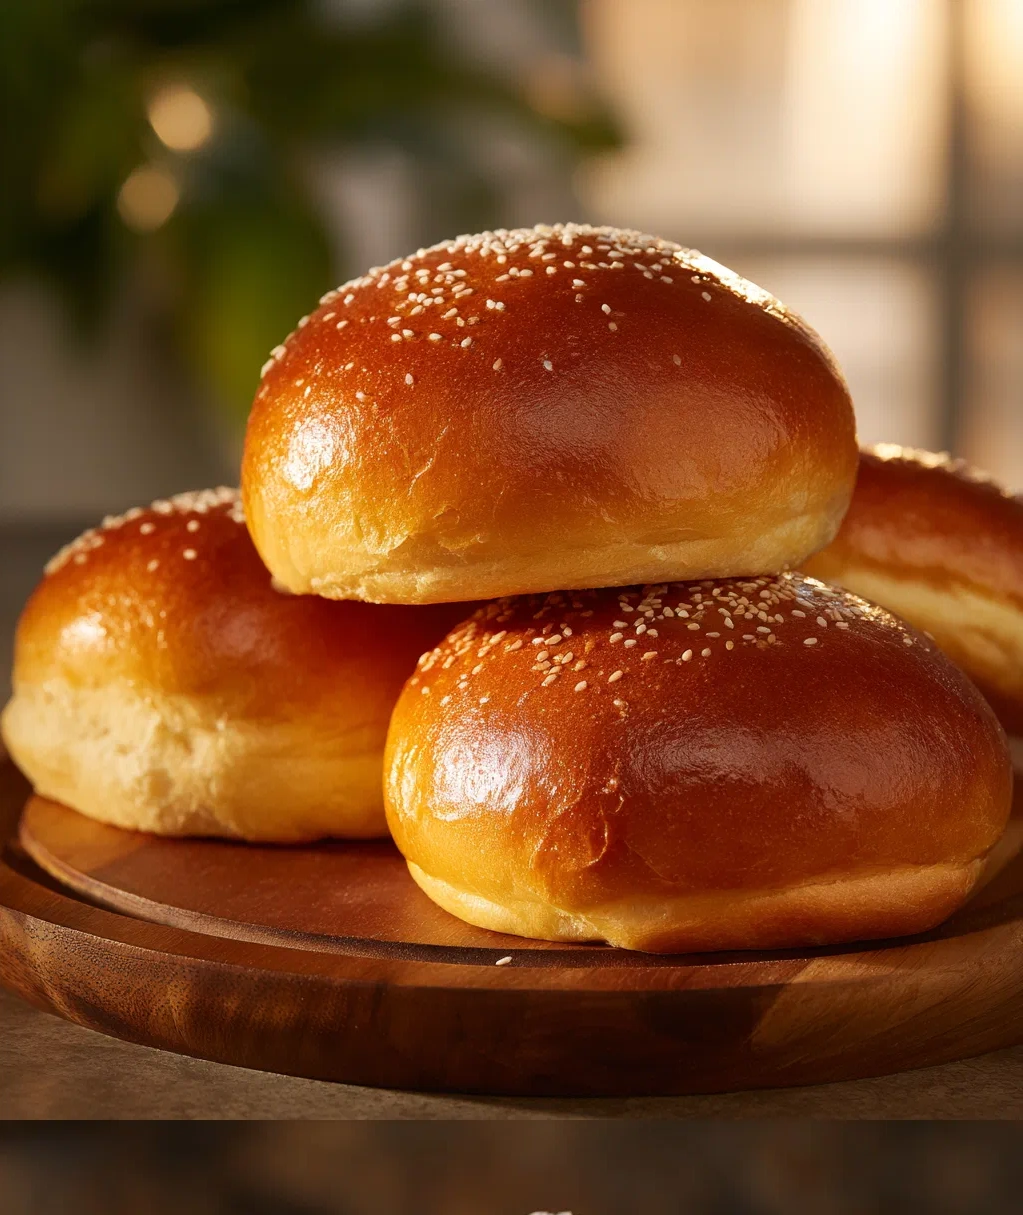
You might be wondering why bother making brioche buns from scratch when you can grab a pack at the store. I get it—time is precious. But once you try the homemade version, you’ll see the difference is night and day. These buns are softer, richer, and just taste more alive. They have a delicate sweetness that pairs perfectly with both savory and sweet fillings, and that golden crust adds a lovely texture contrast.
Here’s what makes them so special:
- Incredible texture: Thanks to the eggs and butter, brioche buns have a tender, almost pillowy crumb that doesn’t get soggy easily. They hold up well to juicy burgers or saucy pulled pork without falling apart.
- Versatility: You can use them for so much more than just burgers. Think breakfast sandwiches, sliders, or even as a base for bread pudding. They’re like the little black dress of the baking world—always appropriate.
- Homemade pride: There’s something deeply satisfying about serving buns you made yourself. Your friends and family will be impressed, and you’ll feel like a kitchen rockstar.
- Control over ingredients: No weird preservatives or additives—just simple, good stuff. You know exactly what’s going into your food.
My favorite part is how forgiving they can be. Even if your shaping isn’t perfect, they still bake up beautifully. And that smell? Pure heaven. Trust me, once you start making brioche buns at home, you’ll never look back.
Everything You'll Need for Perfect Brioche Buns
Let’s gather our ingredients. One of the things I love about this brioche buns recipe is that it uses pretty standard baking staples. No fancy equipment needed—just a mixing bowl, a wooden spoon (or stand mixer if you have one), and your hands. Here’s what you’ll need:
- Flour: 3 ½ cups all-purpose flour. I like to use unbleached for a slightly better texture, but regular works fine too.
- Yeast: 2 ¼ teaspoons active dry yeast. Make sure it’s fresh—check the expiration date. If it doesn’t foam when you proof it, toss it and start over.
- Sugar: ¼ cup granulated sugar. This gives the buns that hint of sweetness and helps feed the yeast.
- Salt: 1 teaspoon fine sea salt. Don’t skip this—it balances the sweetness and enhances flavor.
- Eggs: 3 large eggs at room temperature. Room temp eggs mix better with the dough. If you forget to take them out early, just place them in a bowl of warm water for a few minutes.
- Milk: ½ cup whole milk, warmed to about 110°F. Too hot and you’ll kill the yeast; too cold and it won’t activate properly. I use a thermometer to be safe.
- Butter: ½ cup unsalted butter, softened. This is key for that rich, tender texture. Cut it into small pieces so it incorporates easily.
- For topping: 1 egg beaten with a splash of milk for the egg wash, and maybe some sesame seeds or everything bagel seasoning if you’re feeling fancy.
That’s it! Simple, right? Measure everything out before you start—it makes the process so much smoother. Now, let’s get mixing.
My Step-by-Step Guide to Making Brioche Buns
Ready to bake? Here’s my foolproof method for making brioche buns. I’ve made this recipe dozens of times, and these steps have never let me down. Set aside about 3 hours from start to finish, but most of that is hands-off rising time. You can do this!
- Activate the yeast: In a small bowl, combine the warm milk, sugar, and yeast. Give it a gentle stir and let it sit for 5-10 minutes until it gets foamy. If it doesn’t foam, your yeast might be old—start over with fresh yeast.
- Mix the dough: In a large bowl, whisk together the flour and salt. Make a well in the center and add the yeast mixture, eggs, and softened butter. Mix with a wooden spoon or the dough hook of a stand mixer on low speed until everything comes together. It’ll be sticky at first—that’s normal.
- Knead: Turn the dough out onto a lightly floured surface. Knead for about 8-10 minutes until it becomes smooth and elastic. If using a mixer, knead on medium speed for 5-7 minutes. The dough should feel soft and slightly tacky but not stick to your hands. Add a little more flour if it’s too sticky, but go easy—too much flour makes tough buns.
- First rise: Place the dough in a lightly oiled bowl, cover with a clean kitchen towel or plastic wrap, and let it rise in a warm, draft-free spot for 1-1.5 hours, until doubled in size. I like to put it in my oven with the light on—it creates the perfect warm environment.
- Shape the buns: Punch down the dough to release air bubbles. Divide it into 8 equal pieces (use a scale for accuracy if you want them all the same size). Roll each piece into a smooth ball by cupping your hand and rotating it on the counter. Place them on a parchment-lined baking sheet, about 2 inches apart.
- Second rise: Cover the shaped buns loosely with the towel and let them rise again for 45-60 minutes, until puffy. They won’t quite double this time, but they should look noticeably larger.
- Bake: Preheat your oven to 375°F. Brush the tops of the buns gently with the egg wash—this gives them that beautiful golden shine. Sprinkle with seeds if using. Bake for 15-18 minutes, until deep golden brown and they sound hollow when tapped on the bottom. Rotate the pan halfway through for even baking.
- Cool: Transfer the brioche buns to a wire rack to cool completely before slicing. I know it’s tempting to dig in right away, but letting them cool ensures the crumb sets properly.
And that’s it! You’ve just made incredible homemade brioche buns. See? Not so scary after all.
Creative Ways to Use Your Homemade Brioche Buns
Now for the fun part—eating them! Fresh brioche buns are amazing on their own, but they really shine when you pair them with the right fillings. Here are some of my favorite ways to enjoy them:
- Classic burgers: Split a bun and toast it lightly in a pan with a bit of butter. Load it up with your favorite burger patty, cheese, lettuce, tomato, and maybe some special sauce. The soft crumb soaks up juices without getting mushy.
- Breakfast sandwiches: Toast a bun, spread with a little mayo or butter, and layer with scrambled eggs, crispy bacon or sausage, and a slice of melty cheddar. Perfect for lazy weekend mornings.
- Pulled pork sliders: Use smaller buns or cut regular ones in half for mini sliders. Pile on tender pulled pork, coleslaw, and a drizzle of barbecue sauce. Great for parties!
- French toast: Stale brioche buns make the best French toast. Slice them thick, dip in an egg-milk-cinnamon mixture, and fry until golden. Serve with maple syrup and berries.
- Bread pudding: Cube day-old buns and use them in a sweet bread pudding with custard, raisins, and a sprinkle of sugar on top. Bake until set and custardy—comfort food at its finest.
Don’t be afraid to get creative. I’ve even used them for mini turkey clubs or as a base for eggs Benedict. The slight sweetness plays so well with savory flavors. My tip: always toast them lightly before using—it adds a bit of crunch and helps prevent sogginess.
Storing and Reheating Your Brioche Buns for Maximum Freshness
Let’s talk about keeping your brioche buns delicious for as long as possible. They’re best eaten the day they’re made, but with proper storage, they’ll stay tasty for several days. Here’s what I do:
Storing at room temperature: Once completely cool, place the buns in an airtight container or zip-top bag. They’ll stay soft and fresh for 2-3 days at room temperature. Don’t refrigerate them—the fridge dries out bread quickly and makes it stale faster.
Freezing for later: If you want to keep them longer, freezing is your best bet. Wrap each bun individually in plastic wrap, then place them all in a freezer bag. They’ll keep for up to 3 months. Label the bag with the date so you don’t forget.
Reheating: To revive room-temperature buns, wrap them in foil and warm in a 350°F oven for 5-10 minutes until heated through. For frozen buns, let them thaw at room temperature for a few hours first, or pop them straight into the oven wrapped in foil—add an extra 5 minutes or so. You can also toast slices in a toaster or toaster oven for a quick fix.
A quick safety note: always check for mold if they’ve been stored for a while. If you see any fuzzy spots, toss the whole batch. Better safe than sorry.
One more tip: if your buns start to go stale, don’t throw them out! Cube them, toss with olive oil and herbs, and bake into croutons. Or blend into breadcrumbs for coating chicken or topping casseroles. Waste not, want not.
Conclusion
Well, there you have it—my complete guide to making and enjoying brioche buns at home. I hope you feel inspired to give them a try. Remember, baking is as much about the journey as the destination. Don’t stress if your first batch isn’t perfect. Mine certainly weren’t! Each time you make them, you’ll learn a little more and get a little better. The important thing is to have fun in the kitchen and enjoy the process.
These buns have brought so much joy to my home, from cozy breakfasts with my family to lively summer cookouts with friends. They’re more than just bread—they’re a little piece of homemade happiness. I can’t wait for you to experience that feeling too. Imagine pulling a tray of golden, buttery brioche buns out of your own oven, filling your kitchen with that incredible smell, and sharing them with people you love. That’s the real magic.
So go ahead, gather your ingredients, and get baking. You’ve got this. And when you take that first bite of a warm, homemade brioche bun, you’ll know exactly why I’m so passionate about them. Happy baking, my friend!
Frequently Asked Questions
Q: Can I make brioche buns without a stand mixer?
Absolutely! I often make them by hand. Just use a wooden spoon to mix the ingredients initially, then knead on a floured surface for 8-10 minutes until smooth. It's a great arm workout, and you get to feel the dough transform—very satisfying.
Q: How do I know when my brioche buns are fully baked?
They should be a deep golden brown on top, and if you tap the bottom, they'll sound hollow. An internal temperature of 190-200°F on an instant-read thermometer is a sure sign they're done. Don't underbake, or they might be doughy inside.
Q: Can I use bread flour instead of all-purpose flour?
Yes, but it might make the buns a bit chewier. All-purpose gives that tender crumb I love. If you use bread flour, you might need slightly more liquid, so add a tablespoon of milk at a time if the dough feels too dry.
Q: Why did my brioche buns turn out dense?
A few things could cause this: over-kneading, using too much flour, or not letting them rise long enough. Make sure your yeast is fresh, measure flour correctly (spoon and level, don't scoop), and give them plenty of time in a warm spot to puff up.
Q: Can I make brioche buns ahead of time?
Definitely. You can prepare the dough, shape the buns, and then refrigerate them overnight for a slow second rise. Bake them straight from the fridge in the morning—just add a few extra minutes to the baking time. Perfect for fresh buns at breakfast without the early wake-up call!
PrintClassic Homemade Brioche Buns
- Total Time: 165
- Yield: 8 buns 1x
Description
Soft, buttery, and slightly sweet brioche buns perfect for burgers, sandwiches, or enjoying plain.
Ingredients
2 1/4 teaspoons (1 packet) active dry yeast
1/4 cup warm water (110°F)
1/4 cup granulated sugar
1 teaspoon salt
4 large eggs, at room temperature
3 1/2 cups all-purpose flour
1/2 cup unsalted butter, softened and cubed
1 egg yolk
1 tablespoon milk or cream
Instructions
Step 1: In a small bowl, combine warm water, yeast, and a pinch of sugar. Let sit for 5-10 minutes until foamy.
Step 2: In a large mixing bowl or stand mixer with dough hook, combine flour, sugar, and salt. Add yeast mixture and eggs. Mix on low until combined.
Step 3: With mixer on low, add softened butter one cube at a time, mixing until fully incorporated after each addition.
Step 4: Knead dough on medium speed for 8-10 minutes until smooth, elastic, and slightly sticky. It should pull away from the bowl sides.
Step 5: Place dough in a lightly greased bowl, cover with plastic wrap, and let rise in a warm place for 1-2 hours until doubled in size.
Step 6: Punch down dough and divide into 8 equal pieces (about 4 oz each). Shape each into a smooth ball.
Step 7: Place balls on a parchment-lined baking sheet, spacing 2 inches apart. Cover loosely and let rise for 45-60 minutes until puffy.
Step 8: Preheat oven to 375°F. Whisk egg yolk with milk or cream and gently brush over buns.
Step 9: Bake for 15-18 minutes until golden brown. Transfer to a wire rack to cool completely.
- Prep Time: 30
- Cook Time: 18
- Category: Baking
Nutrition
- Calories: 240
- Fat: 10g
- Carbohydrates: 30g
- Protein: 6g