
Cinnamon Rolls: Incredibly Easy Homemade Comfort
Oh, those cinnamon rolls. You know the ones I’m talking about – the kind that fills your entire house with the most heavenly scent while they’re baking. That warm, spicy, sweet aroma that makes everyone come running to the kitchen, asking “Are they ready yet?” I’m telling you, there’s nothing quite like pulling a fresh batch of homemade cinnamon rolls out of the oven. It’s pure magic, and I’m here to show you how simple it really is to create that magic in your own kitchen.
I used to think making cinnamon rolls from scratch was some kind of baking wizardry reserved for professional bakers or grandmas with decades of experience. But then I tried it myself, and guess what? It’s actually one of the easiest, most satisfying things you can bake! Don’t let the yeast scare you – I promise it’s friendlier than you think. And the payoff? Well, you’ll get the most tender, gooey, perfectly spiced cinnamon rolls you’ve ever tasted. Better than anything from a can or a bakery, and made with love right in your own oven.
What I love most about this recipe is how forgiving it is. Don’t have exactly the right flour? That’s okay. Want to make them the night before? Perfect! Need to adjust the sweetness? Go for it. This is about creating something wonderful without stress. So grab your mixing bowl and let’s make some memories (and some amazing cinnamon rolls) together.
Why Homemade Cinnamon Rolls Will Change Your Life
Okay, maybe that’s a bit dramatic, but hear me out. Once you’ve made these cinnamon rolls yourself, you’ll never go back to store-bought. First off, the flavor is just… different. It’s richer, deeper, more authentic. That combination of real butter, fresh cinnamon, and homemade dough creates something special you can’t get from a package.
Here’s what makes these cinnamon rolls so amazing:
- That fresh-baked texture: Store-bought cinnamon rolls are often too dense or too sweet. Homemade ones have that perfect tender crumb that just melts in your mouth.
- You control everything: Want more cinnamon? Add it! Prefer less sugar? Reduce it! Love nuts or raisins? Toss them in! This is your creation.
- The smell: I can’t emphasize this enough. That aroma of baking cinnamon rolls is like instant happiness in your home.
- They’re actually fun to make: There’s something so satisfying about kneading the dough and seeing it rise. It’s like a little kitchen science experiment that ends with delicious results.
- Perfect for any occasion: Sunday brunch, holiday mornings, just-because days – cinnamon rolls make everything feel special.
Trust me, the first time you pull these out of the oven and see everyone’s faces light up, you’ll understand why homemade is worth the effort. And the effort is surprisingly minimal once you get the hang of it!
Everything You Need for Perfect Cinnamon Rolls
Let’s talk ingredients. One of the best things about making cinnamon rolls is that you probably have most of this stuff already! Here’s what you’ll need – nothing fancy, just good, simple ingredients that work together beautifully.
For the Dough:
- 1 cup warm milk (not hot – around 110°F/43°C)
- 2 ¼ teaspoons active dry yeast (that’s one standard packet)
- ½ cup granulated sugar
- 2 large eggs, at room temperature
- ½ cup unsalted butter, melted and cooled slightly
- 4 ½ cups all-purpose flour (plus extra for dusting)
- 1 teaspoon salt
For the Cinnamon Filling:
- 1 cup packed brown sugar (light or dark both work)
- 2 ½ tablespoons ground cinnamon (use the good stuff!)
- ½ cup softened butter (not melted – just soft enough to spread)
For the Cream Cheese Frosting:
- 4 ounces cream cheese, softened
- ¼ cup unsalted butter, softened
- 1 ½ cups powdered sugar
- ½ teaspoon vanilla extract
- Pinch of salt
A quick note about temperature: Getting your ingredients to the right temperature really does matter. Room temperature eggs mix better into the dough, and warm (not hot!) milk helps activate the yeast properly. If your milk is too hot, it can kill the yeast, and we definitely don’t want that. A good trick? Test the milk on your wrist – it should feel comfortably warm, like a nice bath.
Step-by-Step: Making Your Cinnamon Rolls
Ready to bake? Let’s do this! I’ve broken it down into simple steps that even a first-time baker can follow. Don’t worry – I’ll walk you through every part.
- Activate the yeast: In a large mixing bowl, combine the warm milk, yeast, and 1 tablespoon of the sugar. Give it a gentle stir and let it sit for about 5-10 minutes. You should see it get foamy and bubbly – that means your yeast is alive and happy! If nothing happens after 10 minutes, your milk might have been too hot or your yeast might be old. Better to start over than waste all your other ingredients.
- Make the dough: Add the remaining sugar, eggs, melted butter, and salt to the yeast mixture. Mix until everything is well combined. Now gradually add the flour, about a cup at a time, mixing as you go. Once the dough starts to come together, turn it out onto a lightly floured surface. Knead for about 5-7 minutes until it’s smooth and elastic. It should feel soft but not sticky – add a little more flour if it sticks to your hands too much.
- Let it rise: Place the dough in a lightly greased bowl, turning it once to coat. Cover with a clean kitchen towel or plastic wrap and let it rise in a warm, draft-free spot for 1-2 hours, or until doubled in size. My favorite trick? Turn your oven light on and place the bowl in the (turned off) oven. The gentle warmth from the light creates the perfect rising environment.
- Roll and fill: Punch down the risen dough (that’s the fun part!) and turn it out onto a lightly floured surface. Roll it into a rectangle about 16×21 inches. Spread the softened butter evenly over the entire surface, leaving about a half-inch border around the edges. Mix the brown sugar and cinnamon together, then sprinkle it evenly over the butter. Gently press it into the butter so it sticks.
- Roll and cut: Starting from the long side, tightly roll the dough into a log. Pinch the seam to seal. Using a sharp knife or unflavored dental floss (my secret trick – it cuts cleanly without squishing!), cut the log into 12 equal pieces. Place them cut-side up in a greased 9×13 inch baking pan. Cover and let rise again for 30-45 minutes until puffy.
- Bake: Preheat your oven to 350°F (175°C). Bake the cinnamon rolls for 20-25 minutes, or until golden brown on top. They should sound hollow when tapped lightly. While they bake, make your frosting by beating all the frosting ingredients together until smooth and creamy.
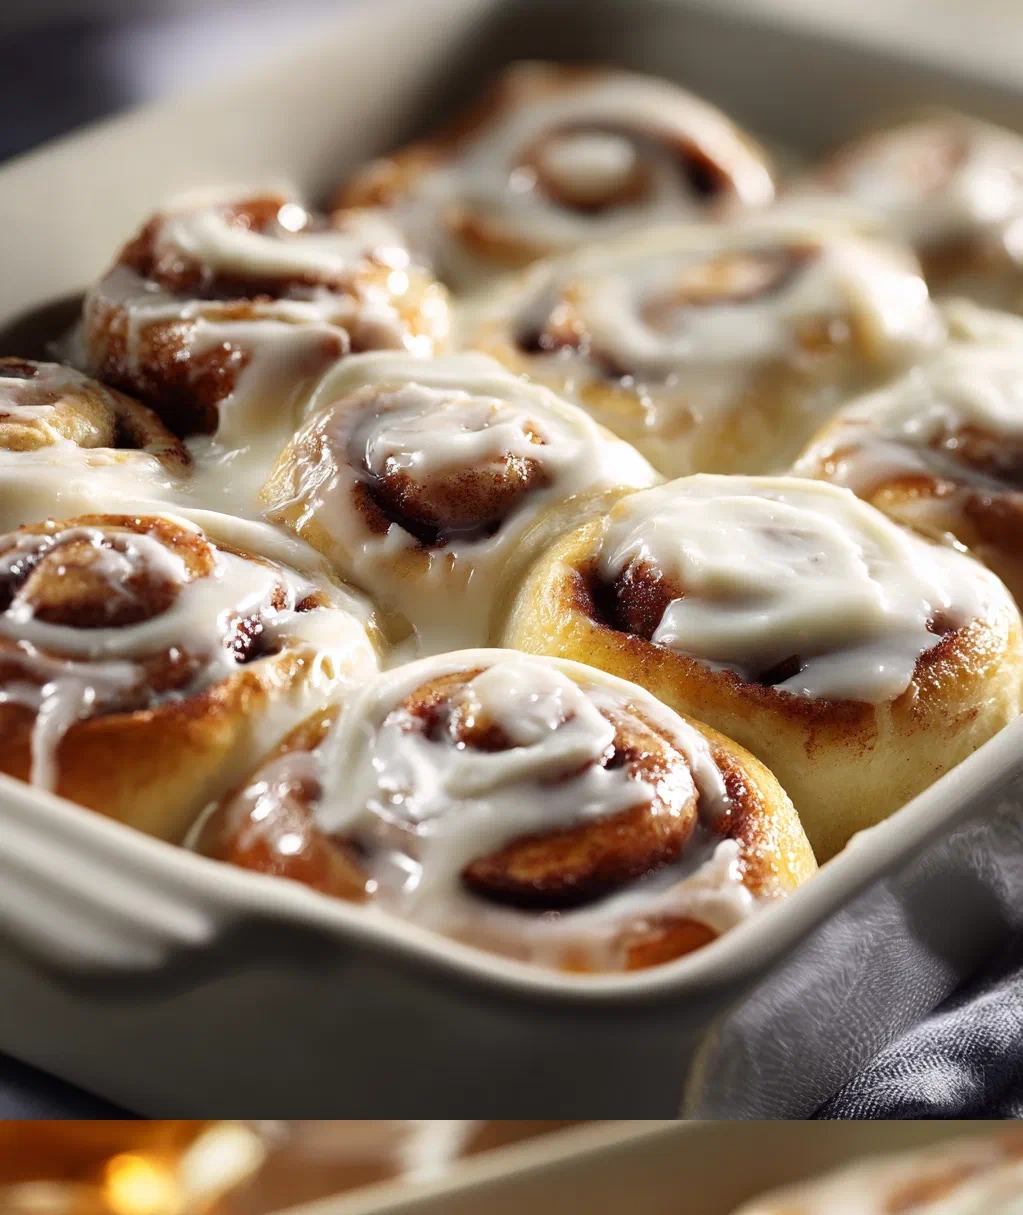
- Frost and enjoy: Let the cinnamon rolls cool for about 10 minutes, then spread the cream cheese frosting over the top while they’re still warm. This lets the frosting melt into all those delicious nooks and crannies. Serve immediately – they’re best fresh and warm!
My Favorite Cinnamon Roll Variations
Once you’ve mastered the basic cinnamon rolls, it’s time to play around! Here are some of my favorite twists that keep things interesting.
Apple Cinnamon Rolls:
Add 1 cup of finely chopped apples (peeled) to the filling along with the cinnamon sugar. The apples get soft and sweet as they bake, adding a wonderful texture and flavor. Granny Smith apples work particularly well because they hold their shape.
Pecan Sticky Buns:
Before adding your cinnamon rolls to the pan, sprinkle the bottom with a mixture of ½ cup melted butter, ½ cup brown sugar, and 1 cup chopped pecans. When you flip them out after baking, you get that gorgeous caramel-pecan topping. Just be careful – the pan will be hot!
Orange Cream Cheese Frosting:
Add 1 tablespoon of orange zest and 1 tablespoon of orange juice to your cream cheese frosting. The citrus cuts through the sweetness beautifully and adds a bright, fresh flavor that’s perfect for spring or summer mornings.
Overnight Cinnamon Rolls:
This is my go-to for holiday mornings! After cutting and placing the rolls in the pan, cover tightly with plastic wrap and refrigerate overnight. In the morning, take them out, let them sit at room temperature for 30 minutes while your oven preheats, then bake as usual. They’ll rise slowly in the fridge and be ready to bake when you wake up.
Healthier Options:
Want to lighten things up a bit? You can use whole wheat flour for half of the all-purpose flour. For the filling, try reducing the sugar by a quarter cup – the cinnamon flavor will shine through even more. And for the frosting, Greek yogurt can replace some of the cream cheese for a tangier, lighter option.
The beauty of homemade cinnamon rolls is how adaptable they are. Don’t be afraid to experiment and make them your own!
Serving and Storing Your Cinnamon Rolls
Fresh, warm cinnamon rolls are truly one of life’s greatest pleasures. But what about leftovers? (If you have any!) Here’s how to make the most of your baking.
Serving Suggestions:
These cinnamon rolls are fantastic on their own, but here are a few ways to make them extra special:
- Serve with a hot cup of coffee or cold glass of milk – the classic pairing never fails
- Add fresh berries on the side for a pop of color and freshness
- For a decadent treat, drizzle with a little extra caramel sauce or melted chocolate
- Pair with scrambled eggs and bacon for a complete breakfast spread
Storage Tips:
If you somehow have leftovers, store them in an airtight container at room temperature for up to 2 days. The frosting will keep them moist. After 2 days, they’re still safe to eat but will start to dry out.
Freezing Cinnamon Rolls:
Yes, you can freeze cinnamon rolls! Here’s how:
- Bake and cool the rolls completely (without frosting)
- Wrap individually in plastic wrap, then place in a freezer bag or airtight container
- Freeze for up to 3 months
- To serve, thaw overnight in the refrigerator or at room temperature for a few hours
- Warm in a 300°F oven for 10-15 minutes, then frost and serve
Reheating:
The best way to reheat cinnamon rolls is in the oven. Preheat to 300°F, place the rolls on a baking sheet, and warm for 10-15 minutes until heated through. You can also use the microwave for 15-20 seconds, but they might get a bit soggy. The oven method keeps that fresh-baked texture.
One safety note: If you’re making these for a crowd or planning to store them, make sure they’re completely cooled before covering or storing. Trapped heat can create condensation and make them soggy or promote mold growth. Just let them cool on a wire rack for at least an hour before putting them away.
Conclusion
There you have it – everything you need to make the most amazing homemade cinnamon rolls. I know it might seem like a lot of steps when you first read through, but I promise once you try it, you’ll see how simple and rewarding the process really is. The first time you pull that pan out of the oven and see those golden, puffy rolls, you’ll feel like a baking superstar.
What I love most about this recipe isn’t just the delicious end result (though that’s definitely a big part of it). It’s the whole experience – the smell filling your home, the satisfaction of kneading the dough, the anticipation as they rise, and the joy of sharing them with people you love. These cinnamon rolls have become a tradition in my house, and I hope they become one in yours too.
Don’t be discouraged if your first batch isn’t perfect. Baking is a learning process, and every time you make these, you’ll get better. Maybe your rolls will be a little lopsided, or maybe you’ll add too much cinnamon (is there such a thing?). That’s okay! They’ll still taste amazing, and you’ll have learned something for next time. The most important ingredient is always the love you put into them.
So go ahead – clear your counter, gather your ingredients, and give it a try. You’ve got this! And when you take that first warm, gooey, cinnamon-spiced bite of your homemade creation, you’ll understand why so many of us are completely obsessed with making cinnamon rolls from scratch. Happy baking!
Frequently Asked Questions
Q: Can I use instant yeast instead of active dry yeast?
Absolutely! If you're using instant yeast, you can mix it directly with the dry ingredients instead of activating it in warm milk first. Use the same amount (2 ¼ teaspoons). The rising times might be slightly shorter, so keep an eye on your dough and go by size rather than time – you want it to double in bulk.
Q: Why didn't my dough rise properly?
A few things could cause this. First, check your yeast – if it didn't get foamy when you activated it, it might be old or the milk was too hot. Yeast dies at temperatures above 130°F. Second, make sure your rising spot is warm enough (around 75-85°F is ideal). Cold kitchens can slow rising. Third, be patient – sometimes it just takes longer, especially in cooler weather. If after 2 hours it hasn't doubled, give it more time in a warmer spot.
Q: Can I make cinnamon rolls without a stand mixer?
You definitely can! I actually made these by hand for years before I got a stand mixer. Just mix everything in a large bowl with a wooden spoon until it comes together, then turn it out onto a floured surface and knead by hand. It might take a little more effort, but it's totally doable and actually quite therapeutic. Knead for 8-10 minutes until the dough is smooth and elastic.
Q: How do I get my cinnamon rolls to be soft and fluffy?
The secret to soft, fluffy cinnamon rolls is in the kneading and rising. Make sure you knead the dough until it's smooth and passes the 'windowpane test' – take a small piece and gently stretch it; it should be thin enough to see light through without tearing. Also, don't skip the second rise after you've cut and placed them in the pan. That final rise is what gives them that light, airy texture. And don't overbake – take them out as soon as they're golden brown.
Q: Can I make these cinnamon rolls dairy-free or vegan?
Yes! For dairy-free, use plant-based milk (almond or oat work well) and vegan butter. For eggs, you can use a flax egg (1 tablespoon ground flax mixed with 3 tablespoons water per egg) or commercial egg replacer. For vegan cream cheese frosting, there are several good store-bought vegan cream cheese options, or you can make a simple glaze with powdered sugar and plant-based milk. The texture might be slightly different, but they'll still be delicious!
PrintEasy Homemade Cinnamon Rolls
- Total Time: 120
- Yield: 12 cinnamon rolls 1x
Description
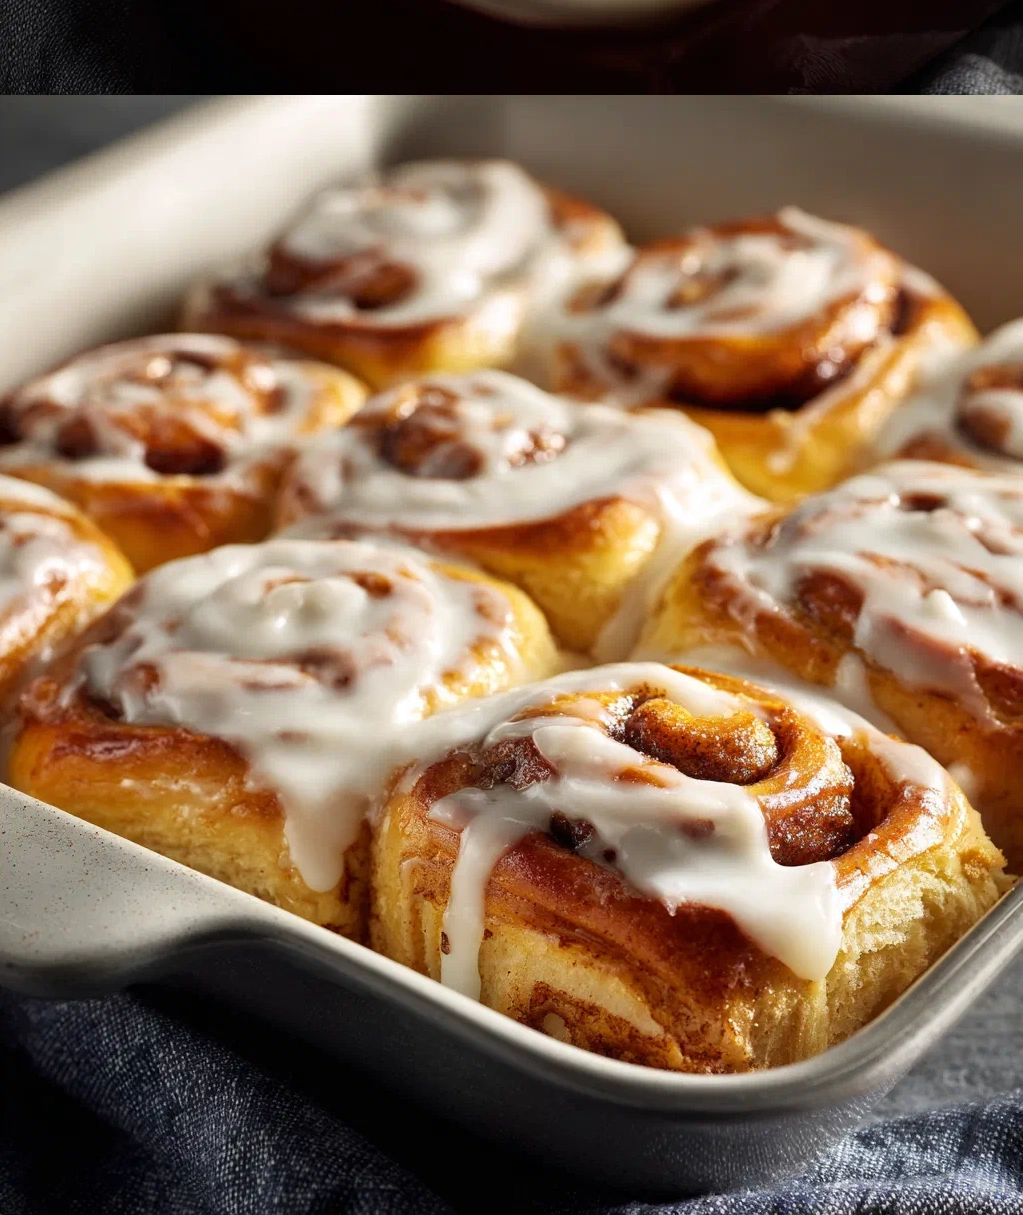
Soft, fluffy cinnamon rolls with a sweet glaze, perfect for a comforting breakfast or dessert.
Ingredients
1 cup warm milk (110°F)
2 1/4 tsp active dry yeast
1/2 cup granulated sugar
1/3 cup unsalted butter, melted
2 large eggs
4 1/2 cups all-purpose flour
1 tsp salt
1/2 cup unsalted butter, softened
1 cup brown sugar, packed
2 1/2 tbsp ground cinnamon
1 cup powdered sugar
2 tbsp milk
1 tsp vanilla extract
Instructions
Step 1: In a bowl, combine warm milk, yeast, and 1 tbsp sugar. Let sit for 5 minutes until foamy.
Step 2: Add melted butter, eggs, remaining sugar, flour, and salt. Mix until a soft dough forms.
Step 3: Knead dough on floured surface for 5 minutes until smooth. Place in greased bowl, cover, and let rise for 1 hour.
Step 4: Roll dough into a 16×21 inch rectangle. Spread softened butter evenly over dough.
Step 5: Mix brown sugar and cinnamon, then sprinkle evenly over buttered dough.
Step 6: Roll dough tightly from long edge and cut into 12 equal slices.
Step 7: Place rolls in greased 9×13 inch baking pan. Cover and let rise for 30 minutes.
Step 8: Preheat oven to 350°F. Bake rolls for 25-30 minutes until golden brown.
Step 9: Whisk powdered sugar, milk, and vanilla to make glaze. Drizzle over warm rolls before serving.
- Prep Time: 30
- Cook Time: 30
- Category: Breakfast
Nutrition
- Calories: 320
- Fat: 12g
- Carbohydrates: 48g
- Protein: 5g