
Homemade Gummies Fun Treat Recipe: 8 Amazingly Simple & Delicious Flavors!
Hey there! If you’re anything like me, you’ve probably stood in the candy aisle staring at those colorful gummy packages and thought, “I wish I could make these at home.” Well, guess what? You totally can! I’m so excited to share my go-to homemade gummies fun treat recipe with you today. I started making these a few years ago when I wanted healthier snacks for my kids, and now they’ve become our favorite kitchen project.
Trust me, there’s something magical about watching simple ingredients transform into chewy, fruity treats right on your stovetop. The best part? You control everything that goes in them. No mystery ingredients, no artificial colors if you don’t want them, just pure gummy goodness. Plus, it’s way more affordable than buying those fancy artisanal gummies at specialty stores.
I remember the first time I made these—my kitchen smelled like a candy factory, and my kids were practically dancing around waiting for them to set. That’s the thing about this homemade gummies fun treat recipe: it’s not just about the end product. It’s about the whole experience of creating something delicious together. So grab your apron, and let’s make some gummies!
Why You'll Love This Homemade Gummies Fun Treat Recipe
Let me tell you why this recipe has become a staple in my kitchen. First off, it’s incredibly simple—you don’t need fancy equipment or culinary skills. If you can stir something on the stove, you can make gummies. Here’s what makes this homemade gummies fun treat recipe so special:
- Total Control Over Ingredients: You know exactly what’s going into your treats. Want to use organic juice? Go for it! Prefer natural sweeteners? You can adjust the recipe.
- Endless Flavor Possibilities: Seriously, the sky’s the limit. I’ve made everything from classic strawberry to wild combinations like pineapple-coconut and even watermelon-mint.
- Perfect for Kids (and Kids at Heart): Making these is a fantastic activity to do with children. They love helping pour the mixture into molds and watching the transformation.
- Surprisingly Affordable: Once you have the basic supplies (which you probably already own), making a batch costs pennies compared to store-bought gummies.
- Great for Special Diets: You can easily make these vegan, gluten-free, or adjust the sweetness to your preference.
My favorite part is the texture. These homemade gummies have that perfect chew—not too hard, not too soft. They melt in your mouth with a burst of real fruit flavor. And the smell? Oh, your whole house will smell amazing while you’re making them.
What You'll Need for Your Homemade Gummies
Don’t worry—you probably have most of these items in your kitchen already! Here’s everything you need for this homemade gummies fun treat recipe:
Essential Ingredients
- 2 cups fruit juice (100% juice, not cocktail—I love using orange, apple, or berry blends)
- 4 tablespoons unflavored gelatin powder (this is what gives gummies their chew)
- 3-4 tablespoons honey or maple syrup (adjust to your sweetness preference)
- 1-2 tablespoons lemon juice (brightens the flavor)
- Optional: natural food coloring or fruit powders for extra color
Equipment You’ll Need
- Medium saucepan
- Whisk
- Measuring cups and spoons
- Silicone gummy molds (you can find these online or at craft stores—the shapes are so fun!)
- Dropper or small measuring cup for pouring
- Refrigerator space for setting
A quick safety note: always use oven mitts when handling hot pans, and keep little hands away from the stove. The mixture gets quite hot while you’re preparing it. I usually have my kids help with the pouring into molds part—that’s where the real fun begins!
Pro tip: If you don’t have gummy molds, you can use a shallow baking dish lined with parchment paper. Once set, just cut the gummies into squares with a pizza cutter. They won’t have cute shapes, but they’ll taste just as delicious.
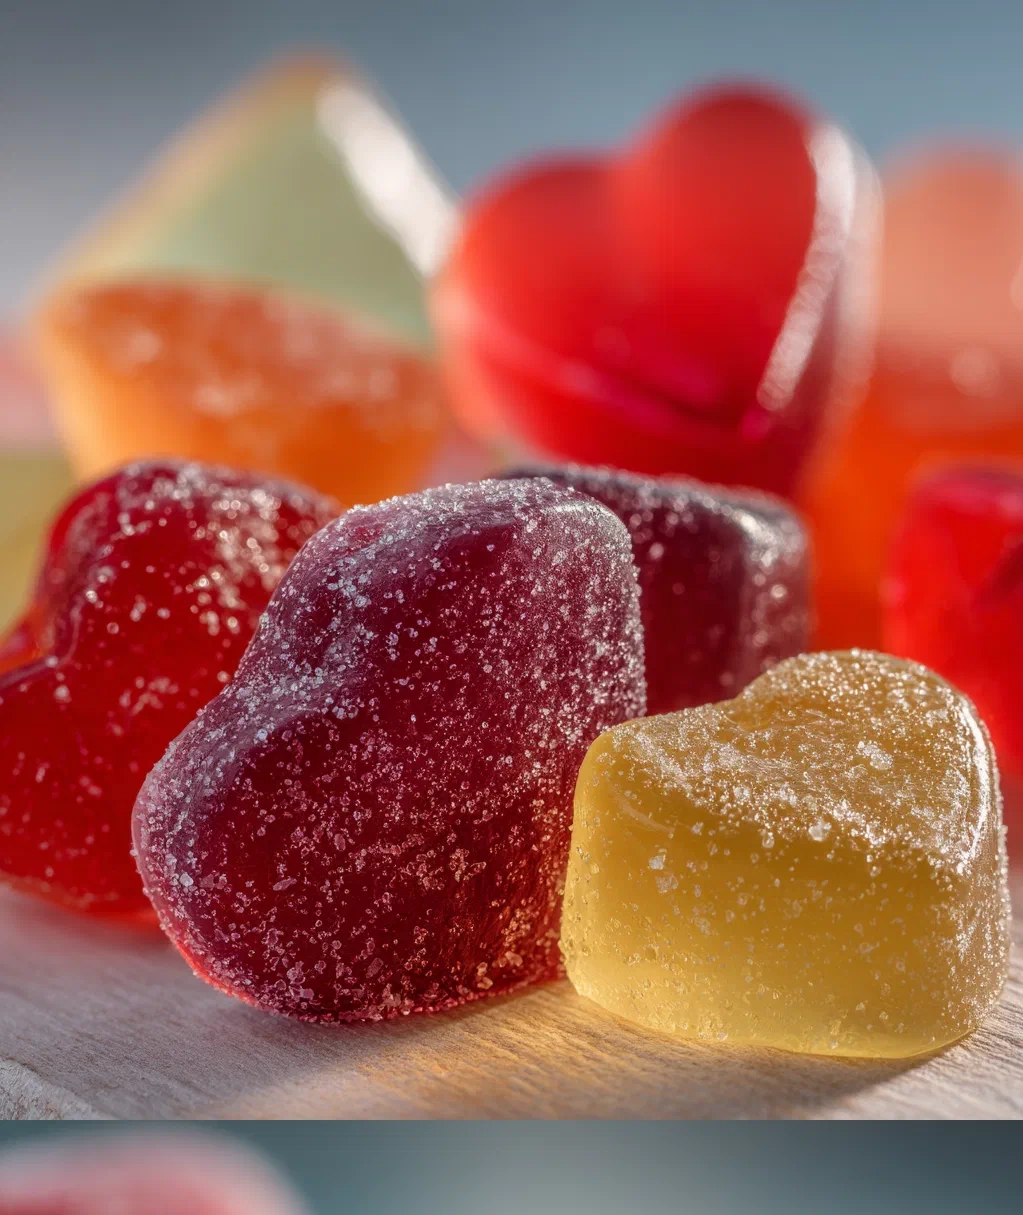
Step-by-Step Guide to Perfect Homemade Gummies
Ready to make magic happen? Follow these simple steps, and you’ll have beautiful homemade gummies in no time. I’ve made this recipe dozens of times, and these tips will help you get perfect results every time.
- Prep Your Molds: First, place your silicone gummy molds on a baking sheet. This makes them easier to move to the refrigerator later. Lightly spray the molds with cooking spray if you want to ensure easy removal—though silicone usually releases beautifully without it.
- Bloom the Gelatin: Pour 1/2 cup of your fruit juice into a medium saucepan. Sprinkle the gelatin powder evenly over the juice. Let it sit for 5 minutes—this is called “blooming” and helps prevent lumps. You’ll see the gelatin absorb the liquid and become spongy.
- Heat and Combine: Turn the heat to medium-low and gently warm the gelatin mixture, stirring constantly with a whisk. Don’t let it boil! Once the gelatin has completely dissolved (about 2-3 minutes), add the remaining juice, sweetener, and lemon juice.
- Strain and Pour: Keep stirring over low heat until everything is well combined and smooth—about another 3-4 minutes. If you want super smooth gummies, you can strain the mixture through a fine mesh sieve. Then use a dropper or small measuring cup to carefully fill each mold cavity.
- Set and Enjoy: Carefully transfer the baking sheet with filled molds to your refrigerator. Let them set for at least 2 hours, but I usually wait 3-4 for the perfect texture. Once firm, pop them out of the molds and enjoy!
Timing note: The whole process takes about 15 minutes of active time, plus setting time. I often make these in the morning and have them ready by afternoon snack time. The hardest part is waiting for them to set!
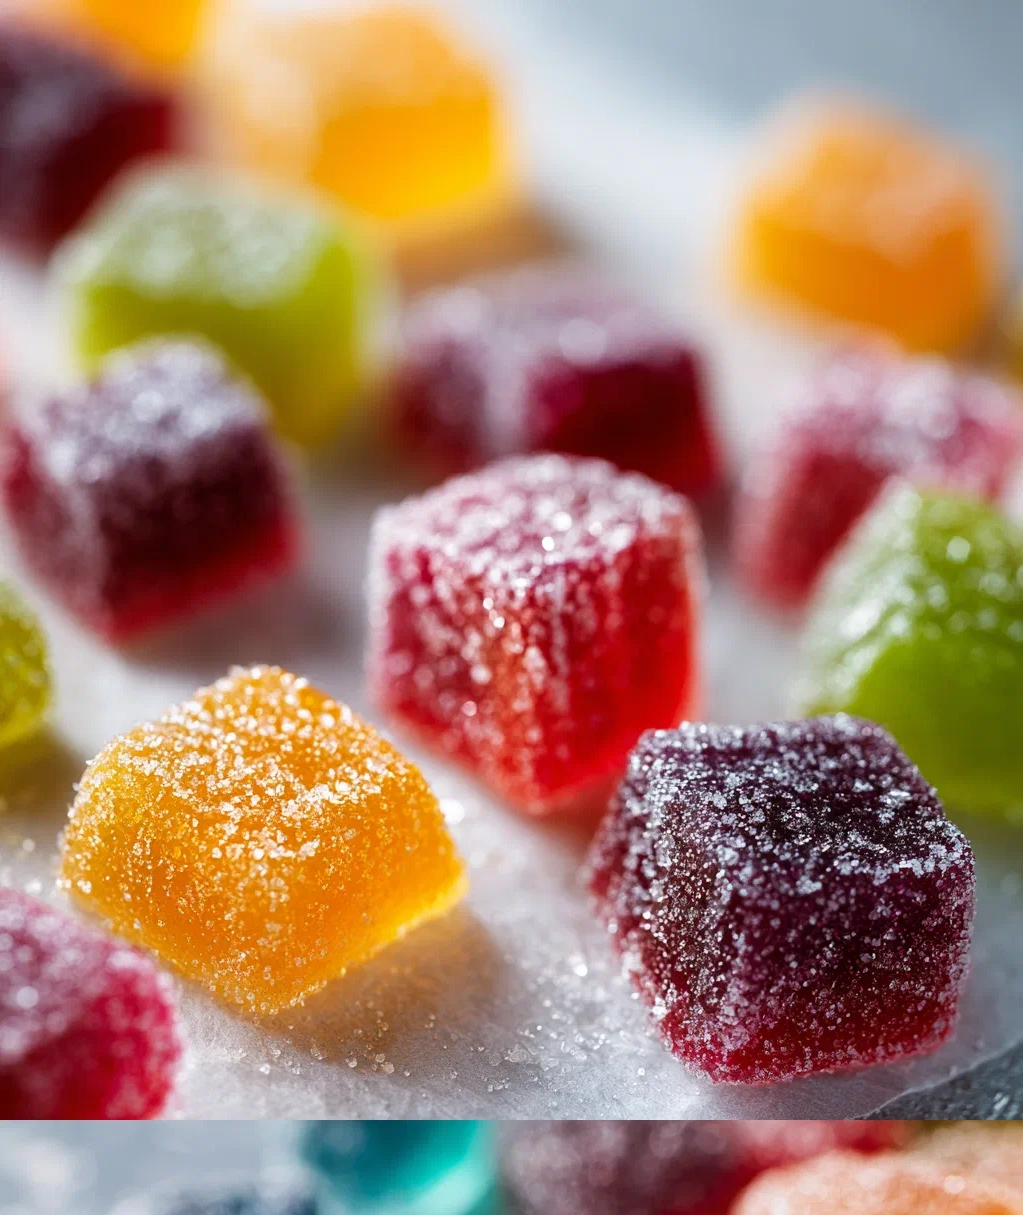
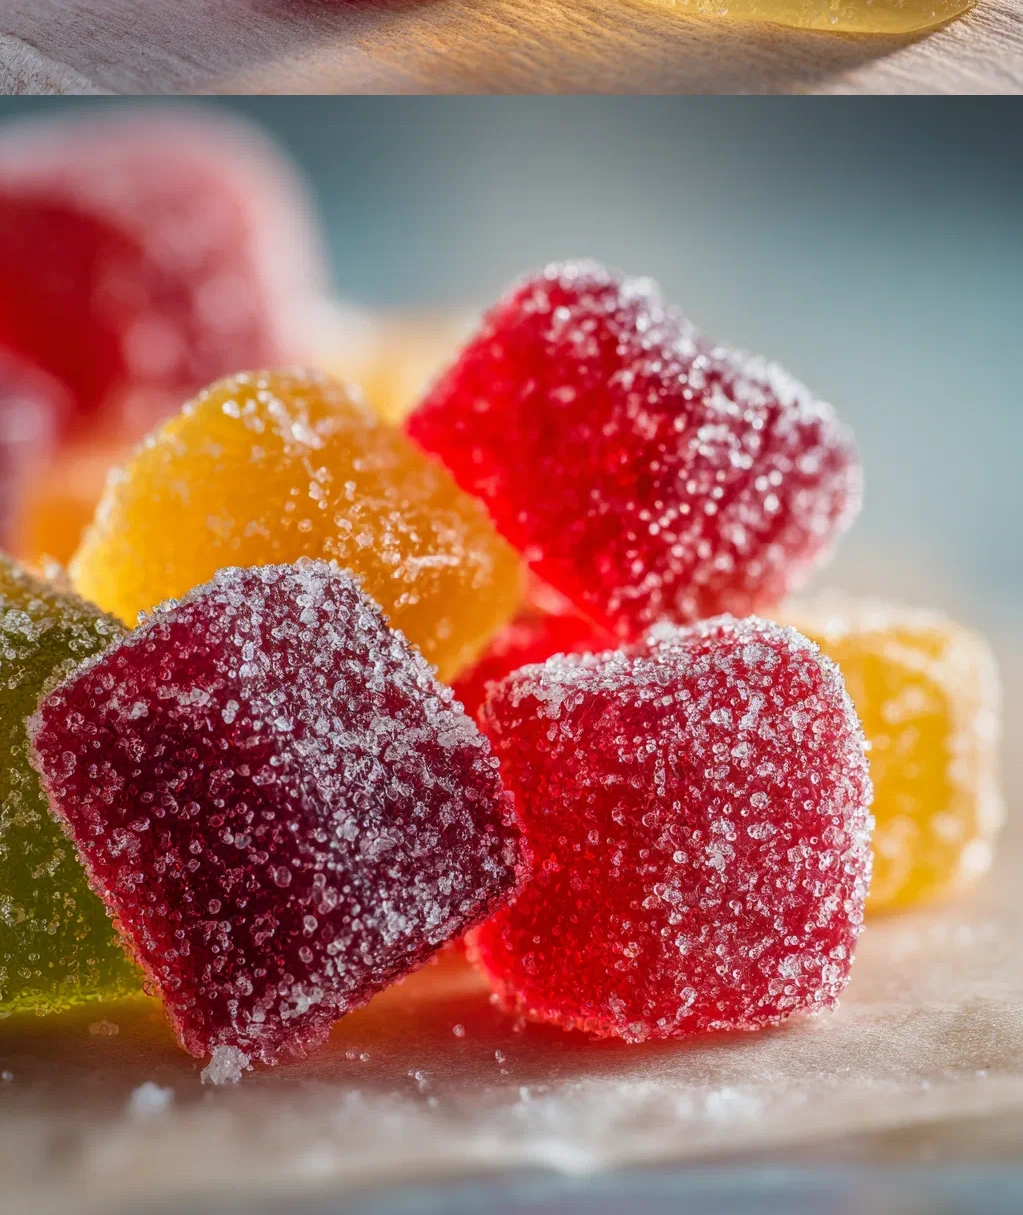
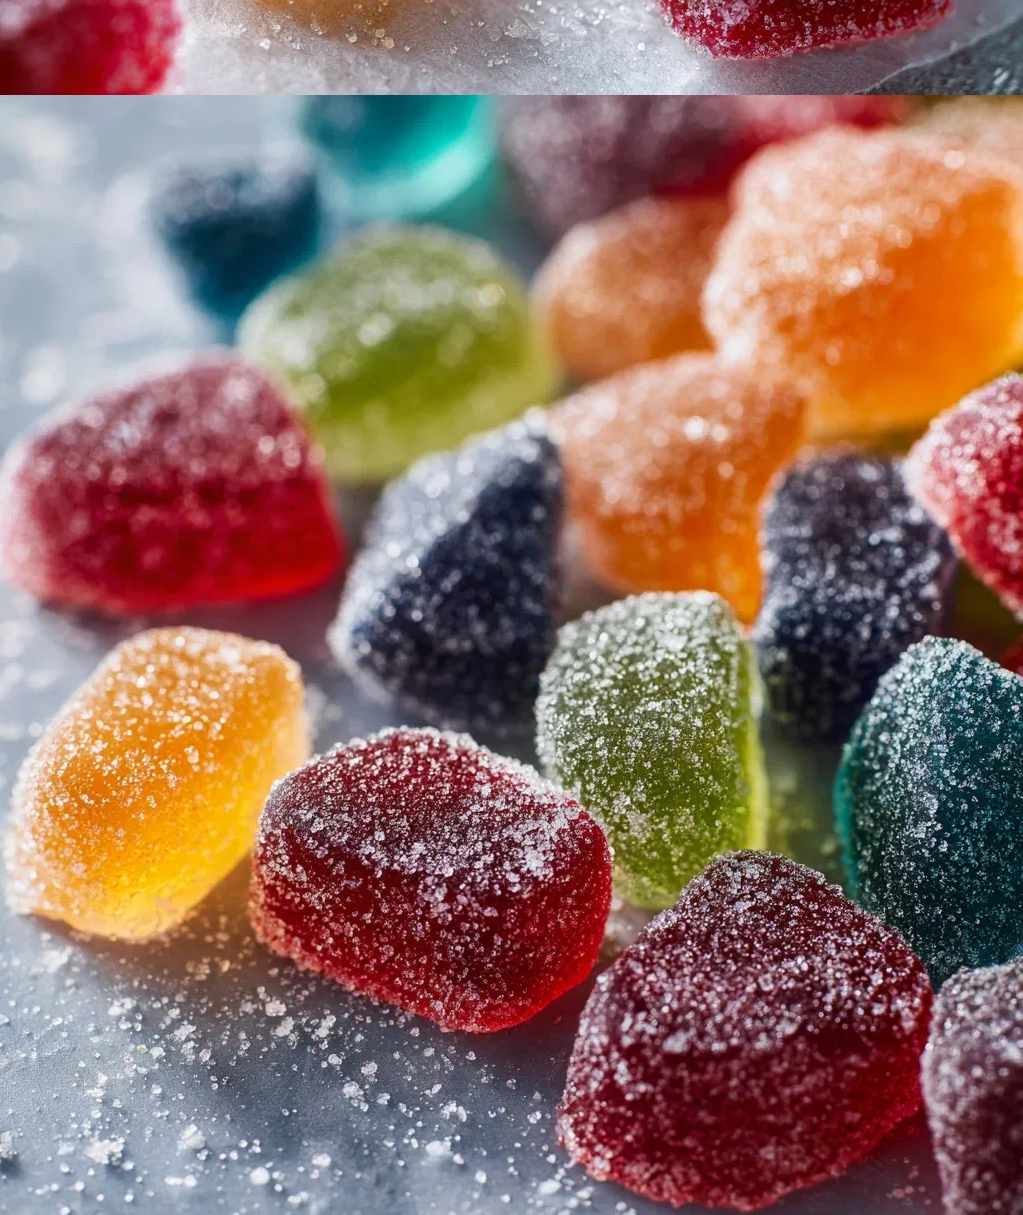
8 Fantastic Flavor Variations for Your Homemade Gummies
This is where the real fun begins! One of my favorite things about this homemade gummies fun treat recipe is how easily you can customize it. Here are 8 delicious flavor ideas to get you started:
- Classic Strawberry: Use strawberry juice and add a teaspoon of strawberry puree for extra flavor. These taste like summer!
- Tropical Paradise: Mix pineapple and coconut juice (half and half). Add a tiny pinch of citric acid for that tangy tropical punch.
- Berry Blast: Combine blueberry, raspberry, and blackberry juices. The color is gorgeous, and the flavor is complex and fruity.
- Citrus Sunrise: Use orange juice with a tablespoon of grapefruit juice. So refreshing and bright!
- Apple Cinnamon: Warm apple juice with a cinnamon stick before using. Remove the stick before adding gelatin. These taste like fall in gummy form.
- Watermelon Mint: Watermelon juice with a few finely chopped mint leaves strained out. So cooling on a hot day.
- Pomegranate Power: Pure pomegranate juice makes stunning deep red gummies that are packed with antioxidants.
- Chocolate Orange: For something different, use orange juice and add a tablespoon of cocoa powder. These have a subtle chocolate flavor that pairs beautifully with the orange.
- Total Time: 150
- Yield: Approximately 100 gummies 1x
- Prep Time: 20
- Cook Time: 10
- Category: Dessert
- Calories: 25
- Fat: 0g
- Carbohydrates: 6g
- Protein: 1g
My personal favorite is the tropical paradise version—it always transports me to a beach vacation. But really, you can’t go wrong with any of these. Feel free to mix and match juices to create your own signature flavor. That’s the beauty of homemade!
Storage tip: Keep your gummies in an airtight container in the refrigerator. They’ll stay fresh for about a week, though mine never last that long!
Troubleshooting Your Homemade Gummies
Even with the simplest recipes, sometimes things don’t go perfectly. Don’t worry—I’ve made every mistake possible with gummies, so I can help you avoid them! Here are common issues and how to fix them:
Problem: Gummies are too soft or don’t set properly.
Solution: You might not have used enough gelatin, or the mixture didn’t heat enough to fully dissolve it. Next time, make sure your gelatin is completely dissolved before pouring—you shouldn’t see any granules. Also, check that you’re using unflavored gelatin powder, not gelatin sheets (they require different measurements).
Problem: Gummies are too tough or rubbery.
Solution: You probably used too much gelatin or overheated the mixture. Remember, low and slow is the way to go! Don’t let the mixture boil, and measure your gelatin carefully.
Problem: Gummies have a weird texture or are grainy.
Solution: The gelatin might have clumped. Always sprinkle it evenly over cool liquid and let it bloom before heating. If you see lumps while heating, keep whisking gently until they dissolve. Straining through a fine mesh sieve can save lumpy mixtures.
Problem: Gummies stick to the molds.
Solution: Make sure your molds are completely clean and dry before using. A very light coating of cooking spray can help, though silicone molds usually release well on their own. If they’re sticking, try freezing them for 15 minutes before popping out.
Remember, even imperfect gummies usually taste great! My first batch was a bit lumpy, but my kids still devoured them. Practice makes perfect, and each batch gets better.
Conclusion
Well, there you have it—my complete guide to making the most delicious homemade gummies! I hope you’re as excited to try this recipe as I was when I first discovered it. There’s something so satisfying about creating these cheerful little treats from scratch, knowing exactly what’s in them, and sharing them with people you love.
My kitchen has seen countless batches of these gummies over the years—birthday party favors, after-school snacks, even little gifts for teachers and neighbors. They always bring smiles, and I love that I can customize them for different occasions. Last Christmas, I made cranberry-orange gummies shaped like trees and stars, and they were a huge hit!
The best part about this homemade gummies fun treat recipe is how it brings people together. Whether you’re making them with kids, friends, or just for yourself as a creative kitchen project, the process is just as enjoyable as the result. So go ahead—pick your favorite juice, grab those molds, and start creating. Your first batch might not be perfect (mine certainly wasn’t!), but I promise they’ll be delicious. And each time you make them, you’ll get better and more creative with your flavors and techniques.
I’d love to hear about your gummy adventures! What flavors did you try? Did you come up with any amazing combinations? However your gummies turn out, remember that the real magic is in the making. Happy gummy creating!
Frequently Asked Questions
Q: Can I make these homemade gummies without gelatin?
Yes! You can use agar agar powder instead of gelatin to make vegan gummies. Use about 2 teaspoons of agar agar for this recipe, but follow the package instructions carefully as it sets differently than gelatin. The texture will be slightly firmer and more brittle, but still delicious.
Q: How long do homemade gummies last and how should I store them?
Store your gummies in an airtight container in the refrigerator. They'll stay fresh for about 5-7 days. If you want to keep them longer, you can freeze them for up to 2 months. Just spread them in a single layer on a baking sheet to freeze first, then transfer to a freezer bag. Thaw in the refrigerator before eating.
Q: Can I use fresh fruit instead of juice in this gummy recipe?
Absolutely! Puree fresh fruit and strain it to remove seeds and pulp, then use it like you would juice. You might need to adjust the sweetener since fresh fruit varies in sweetness. Berries, peaches, and mangoes work particularly well. Just make sure your puree is smooth so your gummies have a nice texture.
Q: My gummies came out sticky. What did I do wrong?
Sticky gummies usually mean they need more setting time or your refrigerator isn't cold enough. Make sure they chill for at least 3-4 hours. You can also lightly dust finished gummies with cornstarch or arrowroot powder to reduce stickiness—just shake off the excess before serving.
Q: Can I make these gummies less sweet?
Definitely! That's one of the great things about making gummies at home. Start with just 2 tablespoons of sweetener instead of 3-4, or use a less sweet juice. You can also increase the lemon juice slightly to balance the flavors. Taste your mixture before pouring into molds (when it's cooled a bit) and adjust as needed.
PrintHomemade Gummies Fun Treat Recipe: 8 Amazingly Simple & Delicious Flavors!
Description
A fun and easy recipe for homemade gummies in eight delicious flavors, perfect for a sweet treat.
Ingredients
2 cups fruit juice (divided into 8 flavors: strawberry, orange, lemon, lime, grape, apple, pineapple, cherry)
6 tablespoons unflavored gelatin powder
1/2 cup honey or maple syrup (adjust to taste)
Optional: food coloring for vibrant colors
Gummy molds (various shapes)
Instructions
Step 1: Heat 1/4 cup of fruit juice in a small saucepan over low heat until warm but not boiling.
Step 2: Sprinkle 3/4 tablespoon of gelatin over the warm juice and whisk until fully dissolved.
Step 3: Stir in 1 tablespoon of honey or maple syrup until combined.
Step 4: Add a drop of food coloring if desired and mix well.
Step 5: Pour the mixture into gummy molds and repeat steps 1-4 for each flavor.
Step 6: Refrigerate the molds for at least 2 hours until the gummies are set.
Step 7: Pop the gummies out of the molds and store in an airtight container in the refrigerator.