
The Best Piroshki Recipe Ever: Incredible Homemade Magic You’ll Adore
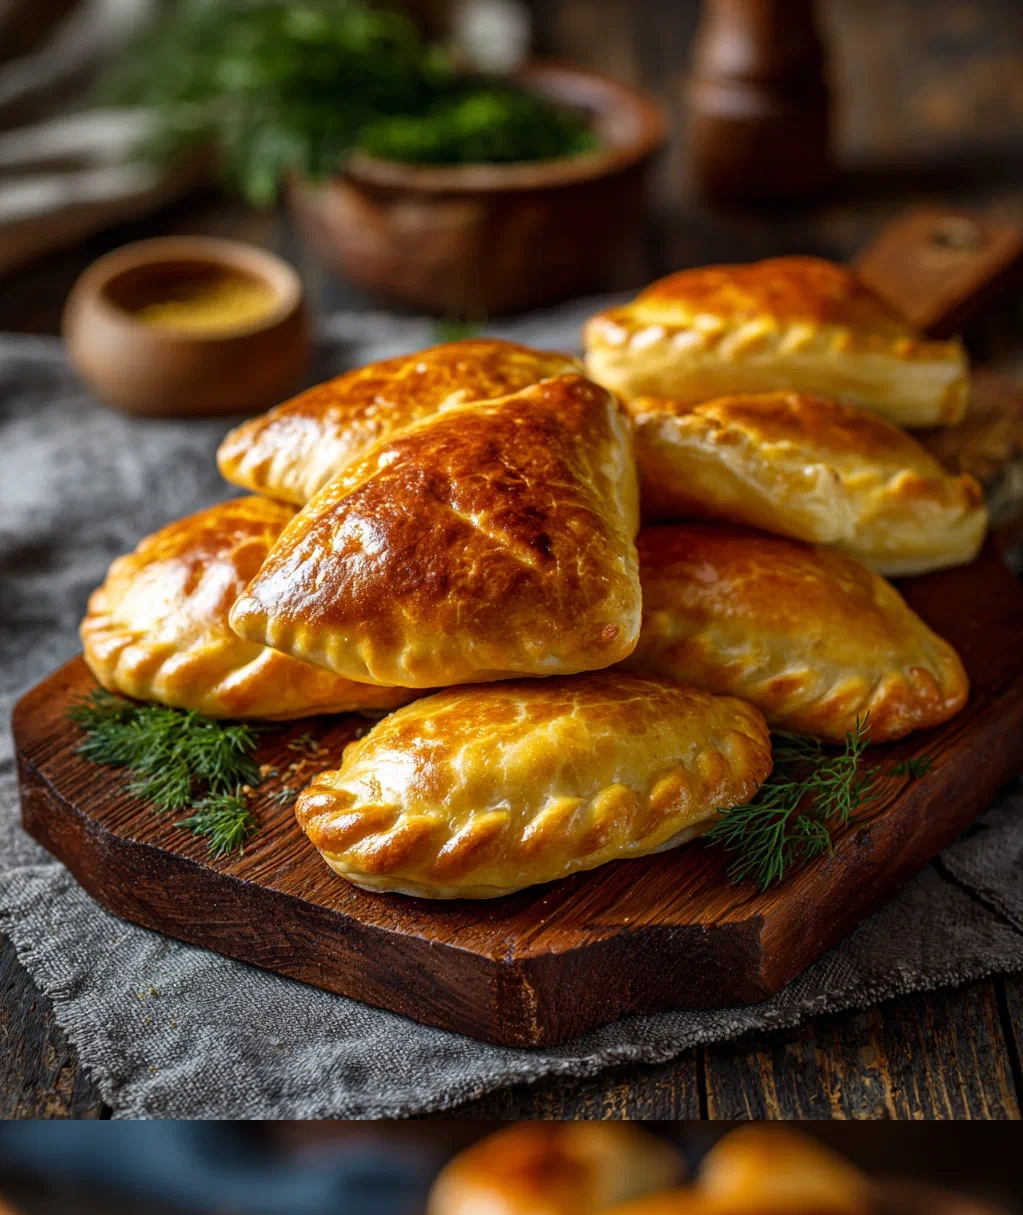
Hey there! I’ve got something special to share today that I’m just bursting to tell you about. You know how sometimes you taste something that makes you close your eyes and just… smile? That’s what these piroshki do for me. I’ve been making them for years, tweaking and perfecting, and I truly believe I’ve landed on the best piroshki recipe ever. Seriously, my family begs me to make them every Sunday now.
I remember the first time I tried piroshki at my grandma’s house when I was little. The smell of that dough frying, the warm filling spilling out when you bit into it… it was pure comfort. But her recipe was always a bit of a mystery, scribbled on an old card with measurements like “a handful” and “until it feels right.” So I spent years testing and simplifying until I got it just perfect for home cooks like us.
What makes this the best piroshki recipe ever? Well, it’s not fussy. You don’t need special equipment or hard-to-find ingredients. Just good, simple stuff from your kitchen. The dough comes together beautifully every time, and the filling options are endless. Plus, they freeze like a dream, so you can have homemade piroshki whenever the craving hits. Trust me, once you try these, you’ll understand why I’m so excited to share them with you.
Why This Is Truly the Best Piroshki Recipe Ever
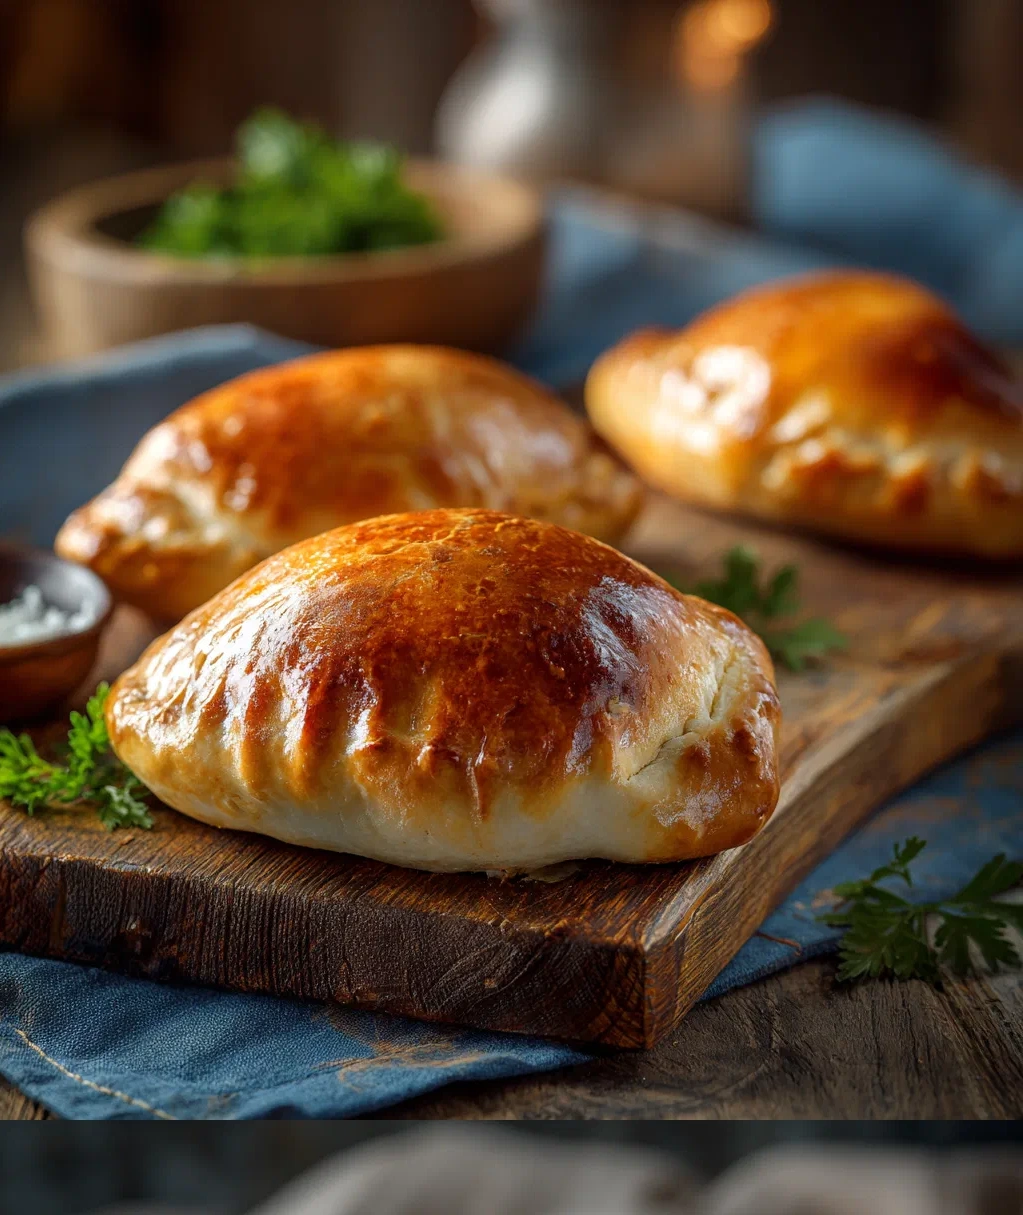
Let me tell you why I’m so confident calling this the best piroshki recipe ever. First, it’s reliable. I’ve made these dozens of times, and they turn out perfect every single time. No more guessing games with the dough consistency or worrying about fillings leaking out while frying. Second, the flavor balance is just right – that golden, slightly crispy exterior giving way to a soft, fluffy inside with a savory (or sweet!) surprise waiting inside.
Here’s what you’ll love about it:
- It’s forgiving: Don’t stress if your dough isn’t perfect at first. This recipe is flexible and easy to work with.
- Versatile fillings: Start with the classic ground beef and onion, then get creative with potato, cabbage, or even sweet options.
- Freezer-friendly: Make a big batch and freeze them for quick meals later. They reheat beautifully.
- Impressive but simple: These look like you spent hours in the kitchen, but the process is actually quite straightforward.
- That homemade taste: Nothing beats the flavor of piroshki made with love in your own kitchen.
My favorite part is watching people’s faces when they take that first bite. There’s always that moment of surprise, then pure enjoyment. It’s why I keep coming back to this recipe – it never fails to delight.
Everything You Need for the Best Piroshki Recipe Ever
Gathering your ingredients is the first step to making the best piroshki recipe ever. The beauty here is that you probably have most of this in your pantry already. I like to get everything measured out before I start – it makes the process so much smoother. Here’s what you’ll need:
For the Dough:
- 4 cups all-purpose flour (plus extra for dusting)
- 1 cup warm milk (about 110°F – not too hot!)
- 2 large eggs
- ¼ cup granulated sugar
- 1 packet active dry yeast (2¼ teaspoons)
- ½ teaspoon salt
- ¼ cup unsalted butter, melted and cooled slightly
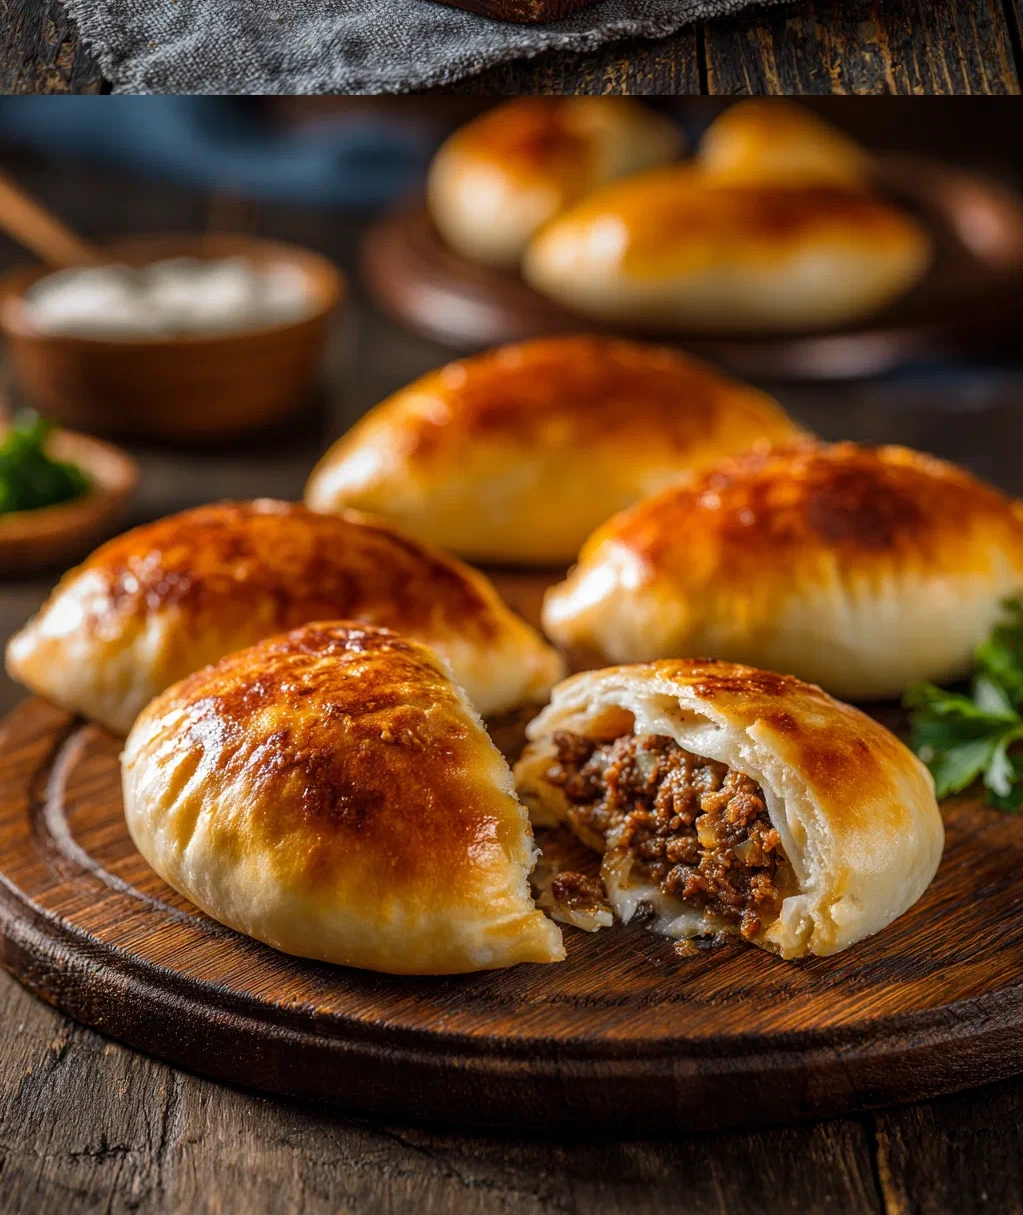
For the Classic Beef Filling:
- 1 pound ground beef (80/20 works great)
- 1 medium onion, finely chopped
- 2 tablespoons vegetable oil
- Salt and black pepper to taste
- Optional: 1 teaspoon paprika or your favorite seasoning
For Frying:
- Vegetable oil for frying (about 2-3 cups)
- Paper towels for draining
A quick note about the yeast: make sure your milk is warm but not hot. If it’s too hot, it’ll kill the yeast and your dough won’t rise properly. I test it on my wrist – it should feel comfortably warm, like bath water. And don’t skip letting your melted butter cool a bit before adding it to the milk mixture. Hot butter plus warm milk could mean trouble for the yeast.
How to Make the Best Piroshki Recipe Ever: Step-by-Step
Ready to dive in? Let’s make the best piroshki recipe ever together. I’ll walk you through each step, just like I would if we were cooking together in my kitchen. Don’t worry if it’s your first time – I’ve included all my little tricks to make it easy.
Step 1: Make the Dough
Start by activating your yeast. In a large bowl, combine the warm milk, sugar, and yeast. Give it a gentle stir and let it sit for about 5-10 minutes. You should see it getting foamy and bubbly – that means your yeast is alive and happy! Next, whisk in the eggs, melted butter, and salt. Now gradually add the flour, about a cup at a time, mixing until a soft dough forms. Turn it out onto a lightly floured surface and knead for 5-7 minutes until smooth and elastic. Place it in a lightly oiled bowl, cover with a clean kitchen towel, and let it rise in a warm spot for about 1-1.5 hours, or until doubled in size.
Step 2: Prepare the Filling
While the dough rises, make your filling. Heat the oil in a skillet over medium heat. Add the chopped onion and cook until soft and translucent, about 5 minutes. Add the ground beef, breaking it up with a spoon as it cooks. Season with salt, pepper, and paprika if using. Cook until the beef is browned and cooked through, then remove from heat and let it cool completely. This is important – if the filling is too hot, it’ll make the dough hard to work with.
Step 3: Assemble and Fry
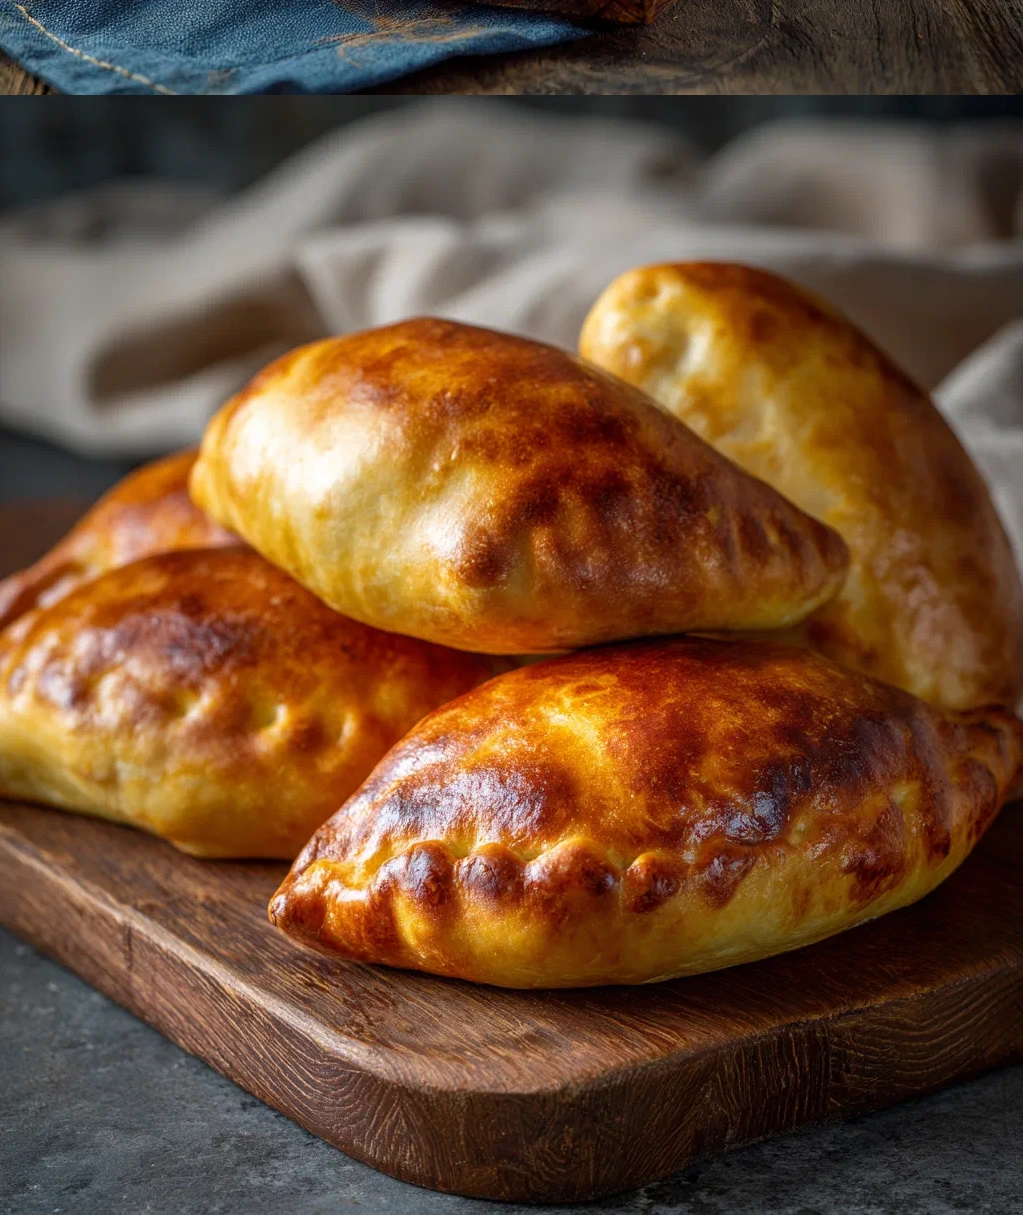
Once your dough has risen, punch it down gently and divide it into 12-16 equal pieces. Roll each piece into a ball, then flatten into a circle about ¼ inch thick. Place a tablespoon of cooled filling in the center. Now here’s my trick: fold the dough over to create a half-moon shape, then pinch the edges together really well. I like to use a fork to press the edges – it seals them perfectly and looks pretty too.
Heat about 2 inches of oil in a heavy-bottomed pot to 350°F. Carefully add 3-4 piroshki at a time, don’t overcrowd them. Fry for 2-3 minutes per side until golden brown. Use a slotted spoon to transfer them to a paper towel-lined plate to drain excess oil. Let them cool for a few minutes before serving – that filling stays hot!
Safety tip: Always be careful when working with hot oil. Keep kids and pets away from the stove, and never leave the pot unattended. If the oil starts smoking, it’s too hot – turn down the heat immediately.
Delicious Variations on the Best Piroshki Recipe Ever
Once you’ve mastered the classic beef version, the fun really begins! The best piroshki recipe ever is incredibly versatile. Here are some of my favorite twists that keep things interesting:
Savory Options:
- Potato and Cheese: Mashed potatoes mixed with shredded cheddar or mozzarella. Add some chopped dill for extra flavor.
- Cabbage and Mushroom: Sautéed cabbage with mushrooms and onions. So comforting on a cold day.
- Chicken and Rice: Cooked chicken mixed with rice and herbs. Great for using up leftovers.
- Spinach and Feta: Sautéed spinach with crumbled feta cheese. Light and delicious.
Sweet Versions:
- Apple Cinnamon: Diced apples cooked with cinnamon and a touch of sugar. Perfect with coffee.
- Cherry Cream Cheese: Cream cheese mixed with cherry preserves. These disappear fast!
- Nutella and Banana: A spoonful of Nutella with banana slices. Kids love these.
My personal favorite variation? I sometimes make mini versions for parties – just use less dough and filling. They’re perfect finger food! And here’s a secret: you can bake these instead of frying if you prefer. Brush them with an egg wash and bake at 375°F for 20-25 minutes until golden. They won’t be quite as traditional, but they’re still delicious and a bit healthier.
Don’t be afraid to experiment with your fillings. The best piroshki recipe ever is meant to be adaptable to what you love. Just remember to cook any raw ingredients in your filling first, and let everything cool before wrapping it in dough.
Serving and Storing Your Perfect Piroshki
You’ve made the best piroshki recipe ever – now let’s talk about enjoying them! Fresh out of the fryer (or oven), these are absolute heaven. I like to serve them warm with a dollop of sour cream on the side. The cool tang of the sour cream pairs perfectly with the rich, savory filling. For sweet versions, a dusting of powdered sugar or a drizzle of honey works wonders.
These make a fantastic meal on their own – 2-3 piroshki per person is usually plenty. But they’re also great as part of a spread. I often serve them with:
- A simple green salad with vinaigrette
- Pickled vegetables for contrast
- A bowl of borscht or other soup
- Just by themselves as a snack!
Now, what about leftovers? The best piroshki recipe ever yields treats that store beautifully. Let them cool completely, then store in an airtight container in the refrigerator for up to 3 days. To reheat, I recommend using an oven or toaster oven at 350°F for 10-15 minutes until warmed through and crispy again. The microwave works in a pinch, but they won’t be as crispy.
For freezing: arrange cooled piroshki in a single layer on a baking sheet and freeze until solid, then transfer to freezer bags. They’ll keep for up to 3 months. To reheat from frozen, bake at 375°F for 20-25 minutes – no need to thaw first. This is my secret for having homemade piroshki ready whenever guests drop by or I need a quick dinner.
One last tip: if you’re making these ahead for a party, you can assemble them the day before and refrigerate them uncooked. Just let them come to room temperature for about 30 minutes before frying or baking.
Conclusion
Well, there you have it – my absolute favorite way to make piroshki! I hope you’ll give this recipe a try and discover for yourself why I call it the best piroshki recipe ever. It’s become such a cherished part of my cooking routine, something I make not just for special occasions, but for ordinary days when we need a little extra comfort.
Remember, don’t get discouraged if your first batch isn’t perfect. Cooking is like any skill – it gets better with practice. My first piroshki were… let’s just say they were more abstract art than perfect half-moons! But each time I made them, I learned something new, adjusted something small, and got closer to that ideal balance of fluffy dough and flavorful filling.
What I love most about this recipe is how it brings people together. There’s something about homemade piroshki that makes everyone gather in the kitchen, waiting for that first batch to come out of the oil. The conversations, the laughter, the shared anticipation – it’s as much about the experience as it is about the food.
So grab your apron, gather your ingredients, and get ready to make some kitchen magic. Whether you stick with the classic beef filling or try one of the variations, I know you’re going to love these. And who knows – maybe this will become your family’s new favorite tradition too. Happy cooking!
Frequently Asked Questions
Q: Can I make the dough ahead of time?
Absolutely! You can prepare the dough, let it rise once, then punch it down and refrigerate it overnight in an oiled bowl covered with plastic wrap. The next day, let it come to room temperature for about an hour before shaping and frying. The cold fermentation actually develops more flavor.
Q: What's the best oil for frying piroshki?
I prefer vegetable oil or canola oil because they have a high smoke point and neutral flavor. Avoid olive oil as it can burn at the high temperatures needed for frying. Peanut oil works well too if you don't have allergies to consider. Just make sure you have enough oil to cover the piroshki at least halfway while frying.
Q: My piroshki are splitting open while frying. What am I doing wrong?
This usually happens for two reasons: either your filling is too hot when you wrap it (it should be completely cooled), or you're not sealing the edges well enough. Make sure to pinch the edges firmly, and I find using a fork to press them closed creates a really secure seal. Also, don't overfill them – about a tablespoon of filling is perfect.
Q: Can I bake piroshki instead of frying them?
Yes, you can! Brush them with an egg wash (one egg beaten with a tablespoon of water) and bake at 375°F for 20-25 minutes until golden brown. They won't be quite as crispy as fried piroshki, but they're still delicious and a bit healthier. The baking method works particularly well for sweet fillings.
Q: How do I know when my oil is at the right temperature for frying?
The best way is to use a kitchen thermometer – aim for 350°F. If you don't have one, you can test with a small piece of dough. Drop it in the oil – if it sizzles immediately and rises to the surface, the oil is ready. If it burns quickly, the oil is too hot. If it sinks and doesn't bubble much, it's too cool. Maintaining the right temperature is key for perfectly cooked piroshki.
PrintThe Best Piroshki Recipe Ever: Incredible Homemade Magic You’ll Adore
- Total Time: 100
- Yield: 8 piroshki 1x
Description
Fluffy yeast dough filled with savory ground beef and onion mixture, fried to golden perfection for the ultimate comfort food experience.
Ingredients
2 cups all-purpose flour
1/2 cup warm milk
1 large egg
2 tablespoons sugar
1 teaspoon active dry yeast
1/2 teaspoon salt
2 tablespoons unsalted butter, softened
1 tablespoon vegetable oil
1/2 pound ground beef
1 small onion, finely chopped
1/4 teaspoon black pepper
Vegetable oil for frying
Instructions
Step 1: In a bowl, combine warm milk, sugar, and yeast. Let sit for 5 minutes until frothy.
Step 2: Add egg, salt, and softened butter to the yeast mixture. Mix well.
Step 3: Gradually add flour, mixing until a soft dough forms. Knead for 5 minutes until smooth.
Step 4: Place dough in a greased bowl, cover with a towel, and let rise for 1 hour until doubled.
Step 5: While dough rises, heat 1 tablespoon oil in a pan. Cook onion until translucent, then add ground beef and pepper. Cook until browned, then cool.
Step 6: Punch down dough and divide into 8 equal pieces. Roll each into a circle.
Step 7: Place 1-2 tablespoons of filling in the center of each circle. Fold and seal edges tightly.
Step 8: Heat 2 inches of vegetable oil in a deep pan to 350°F (175°C). Fry piroshki in batches for 3-4 minutes per side until golden brown.
Step 9: Drain on paper towels and serve warm.
- Prep Time: 20
- Cook Time: 20
- Category: Main Course
Nutrition
- Calories: 280
- Fat: 14g
- Carbohydrates: 28g
- Protein: 11g