
Chocolate Mousse Cake: The Incredible Dessert That Will Steal Your Heart
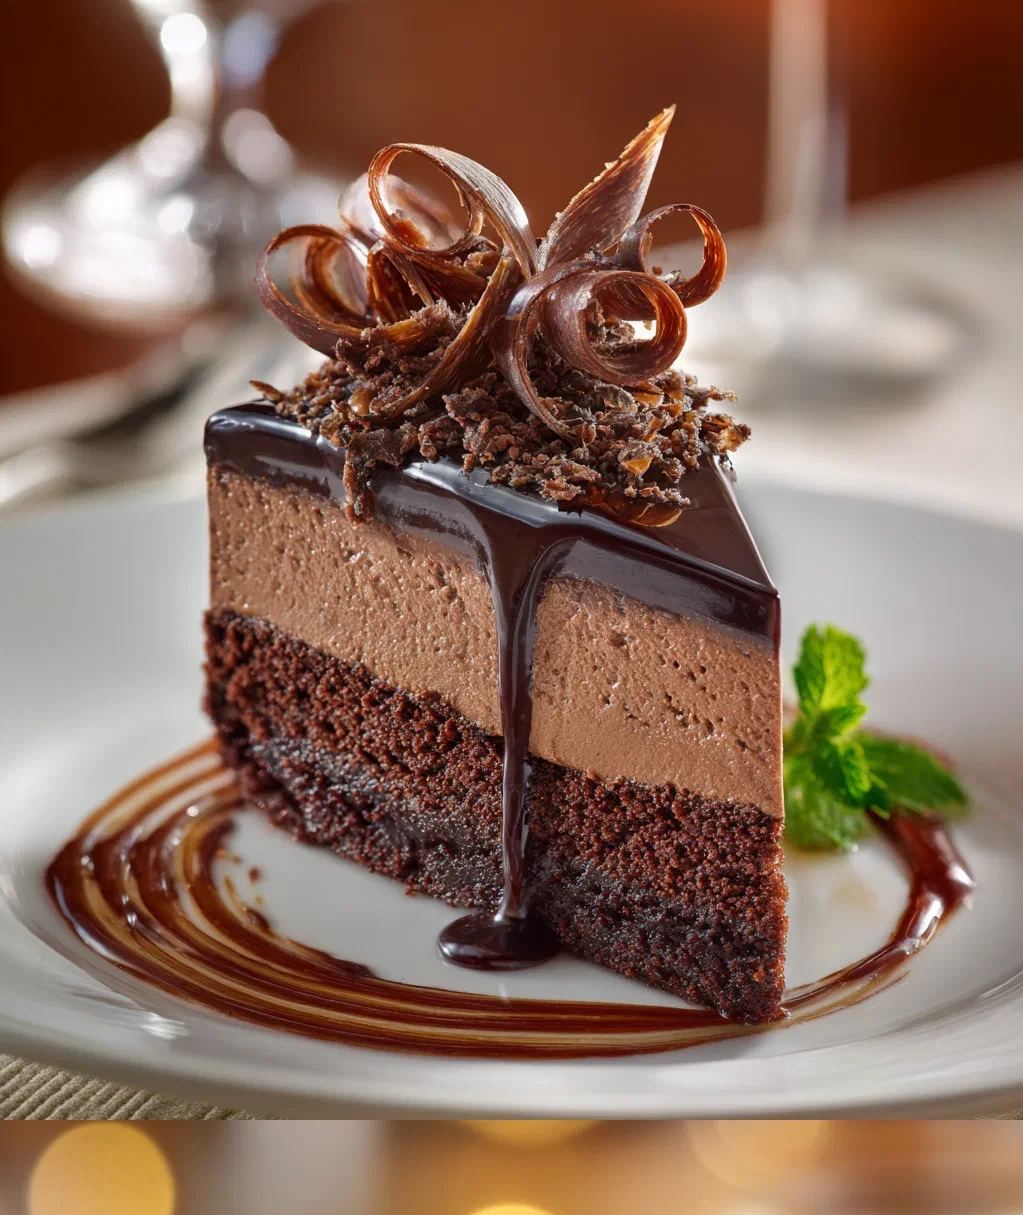
Let’s talk about chocolate mousse cake. I know, just saying it makes my mouth water too. This isn’t just any dessert—it’s the one I make when I really want to impress, or when I need a serious chocolate fix. You know those days when nothing but rich, creamy, melt-in-your-mouth goodness will do? That’s when this chocolate mousse cake comes to the rescue.
I remember the first time I tried making one. I was so nervous! I thought it would be complicated, all fancy techniques and tricky steps. But you know what? It’s actually pretty straightforward once you get the hang of it. And the result? Oh my goodness. That silky mousse layer on top of a moist chocolate cake base—it’s pure magic.
What I love most about this chocolate mousse cake is how it feels special without being fussy. You don’t need fancy equipment or hard-to-find ingredients. Just good chocolate, some basics from your pantry, and a little patience. Trust me, the effort is so worth it when you see that first slice come out perfectly.
So whether you’re planning a dinner party or just treating yourself (no judgment here!), this chocolate mousse cake recipe is about to become your new favorite. Let me walk you through it step by step—I promise it’s easier than you think!
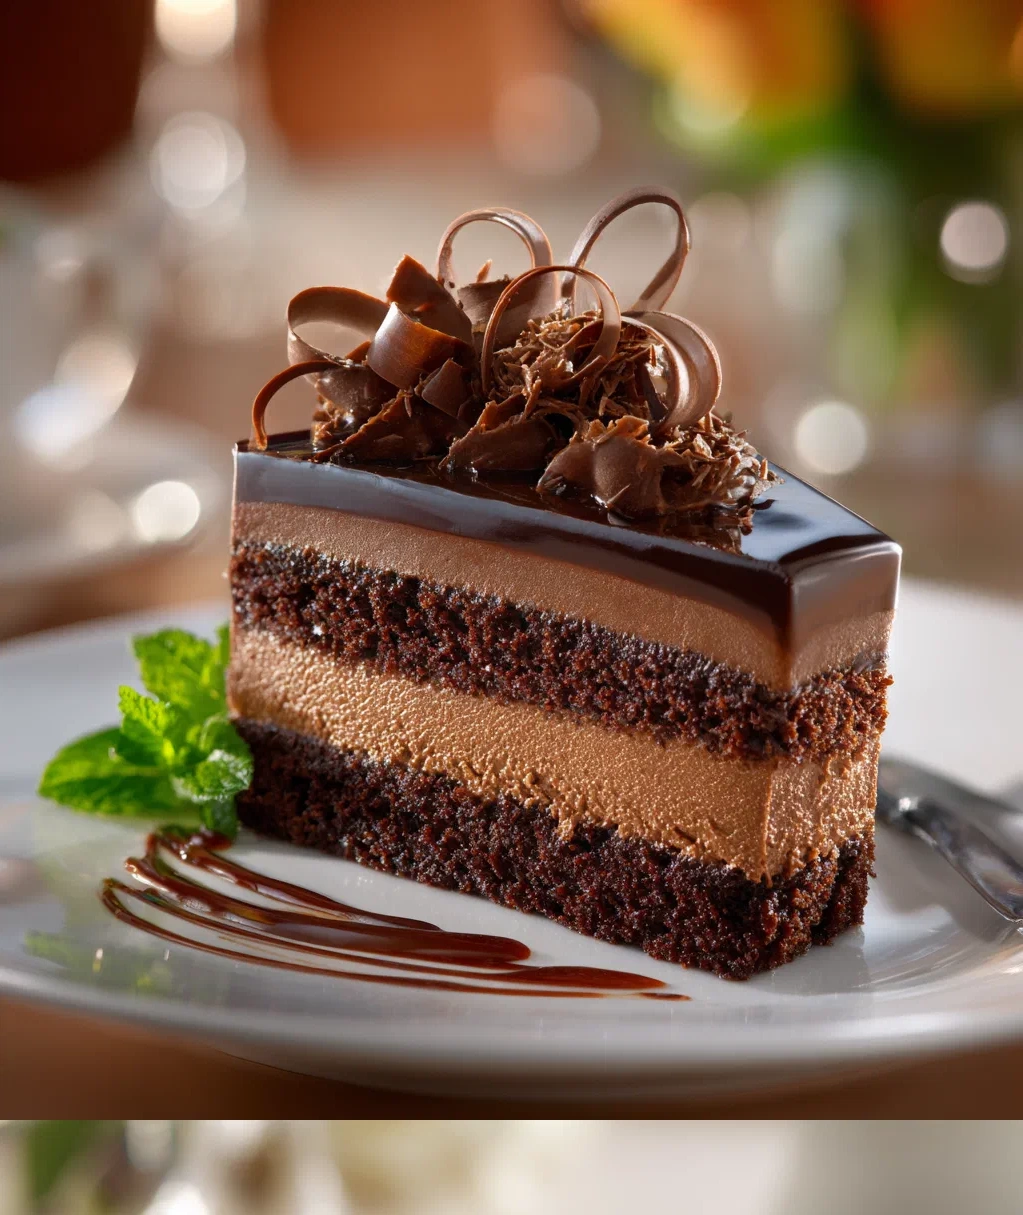
Why You'll Love This Chocolate Mousse Cake
Let me tell you why this chocolate mousse cake recipe is such a keeper. First, it’s that perfect balance of textures—the light, airy mousse sitting on top of a rich, fudgy cake base. Each bite gives you that wonderful contrast that makes desserts so satisfying.
Here’s what makes it special:
- It looks impressive but isn’t hard to make – Seriously, if I can do it, you can too. The mousse might sound fancy, but it’s just whipped cream folded into melted chocolate.
- You can make it ahead – This chocolate mousse cake actually gets better after chilling overnight. Perfect for when you want dessert ready to go.
- It’s versatile – Dress it up with berries for company, or keep it simple for family night. Either way, it disappears fast!
- The chocolate flavor is deep and rich – Using good quality chocolate really makes a difference here. You’ll taste it in every layer.
My favorite part is watching people’s faces when they take that first bite. There’s always that little pause, then that happy chocolate-induced smile. That’s when you know you’ve nailed it.
One more thing—this chocolate mousse cake freezes beautifully too. I often make two and freeze one for emergencies. You know, those ‘I need chocolate NOW’ emergencies. We all have them!
Ingredients for Your Perfect Chocolate Mousse Cake
Gathering your ingredients is the first step to chocolate mousse cake success. Here’s everything you’ll need. Don’t worry—most of this is probably already in your kitchen!
For the cake base:
- 1 cup all-purpose flour
- 1 cup granulated sugar
- 1/2 cup cocoa powder (I prefer Dutch-processed for deeper color)
- 1 teaspoon baking soda
- 1/2 teaspoon salt
- 1 large egg
- 1/2 cup buttermilk (or regular milk with 1/2 tablespoon vinegar)
- 1/4 cup vegetable oil
- 1 teaspoon vanilla extract
- 1/2 cup hot water
For the chocolate mousse layer:
- 8 ounces semi-sweet chocolate (chopped—better quality means better flavor)
- 2 cups heavy whipping cream
- 1/4 cup powdered sugar
- 1 teaspoon vanilla extract
- A pinch of salt
For decoration (optional but fun):
- Chocolate shavings or curls
- Fresh berries
- Whipped cream rosettes
A quick tip about the chocolate: don’t use chocolate chips if you can help it. They have stabilizers that can make your mousse grainy. A good baking bar works best. And for the cream—make sure it’s very cold. It whips up so much better that way.
Measure everything before you start. Trust me, it makes the process so much smoother. Nothing worse than realizing you’re out of something mid-recipe!
Step-by-Step Guide to Making Chocolate Mousse Cake
Ready to make some magic? Let’s dive into the steps for this chocolate mousse cake. I’ll walk you through each part, and don’t worry—I’ve included all my little tricks along the way.
Step 1: Make the cake base
Start by preheating your oven to 350°F. Grease a 9-inch springform pan—this is key for easy removal later. In a large bowl, whisk together the flour, sugar, cocoa powder, baking soda, and salt. In another bowl, beat the egg, then add buttermilk, oil, and vanilla. Mix the wet ingredients into the dry until just combined. Now carefully stir in the hot water. The batter will be thin, but that’s normal!
Pour into your prepared pan and bake for 25-30 minutes. You’ll know it’s done when a toothpick comes out clean. Let it cool completely in the pan on a wire rack. Don’t rush this—a warm cake will melt your mousse.
Step 2: Prepare the chocolate mousse
While the cake cools, make your mousse. Melt the chopped chocolate in a heatproof bowl over simmering water (double boiler method), or in short bursts in the microwave, stirring between each. Let it cool slightly—you don’t want it hot when you add the cream.
In a chilled bowl, beat the heavy cream with powdered sugar, vanilla, and salt until soft peaks form. This means when you lift the beaters, the peaks gently curl over. Don’t overbeat! Gently fold about a third of the whipped cream into the cooled chocolate to lighten it, then fold in the rest. Be gentle—you want to keep that airy texture.
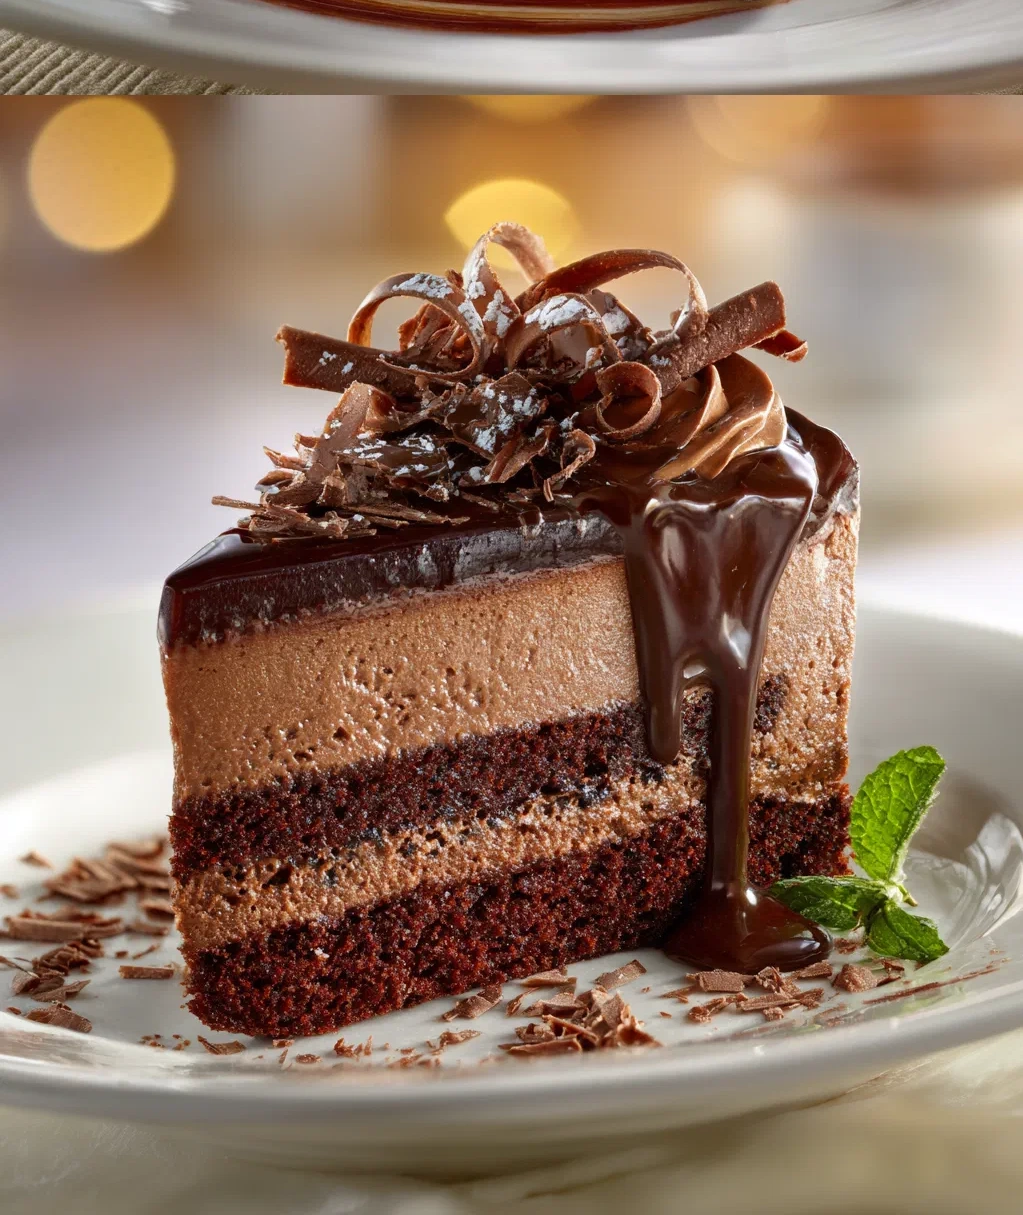
Step 3: Assemble your chocolate mousse cake
Once the cake is completely cool, spread the chocolate mousse evenly over the top. If you’re using a springform pan, you can leave the cake in it—just make sure the sides are clean for a neat look. Smooth the top with a spatula. For extra flair, you can pipe decorative borders or create swirls.
Chill for at least 4 hours, but overnight is even better. The mousse needs time to set properly. I know it’s tempting to cut into it right away, but patience pays off here!
When ready to serve, run a knife around the edge if using a springform pan, then release the sides. Decorate with chocolate shavings or berries if you like. Use a hot knife (dipped in hot water and dried) for clean slices.
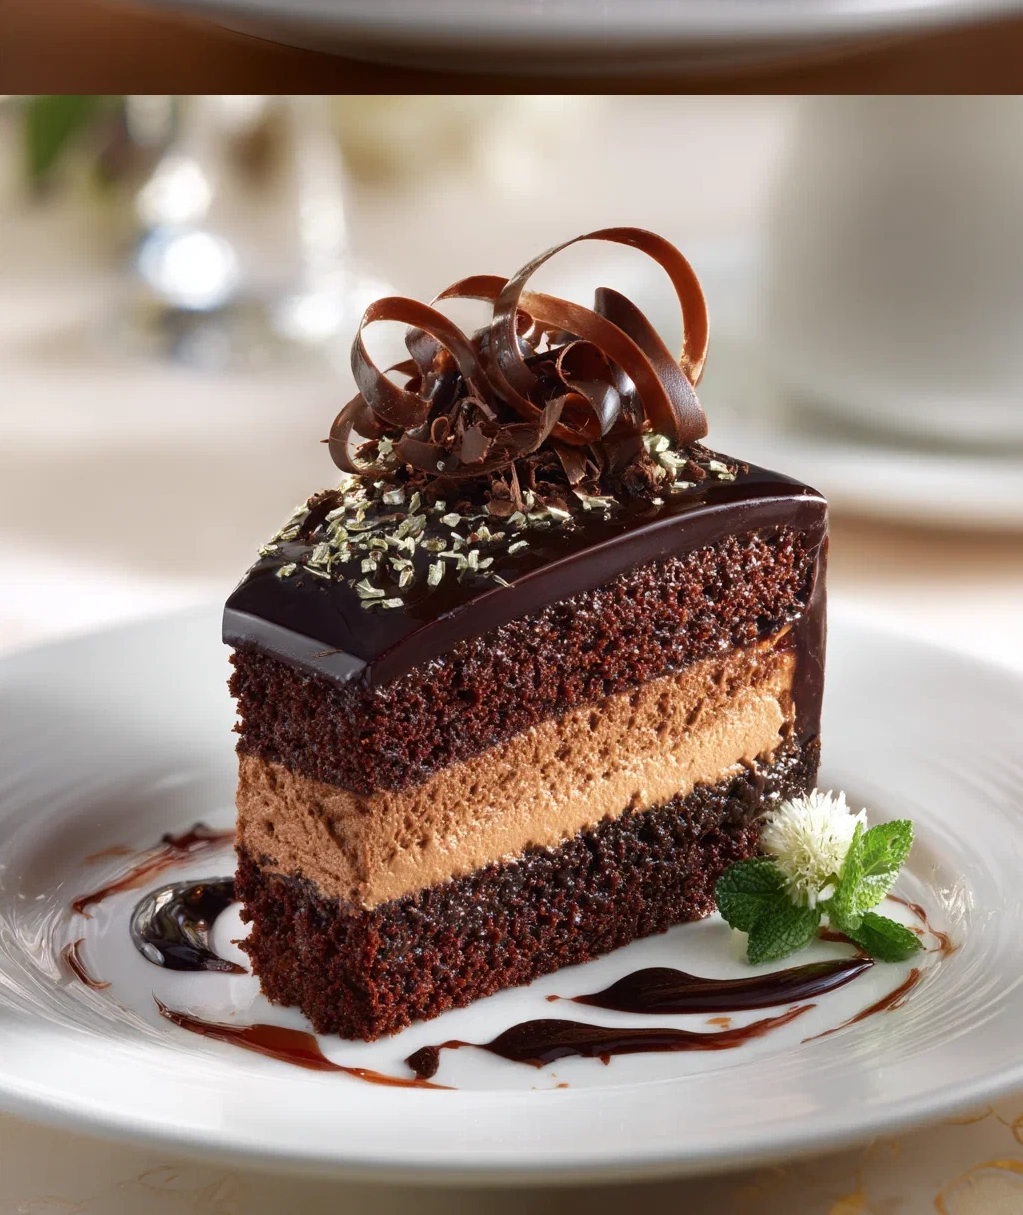
Chocolate Mousse Cake Variations to Try
Once you’ve mastered the basic chocolate mousse cake, you can have fun with variations. Here are some of my favorites—they’re all delicious twists on the original.
Mocha version: Add 1-2 tablespoons of instant espresso powder to your cake batter and mousse. The coffee enhances the chocolate flavor beautifully without making it taste like coffee. It just makes everything richer and deeper.
Mint chocolate: Add 1/2 teaspoon peppermint extract to your mousse. Top with crushed candy canes during the holidays, or mint chocolate shavings any time of year. So refreshing!
Berry delight: Spread a thin layer of seedless raspberry jam on the cooled cake before adding the mousse. Top with fresh raspberries when serving. The tart berries cut through the richness perfectly.
Nutty twist: Fold 1/2 cup finely chopped toasted hazelnuts or almonds into the cake batter. You could also sprinkle some between the cake and mousse layers for crunch.
White chocolate mousse cake: Use white chocolate for the mousse instead of semi-sweet. Keep the chocolate cake base for contrast, or make a vanilla cake instead. Decorate with dark chocolate curls for a stunning look.
Remember, baking is about making it your own. Don’t be afraid to experiment once you’re comfortable with the basic recipe. That’s half the fun of making this chocolate mousse cake!
A quick safety note: if you’re adding extracts or other flavorings, start with less than you think you need. You can always add more, but you can’t take it out. Taste as you go when possible.
Serving and Storing Your Chocolate Mousse Cake
You’ve made your beautiful chocolate mousse cake—now let’s talk about serving and keeping it fresh. These tips will help you enjoy every last crumb.
Serving suggestions:
This chocolate mousse cake is rich, so I usually cut it into 12 slices rather than 8. Use a sharp knife dipped in hot water and wiped clean between cuts for neat slices. Serve it straight from the fridge—the mousse holds its shape better when cold.
For toppings, fresh berries are my go-to. Raspberries or strawberries add a nice tart contrast. A dollop of whipped cream never hurts either. In the summer, I love serving it with a scoop of vanilla ice cream on the side. The warm-cold combination is divine.
Presentation matters! Dust the plate with cocoa powder or powdered sugar before placing the slice. A mint leaf or edible flower makes it look extra special for guests.
Storage tips:
Your chocolate mousse cake will keep in the refrigerator for up to 5 days. Cover it well with plastic wrap or store in an airtight container. The mousse can absorb fridge odors, so good coverage is important.
You can also freeze it for up to 3 months. Wrap individual slices or the whole cake tightly in plastic wrap, then aluminum foil. Thaw overnight in the refrigerator before serving. The texture holds up surprisingly well.
One thing to note: if you’ve decorated with fresh berries, add those right before serving, not before storing. They can get mushy and release juices that might make your mousse weep.
Leftover cake (if you’re lucky enough to have any!) makes a fantastic midnight snack. I won’t tell if you eat it straight from the fridge with a fork. We’ve all been there!
Conclusion
There you have it—everything you need to create your own show-stopping chocolate mousse cake. From that first bite of rich cake to the light-as-air mousse topping, this dessert never fails to delight. I hope you feel confident to give it a try now.
Remember, the key is taking your time. Let the cake cool completely before adding the mousse. Chill it long enough to set properly. Use good quality chocolate—it really makes a difference in flavor. And most importantly, have fun with it! Baking should be enjoyable, not stressful.
I’d love to hear how your chocolate mousse cake turns out. Did you try any of the variations? Maybe you created your own twist? That’s the beautiful thing about recipes—they’re starting points for your creativity.
Next time you’re looking for a dessert that feels special but won’t keep you in the kitchen all day, remember this chocolate mousse cake. It’s become my go-to for birthdays, dinner parties, and yes, those ‘I deserve chocolate’ Tuesday nights. Because sometimes, Tuesday needs a little celebration too.
Happy baking, and enjoy every delicious bite of your homemade chocolate mousse cake!
Frequently Asked Questions
Q: Can I make chocolate mousse cake without a springform pan?
Absolutely! You can use a regular 9-inch cake pan lined with parchment paper. Just be extra careful when removing the cake. Let it cool completely, run a knife around the edges, then invert it onto a plate. You might need to flip it again to get the right side up. The mousse might be trickier to spread without the pan sides, but it's totally doable.
Q: My mousse turned out grainy. What went wrong?
Grainy mousse usually means the chocolate seized or the whipped cream was overbeaten. Make sure your chocolate is completely smooth after melting and has cooled slightly before folding in the cream. Also, stop beating the cream when you get soft peaks—stiff peaks can make folding difficult and lead to graininess. If it happens, you can try gently reheating the mixture slightly and re-whipping, but prevention is easier!
Q: How do I know when my chocolate mousse cake is set properly?
The mousse should look matte rather than glossy on top, and it shouldn't jiggle much when you gently shake the pan. Give it at least 4 hours in the fridge, but overnight is best. If you're in a hurry, you can pop it in the freezer for 1-2 hours, then transfer to the fridge. Just don't let it freeze solid!
Q: Can I use milk chocolate instead of semi-sweet?
You can, but keep in mind milk chocolate is sweeter and has less cocoa solids. Your mousse might be softer and sweeter. I'd reduce the powdered sugar in the whipped cream if using milk chocolate. For the best texture, stick with semi-sweet or dark chocolate (around 60-70% cocoa). They set better and give that classic chocolate mousse cake flavor.
Q: How far in advance can I make this dessert?
This chocolate mousse cake actually gets better with time! You can make it up to 2 days ahead. The flavors meld together, and the texture improves. Just keep it covered in the refrigerator. Add any fresh fruit decorations right before serving. It also freezes well for up to 3 months—perfect for planning ahead for special occasions.
PrintDecadent Chocolate Mousse Cake
- Total Time: 300
- Yield: 8 servings 1x
Description
A rich, airy chocolate mousse layered on a dark chocolate cake base, creating an irresistible dessert that melts in your mouth.
Ingredients
For the cake base:
1 cup all-purpose flour
1/2 cup unsweetened cocoa powder
1 tsp baking soda
1/2 tsp salt
1/2 cup unsalted butter, softened
3/4 cup granulated sugar
2 large eggs
1 tsp vanilla extract
1/2 cup buttermilk
For the chocolate mousse:
8 oz semi-sweet chocolate, chopped
2 cups heavy cream, divided
1/4 cup powdered sugar
1 tsp vanilla extract
For garnish:
Chocolate shavings
Fresh berries
Instructions
Step 1: Preheat oven to 350°F (175°C). Grease and line an 8-inch springform pan with parchment paper.
Step 2: In a medium bowl, whisk together flour, cocoa powder, baking soda, and salt. Set aside.
Step 3: In a large bowl, cream butter and sugar until light and fluffy. Add eggs one at a time, beating well after each addition. Stir in vanilla extract.
Step 4: Alternately add dry ingredients and buttermilk to the butter mixture, beginning and ending with dry ingredients. Mix until just combined.
Step 5: Pour batter into prepared pan and bake for 25-30 minutes, or until a toothpick inserted comes out clean. Let cool completely in pan.
Step 6: For the mousse, melt chocolate with 1/2 cup heavy cream in a double boiler or microwave, stirring until smooth. Let cool to room temperature.
Step 7: In a chilled bowl, whip remaining 1 1/2 cups heavy cream with powdered sugar and vanilla until stiff peaks form.
Step 8: Gently fold cooled chocolate mixture into whipped cream until fully incorporated.
Step 9: Spread mousse evenly over cooled cake base. Refrigerate for at least 4 hours, or overnight.
Step 10: Before serving, garnish with chocolate shavings and fresh berries.
- Prep Time: 30
- Cook Time: 30
- Category: Dessert
Nutrition
- Calories: 480
- Fat: 32g
- Carbohydrates: 45g
- Protein: 7g